

Brooklyn Physical Therapy News- Evolve NY
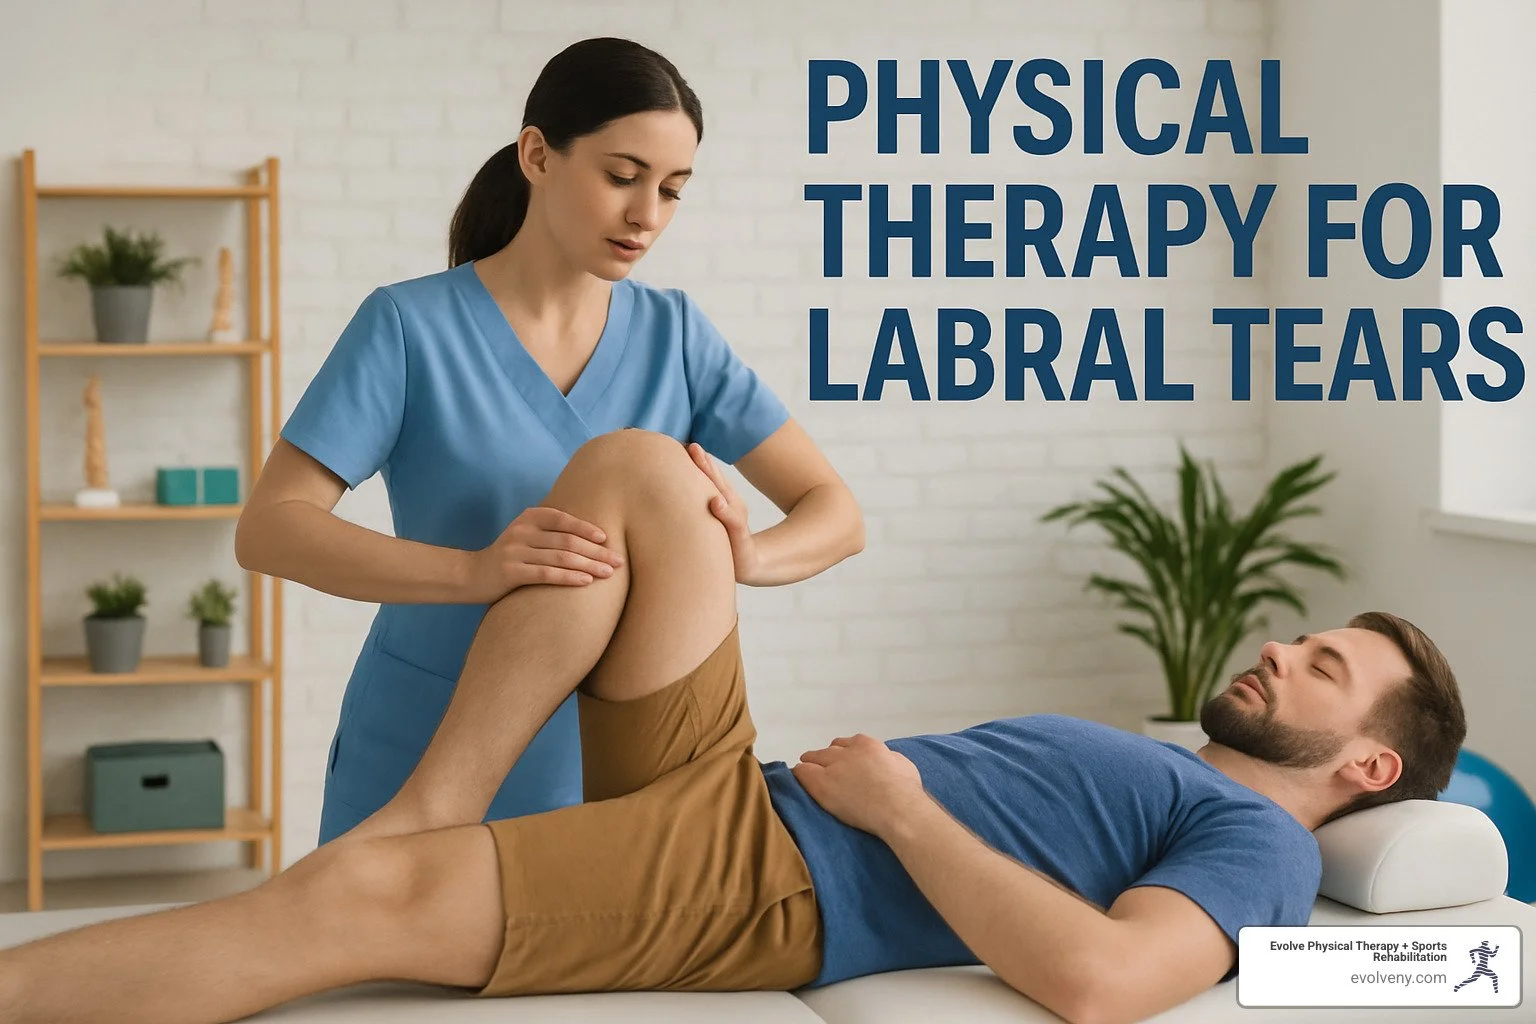
How to Treat Labral Tears with Physical Therapy: 5 Effective Methods
Understanding Labral Tears: When Cartilage Causes Pain

Physical therapy for labral tears is an effective first-line treatment that can reduce pain, improve function, and potentially help patients avoid surgery. Here's what you need to know:
Physical Therapy for Labral Tears: Quick Facts • Can occur in both hip and shoulder joints • Conservative PT management helps 50% of patients avoid surgery • Typical PT program lasts 10-12 weeks • Includes manual therapy, stretching, strengthening, and education • Post-surgical PT rehabilitation takes 9-12 months for complete healing
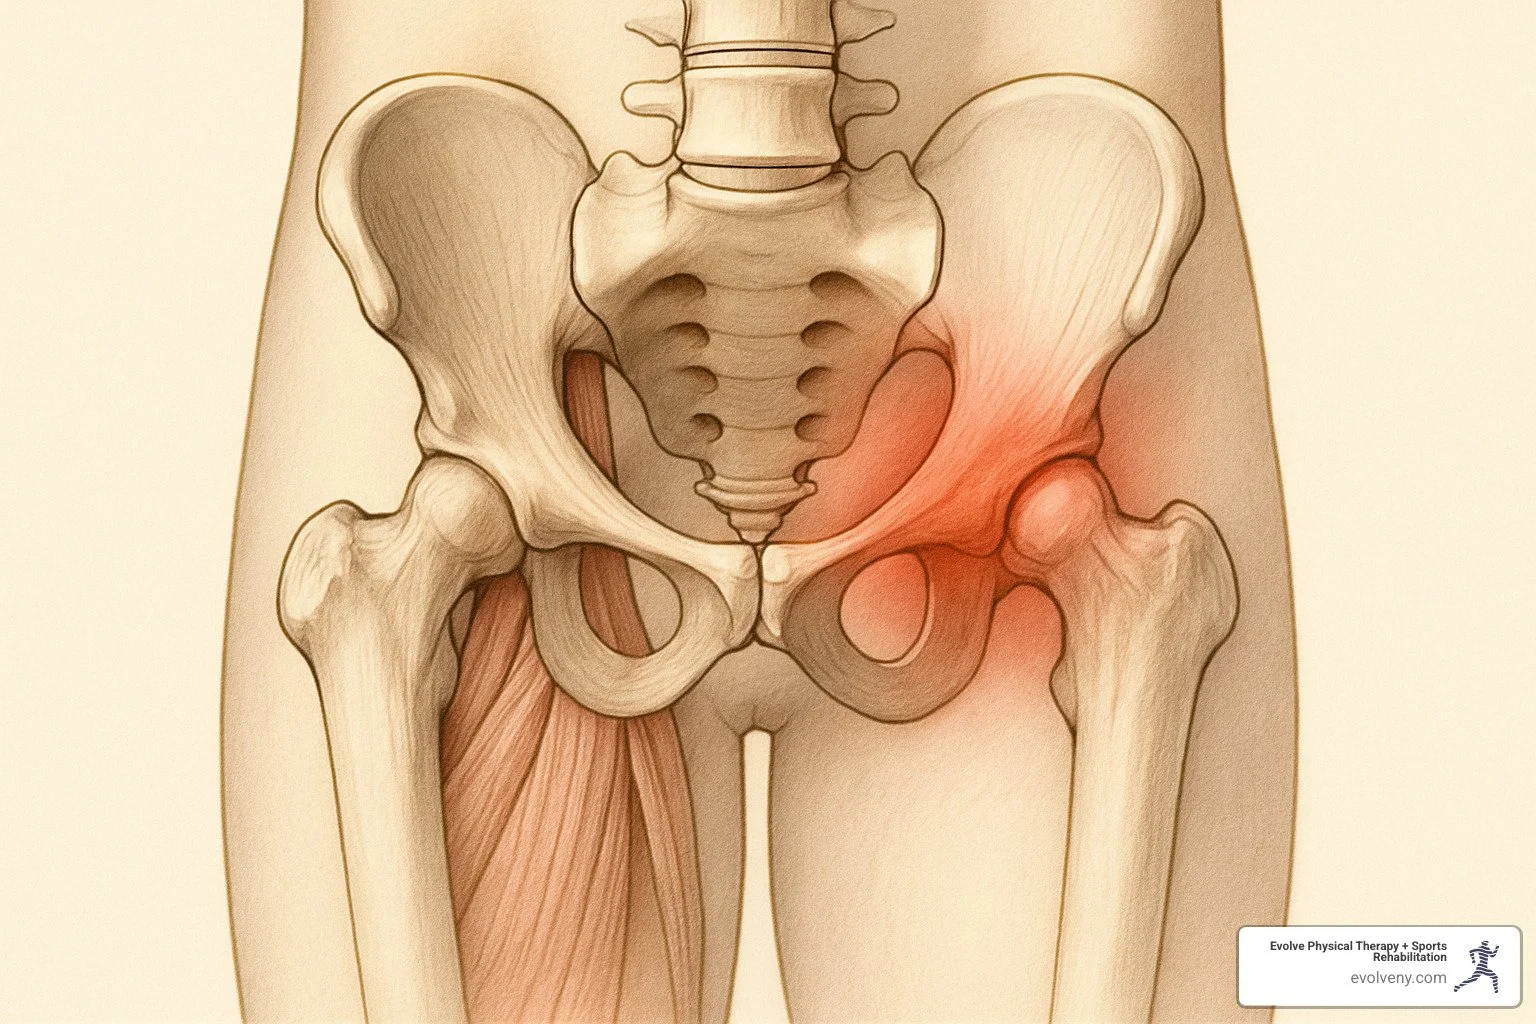
A labral tear is damage to the ring of cartilage (labrum) that surrounds either your hip socket (acetabulum) or shoulder socket (glenoid). This specialized cartilage deepens the socket, provides stability, and helps distribute pressure evenly across the joint.
Studies show that labral tears are present in up to 22% to 55% of patients with mechanical hip pain, while shoulder labral tears are common in athletes and individuals who perform repetitive overhead activities.
The good news? Physical therapy for labral tears offers hope. A well-designed PT program can significantly improve symptoms, with research showing that up to 50% of patients can avoid surgery through conservative management.
"When your labrum tears, it can lead to pain and disability—exercises that stretch and strengthen the joint can effectively decrease both."
I'm Lou Ezrick, founder of Evolve Physical Therapy, with nearly two decades of experience treating complex orthopedic conditions including labral tears; my approach to physical therapy for labral tears combines manual therapy techniques with targeted exercise progressions to restore function and reduce pain.

Method 1: Accurate Evaluation & Diagnosis
Getting to the root of your pain starts with an accurate diagnosis. At Evolve Physical Therapy + Sports Rehabilitation in Brooklyn, we begin with a thorough evaluation to determine if you're dealing with a labral tear and understand its severity.
Clinical Tests That Matter
For hip labral issues, we perform specialized tests like the FADIR test, which often reproduces pain if a tear is present. The FABER test helps distinguish between labral problems and other issues like sacroiliac joint dysfunction. A simple resisted straight leg raise can reveal labral tears, particularly those involving the acetabular rim.
For shoulder labral tears, O'Brien's Active Compression Test is effective for detecting SLAP tears. The Crank Test involves compressing your shoulder joint while rotating it to check for labral damage. For suspected anterior labral tears (Bankart lesions), apprehension and relocation tests help confirm our suspicions.
Diagnostic Method Sensitivity Specificity Best For Physical Exam Tests 70-85% 65-80% Initial screening MRI 66-79% 80-90% Soft tissue assessment MR Arthrography 90-95% 85-95% Gold standard for labral tears Diagnostic Injection 85-90% 85-90% Confirming pain source
Why Early Imaging Matters
MR arthrography—an MRI with contrast injected directly into your joint—provides the highest diagnostic accuracy for labral tears. This detailed imaging helps us confirm the tear's location and extent, and spot accompanying issues like femoroacetabular impingement (FAI) in hip cases or rotator cuff damage in shoulders.
Screening for Surgical Red Flags
While many labral tears respond to conservative care, certain situations may indicate a need for surgical consultation: joint locking or catching, significant instability (particularly in the shoulder), large displaced tears, or severe bony abnormalities that will continue damaging your labrum. If you've given physical therapy for labral tears a solid 8-12 weeks without improvement, it might be time to explore other options.
Method 2: Pain Relief & Joint Protection in the Acute Phase
Once diagnosed, the initial phase of physical therapy for labral tears focuses on controlling pain and protecting the joint from further damage.

Activity Modification Strategies
The first step is giving your body a chance to calm down. For hip labral tears, avoid deep squatting, prolonged sitting, and quick pivoting movements. With shoulder labral tears, reaching overhead or lifting heavy objects can worsen the condition.
Depending on severity, we might recommend crutches for 1-2 weeks for hip tears, or a brief period with a sling for shoulder tears.
Physical Therapy for Labral Tears: Early Goals
During the first couple of weeks, we focus on:
Reducing inflammation: Ice therapy (15 minutes, 3-4 times daily) can significantly decrease pain levels
Protecting injured tissue: Learning movement patterns that don't stress your labrum
Maintaining mobility in surrounding joints
Gentle isometric exercises to maintain strength without stressing the tear
Scientific research on non-operative management confirms these early interventions can dramatically reduce pain and create the foundation for successful healing.
Movements to Avoid with a Fresh Tear
For hip labral tears, avoid deep hip flexion beyond 90 degrees, combinations of flexion, adduction, and internal rotation, and high-impact activities like running or jumping.
For shoulder labral tears, avoid reaching overhead, heavy lifting, and quick rotational movements like throwing or tennis serves.
"Finding the sweet spot between rest and movement is the art of early labral tear management," explains our team. "Too much stillness leads to stiffness, but pushing too hard can set you back weeks."
Method 3: Physical Therapy for Labral Tears – Mobility Restoration with Manual Therapy
As pain and inflammation subside, we focus on restoring normal movement through hands-on care and targeted exercises.
Hands-On Techniques That Work
For hip labral tears, we use grade I-IV joint glides and hip distraction techniques to create space in the joint. Many patients describe this as feeling like "finally being able to take a deep breath" in their hip.
With shoulder labral tears, we focus on posterior-to-anterior glides (especially helpful for anterior tears) while working on your shoulder blade (scapula) to ensure proper movement of the entire shoulder complex.
"The magic often happens when we combine these techniques with gentle contract-relax stretching," explains Lou, our founder. "It's like we're having a conversation with your nervous system, asking it to let go of unnecessary tension."
Stretching & Range-of-Motion Drills
For hip labral tears, child's pose rock backs create space in your hip joint without aggravating the tear, while dynamic pigeon pose variations gradually expand your range.
For shoulder labral tears, wall stretches and the cross-body stretch are remarkably effective when performed correctly.
"Stretching should never cause sharp pain," we remind our patients. "You're looking for a gentle pull, not a painful tug."
Our approach also addresses thoracic and lumbar mobility, which directly impacts how your hip or shoulder functions. Research shows this progressive, gentle mobility work improves range of motion and helps manage pain by improving joint nutrition and reducing stiffness.
Want to learn more about post-surgical rehab? Check out our detailed information about post-surgical rehab for labral tears.
Method 4: Progressive Strengthening & Motor Control
As mobility improves, strengthening becomes the focus of physical therapy for labral tears. This phase is critical for providing stability to the injured joint and preventing recurrence.

Core Foundation First
Before targeting the specific joint, we build a strong foundation with fundamental exercises like dead bug, bird dog, and carefully progressed planks. We also focus on pelvic and scapular control, as these connecting areas significantly influence shoulder and hip function.
Physical Therapy for Labral Tears: Key Exercises
For hip labral tears, we focus on:
Clam shells (3 sets of 15-20 repetitions) to target the gluteus medius
Single-leg bridges to strengthen glutes while teaching proper hip control
Monster walks with resistance bands
Side-lying leg lifts to build strength in multiple planes of movement
For shoulder labral tears, we emphasize:
External rotation exercises using light resistance bands
Prone row to external rotation to reinforce proper shoulder mechanics
"Many patients are surprised by how much better they feel once we establish proper strength around the joint," says Lou Ezrick. "It's about teaching the right muscles to fire at the right time."

Progression Principles
Your strengthening program will follow these key principles:
Start in supported positions before standing exercises
Progress from isometric to dynamic movements
Advance from closed-chain to open-chain exercises
Gradually increase load starting with bodyweight before introducing bands and weights
Focus on eccentric control for tendon strength and joint control
"Proper form is more important than the amount of weight or number of repetitions," our team reminds patients.
Return-to-Function Milestones
We track specific milestones including range of motion (at least 75% of normal early in treatment), pain levels (2/10 or less during daily activities), functional tests like pain-free single-leg squats, and strength symmetry (90% compared to your unaffected side).
Research published in the Journal of Orthopaedic & Sports Physical Therapy confirms that patients who achieve these milestones have significantly better long-term results and lower recurrence rates.
Method 5: Sport-Specific Conditioning & Prevention Strategies
The final phase of physical therapy for labral tears prepares you to return to the activities you love while ensuring you stay injury-free.
Advanced Exercise Progression
Once you've built a solid foundation, we help you progress with:
Plyometric training: Starting with gentle double-leg jumps before advancing to single-leg hops
Agility drills: Side-to-side movements and controlled directional changes
Sport-specific movement patterns customized to your activities
For overhead athletes with shoulder labral tears, we implement a structured throwing program that gradually increases distance, speed, and volume.
Movement Retraining
We use video analysis to identify problematic movement patterns and implement neuromuscular training to improve body awareness and joint position sense. Our fatigue-resistant training teaches your body to maintain proper form even when tired, which is when most injuries occur.
Ergonomic and Equipment Modifications
We'll help you adjust your workspace setup to reduce joint strain, optimize your sleep positioning, and evaluate your sports equipment to ensure it's not contributing to your problem.
Criteria for Return to Play
We measure readiness to return to sports through:
Functional test scores like the iHOT-33 for hip or ASES for shoulder (90% or higher)
Strength at least 90% compared to your unaffected side
Movement quality during sport-specific activities
Psychological readiness and confidence in your body's ability
Long-Term Injury Prevention
We'll design a maintenance exercise program (15-20 minutes, 2-3 times weekly), recommend periodic "tune-up" visits during competitive seasons, teach activity modification strategies, and offer preseason screening to identify risk factors before they lead to injury.
Want to learn more about recovery over time? Check out our detailed labral tear recovery timeline.
Frequently Asked Questions about Physical Therapy for Labral Tears
How long does recovery take with conservative care?
A comprehensive physical therapy for labral tears program typically spans about 10-12 weeks, though individual timelines vary based on the tear's location and severity, additional issues like FAI or rotator cuff damage, your age, activity level, and exercise compliance.
Many patients notice real improvements within 4-6 weeks. Research shows that nonoperative management of femoroacetabular impingement (a common cause of labral tears) leads to significant improvements for 70% of patients.
When is surgery the better option?
Surgery might be the right choice if you're dealing with:
Large, displaced tears causing catching or locking sensations
Tears alongside substantial bony abnormalities
Persistent symptoms despite 3-4 months of dedicated therapy
High-level athletic demands requiring quicker return to sport
Significant joint instability, particularly in the shoulder
Even when surgery becomes necessary, physical therapy remains crucial both before and after the procedure.
Can a labral tear heal without physical therapy?
The labrum has limited blood supply, affecting its healing capacity. While small tears might become less painful over time with rest alone, without proper rehabilitation:
Your body develops compensation patterns that can create new problems
Muscle weakness and imbalances often persist, increasing re-injury risk
Underlying factors that contributed to your tear remain unaddressed
Research consistently shows that a structured physical therapy for labral tears program significantly improves outcomes compared to rest alone.
Conclusion: The Evolve Approach to Labral Tear Recovery
At Evolve Physical Therapy + Sports Rehabilitation in Brooklyn, we believe in treating you as a whole person, not just your symptoms. Our approach to physical therapy for labral tears is customized to your unique needs.
We start with a thorough evaluation using specialized clinical tests and appropriate imaging when necessary. From there, we craft an individualized treatment plan whether you're dealing with a hip labral tear from weekend activities or a shoulder tear from swimming.
Our hands-on manual therapy techniques improve joint mobility, calm irritated tissues, and address compensatory patterns. As you progress, your exercises will advance from basic activation to sport-specific training, each step building on the last.
We empower you with knowledge about your condition, helpful movements, and strategies to manage flare-ups, putting you in control of your recovery.
Our Brooklyn neighbors—from Marine Park to Park Slope, Gravesend to Midwood, and Mill Basin—have found their way back to pain-free living through our program. Some have avoided surgery entirely, while others have achieved optimal outcomes after surgical intervention.
Whether you're a competitive athlete eager to return to your sport, a professional who wants to sit through meetings without pain, or a grandparent who misses lifting your grandchildren, we're committed to helping you achieve your goals.
Time matters with labral tears—the sooner you begin appropriate treatment, the better your outcomes typically are. Contact Evolve Physical Therapy + Sports Rehabilitation today to schedule your comprehensive evaluation and take that important first step toward reclaiming your active, pain-free life.
More info about our physical therapy for labral tears services
The Definitive Guide to Understanding Anterior Hip Pain Causes
Understanding the Pain at the Front of Your Hip

Anterior hip pain is discomfort experienced at the front of the hip joint, where your thigh meets your pelvis. If you're experiencing this type of pain, here's what you need to know:
Common Causes of Anterior Hip Pain:
Hip osteoarthritis (most common in adults over 50)
Femoroacetabular impingement (FAI)
Labral tears
Hip flexor strain or tendinopathy
Iliopsoas bursitis
Stress fractures
Acetabular dysplasia
Nerve entrapment
Anterior hip pain affects people of all ages and activity levels, from young athletes to older adults. The lifetime risk for developing hip osteoarthritis—a leading cause of anterior hip pain—is 18.5% for men and 28.6% for women. For active individuals, hip and groin injuries represent between 28-55% of injuries in sports like soccer.
The pain may present as a deep ache in the groin, sharp pain with certain movements, or discomfort that worsens with activities like running, squatting, or prolonged sitting. Many patients describe pointing to the pain using what clinicians call the "C-sign"—cupping their hand around the front of the hip.
Understanding the true source of your anterior hip pain is crucial because treatment varies significantly depending on the underlying cause. While soft tissue problems like muscle strains may respond well to stretching and strengthening, joint-related issues often require different approaches.
I'm Lou Ezrick, founder of Evolve Physical Therapy, and I've helped thousands of patients overcome anterior hip pain through a comprehensive, hands-on approach that addresses not just symptoms but the root causes of hip dysfunction.

Why This Guide Matters
Hip pain can be confusing and frustrating. With so many potential causes and structures in a relatively small area, getting the right diagnosis and treatment plan is essential for recovery. This comprehensive guide will help you:
Understand the complex anatomy of the hip and what might be causing your pain
Recognize symptoms that suggest specific conditions
Learn about evidence-based assessment and treatment approaches
Find strategies to prevent recurrence and maintain hip health
Whether you're an athlete dealing with a sudden injury, someone experiencing gradual onset of pain, or simply looking to understand hip pain better, this guide provides the information you need to take control of your hip health.
Understanding Anterior Hip Pain: Definition & Key Anatomy
Anterior hip pain refers to discomfort felt at the front of your hip. If you're pointing to the area where your thigh meets your pelvis, or that crease at the front of your hip, you're identifying the anterior hip region. This area stretches from your pubic bone in the middle to the prominent hip bone (anterior superior iliac spine) on the side, and from your lower abdomen down to about 2-4 inches into your thigh.
Your hip is an engineering marvel – a perfect ball-and-socket joint where the round head of your thigh bone (femur) fits snugly into the cup-shaped socket (acetabulum) in your pelvis. This design gives you incredible freedom of movement while keeping everything stable. It's like having a golf ball sitting in a tee, but with muscles, ligaments, and cartilage holding everything together perfectly.
When we look at the anatomy around the front of the hip, several key structures can contribute to anterior hip pain:
The acetabulum (your hip socket) and femoral head (the ball) form the main joint
A ring of tough cartilage called the labrum surrounds your socket, deepening it and creating suction for added stability
The joint capsule, a strong fibrous envelope, wraps around the entire joint
Your iliopsoas muscle (a major hip flexor) runs across the front of your hip and helps you lift your leg
The rectus femoris (part of your quadriceps) crosses the front of your hip and helps with both hip flexion and knee extension
Several bursae (fluid-filled cushions) reduce friction between moving tissues
The front of your hip is also home to important blood vessels and nerves, including the femoral nerve, artery, and vein – your body's superhighway to and from your leg.
Common Symptoms of Anterior Hip Pain
When people visit us at Evolve Physical Therapy with anterior hip pain, they typically describe some familiar patterns:
Many report a deep ache in the groin that can be hard to pinpoint. We often see what we call the "C-sign" – where patients cup their hand in a C-shape around the front of their hip to show where it hurts. This gesture is so common it's become a clinical clue!
Morning stiffness or stiffness after sitting is another telltale sign. You might notice this when getting up from your desk or out of your car after a long drive.
Clicking, catching, or a feeling that something is "out of place" can signal problems with the labrum or joint surfaces. Some patients even experience a sensation of the hip "giving way" during activities.
Certain movements typically make anterior hip pain worse. These include bringing your knee toward your chest, turning your leg inward, squatting deeply, or climbing stairs. Many runners find their pain increases with distance, while office workers might struggle most after long periods of sitting.
Differentiating Anterior Hip Pain from Lateral & Posterior Presentations
Hip pain isn't one-size-fits-all – where it hurts gives us important diagnostic clues. Here's how anterior hip pain differs from pain in other parts of the hip:
Location Typical Pain Area Common Causes Key Features Anterior (Front) Groin, front of thigh Osteoarthritis, FAI, labral tears, hip flexor strain C-sign, pain with hip flexion and internal rotation Lateral (Side) Outer hip, greater trochanter Greater trochanteric pain syndrome, gluteus medius tendinopathy, IT band syndrome Pain lying on affected side, pain with side-stepping Posterior (Back) Buttock, back of hip Piriformis syndrome, ischiofemoral impingement, hamstring tendinopathy, referred lumbar pain Pain with sitting, deep squat, or stretching hamstrings
What makes diagnosis tricky is that pain can be referred from one area to another. Your brain sometimes gets confused about where pain is coming from! Hip joint problems can send pain down to your knee. Back issues can make your hip hurt. And hip problems can disguise themselves as groin pain.
At Evolve Physical Therapy in Brooklyn, our detailed assessment helps untangle these complex relationships. We look at the whole picture – not just where it hurts, but how it hurts, when it started, and what makes it better or worse – to get to the true source of your anterior hip pain.
Top Causes of Anterior Hip Pain (Joint, Soft Tissue, Bone, Nerve)
That nagging pain at the front of your hip can come from many different sources. Understanding what's causing your anterior hip pain is the first step toward effective treatment. Let's explore the most common culprits:

Joint-Related Drivers
When we talk about joint-related causes of anterior hip pain, we're looking at problems with the ball-and-socket connection and its surrounding structures.
Hip Osteoarthritis (OA) is the most common joint-related cause, especially if you're over 50. This progressive wearing down of cartilage affects nearly 1 in 10 adults over age 45, with a lifetime risk of 25% by age 85. You might notice morning stiffness, pain that gets worse with activity but then improves, and gradually decreasing range of motion. X-rays typically show narrowing joint spaces, bone spurs, and increased bone density beneath the cartilage.
Ever heard of Femoroacetabular Impingement (FAI)? This condition occurs when the hip bones don't fit together perfectly. There are three types: cam (extra bone on the femoral head/neck), pincer (overcoverage of the socket), and mixed (both problems together). FAI is particularly common in young active adults—especially athletes. Research shows cam deformities appear in 41% of male soccer players compared to just 17% of non-athletes. According to scientific research on cam morphology, unfortunately, FAI often leads to early arthritis, with 6-25% developing OA within 5-19 years.
Labral tears affect the fibrocartilage ring around your hip socket. They're found in about 64% of people with hip pain, though interestingly, they're also present in 54% of people without symptoms! These tears often occur alongside FAI and typically cause catching, locking, and pain with pivoting movements. If you're experiencing these symptoms, your labrum might be compromised.
The ligamentum teres is a small but important ligament connecting your femoral head to the acetabulum. Tears here are present in nearly half of painful hips but only 2% of pain-free hips. These tears create a deep groin pain and feelings of instability, and when combined with labral tears, they increase the risk of needing surgery by 16 times.
Rounding out our joint-related causes are synovitis and capsular issues—inflammation of the joint lining or capsule that can result from trauma, overuse, or underlying conditions. These typically cause diffuse pain and restricted movement due to discomfort.
Soft-Tissue & Muscle-Tendon Sources
The front of your hip contains several muscles and tendons that can become irritated or injured.
Iliopsoas tendinopathy or strain affects your primary hip flexor muscle. If you're involved in activities with lots of hip flexion—like running, dancing, or soccer—you're at higher risk. You'll typically feel pain when lifting your leg or resisting hip flexion. Sometimes this condition causes a snapping feeling known as snapping hip syndrome.
Are you a sprinter or involved in kicking sports? Watch out for rectus femoris strains. This muscle is part of your quadriceps but also crosses the hip joint. Strains often happen during explosive movements and cause pain with both hip flexion and knee straightening.
That clicking sound when you move your hip might be snapping hip syndrome (coxa saltans). There are two main types: external (IT band snapping over the greater trochanter) and internal (iliopsoas tendon snapping over bony prominences). While often more annoying than painful, repeated snapping can eventually cause inflammation and discomfort.
Athletes who make quick direction changes often develop adductor strains or tendinopathy in the inner thigh muscles. This presents as groin pain that worsens when bringing your legs together and may contribute to sports hernias.
Finally, iliopsoas bursitis—inflammation of the fluid-filled sac between the iliopsoas tendon and hip joint—often occurs alongside snapping hip syndrome. It typically causes pain that worsens with activity and improves with rest.
At Evolve Physical Therapy + Sports Rehabilitation in Brooklyn, we regularly see patients with these soft tissue injuries, often related to overtraining or improper movement patterns. For more information about anterior hip pain causes, visit our dedicated resource page. The good news? These conditions generally respond well to targeted physical therapy.
Bone & Morphology Contributors
Sometimes anterior hip pain stems from the bones themselves or their structural arrangement.
Femoral neck stress fractures are overuse injuries causing tiny cracks in the neck of your femur. Distance runners, military recruits, and people with low bone density face higher risk, particularly female athletes with menstrual irregularities. The pain typically develops gradually in the groin, sometimes hurting at night. These fractures require prompt diagnosis as displacement can lead to serious complications.
Born with shallow hip sockets? That's called acetabular dysplasia—an underdevelopment of the acetabulum that leaves the femoral head insufficiently covered. It's more common in women and firstborn children, with risk factors including family history and breech positioning before birth. The condition causes pain as your labrum and cartilage bear extra load, potentially leading to early arthritis if untreated.
Your femur's natural rotation can also cause problems. Femoral version abnormalities (excessive inward or outward rotation) alter your hip biomechanics and can lead to impingement or instability. Normal femoral anteversion is 10°–20°, with anything over 20° considered excessive.
Growing teens face unique risks like apophyseal injuries—damage to growth plates where tendons attach to bone. These are common during growth spurts and present with acute pain, swelling, and sometimes a palpable gap. Similarly, slipped capital femoral epiphysis (SCFE) involves displacement of the femoral head from the femoral neck at the growth plate. This typically affects overweight adolescents and requires urgent orthopedic evaluation.
Nerve & Referred Pain Considerations
Sometimes what feels like hip pain isn't actually coming from your hip at all.
Lumbar spine referral happens when compressed or irritated nerve roots (especially L1-L3) send pain signals to your anterior hip region. This may come with sensory changes, weakness, or back pain, and often follows a predictable pattern based on which nerve is affected. Many patients have both spine and hip issues simultaneously, making diagnosis tricky.
Nerve entrapment syndromes involve compression of nerves supplying the anterior hip region—including the ilioinguinal, iliohypogastric, lateral femoral cutaneous, or femoral nerves. These typically cause burning, tingling, or shooting pain and may be triggered by surgery, pregnancy, or even tight clothing.
Athletes in twisting, cutting sports should be aware of sports hernia/athletic pubalgia—injury to the muscular or tendinous attachments in the lower abdomen and pubic area. This causes exercise-induced groin pain that may radiate to the inner thigh. Diagnosis can be challenging, as symptoms overlap with other conditions.
Don't overlook visceral referral—pain that originates from abdominal or pelvic organs but is felt in the hip region. Conditions like appendicitis, inguinal hernia, gynecological issues, or urinary tract infections can all mimic hip pain. These usually come with other systemic symptoms and require different treatment approaches.
Finally, osteitis pubis—inflammation of the pubic symphysis and surrounding structures—is common in soccer and rugby players. Recovery typically takes months (about 7 months for women and 10 months for men).
Understanding these varied causes explains why diagnosing anterior hip pain requires a comprehensive approach. At Evolve Physical Therapy + Sports Rehabilitation, we consider all potential contributors to ensure you receive the most accurate and effective treatment plan for your specific condition.
Diagnosing & Measuring Anterior Hip Pain
Getting to the root cause of anterior hip pain is like solving a puzzle - one that requires careful assessment and the right diagnostic tools. At Evolve Physical Therapy, we believe an accurate diagnosis forms the foundation of successful treatment.

Clinical Examination Flow for Anterior Hip Pain
When you visit us with anterior hip pain, we'll take you through a comprehensive evaluation that leaves no stone unturned.
We start with a conversation about your story - when your pain began, what makes it better or worse, and how it's affecting your daily life. Understanding whether your pain started suddenly during a tennis match or gradually developed over months gives us important clues about what might be happening.
Next, we observe how you move. The way you walk, stand, and shift your weight can reveal valuable information about what's happening at your hip. We might notice subtle compensation patterns you've developed without even realizing it.
Range of motion testing helps us understand what movements provoke your pain and whether you have restrictions in certain directions. Healthy hips should move freely through flexion (bringing your knee toward your chest), extension (moving your leg behind you), rotation, and other movements. Limitations or pain with specific movements often point to particular problems.
Muscle strength assessment is equally important. We'll check the strength of muscles around your hip, looking for weaknesses or pain during resistance. Sometimes what feels like joint pain actually stems from overworked or weak muscles trying to stabilize your hip.
Special tests are where our clinical expertise really shines. Tests like the FADDIR (where we flex, adduct, and internally rotate your hip) can reproduce symptoms of impingement, while the FABER test helps differentiate between hip, SI joint, and back issues. These maneuvers help us narrow down potential diagnoses with surprising accuracy.
We'll gently palpate (touch) key areas around your hip to identify tender spots, and we'll screen for nerve involvement too. Hip pain sometimes originates from pinched nerves in your back or around your pelvis, so we need to rule this out.
At Evolve, we pride ourselves on thorough evaluations that consider the whole picture - not just isolated symptoms. Our comprehensive physical therapy evaluation is designed to get to the heart of what's causing your discomfort.
Imaging & Special Tests for Confirming Anterior Hip Pathology
While our hands-on examination provides tremendous insight, sometimes we need to look beneath the surface to confirm a diagnosis.
X-rays are typically the first imaging study we recommend. A standing AP (anteroposterior) pelvis view shows both hips for comparison and can reveal arthritis, bone spurs, or structural abnormalities. Special views like the Dunn view are particularly good at showing cam-type impingement deformities at the femoral head-neck junction.
For soft tissue problems like labral tears or muscle injuries, MRI is the gold standard. The good news is that modern 3-Tesla MRIs offer excellent visualization without always needing contrast injection. That said, MR arthrography (MRI with contrast injected into the joint) still provides the most detailed view of labral tears, with about 90% sensitivity.
Ultrasound has a special place in our diagnostic toolkit because it allows for dynamic assessment - we can actually see structures move in real-time. This is particularly useful for conditions like snapping hip syndrome, where the problem only occurs during specific movements.
Sometimes, diagnostic injections can be both informative and therapeutic. If an anesthetic injection into your hip joint significantly relieves your pain, it confirms the joint itself is the source of the problem. This can help differentiate hip pain from referred pain originating in your back.
Outcome Measures & Tracking Progress
How do we know if you're getting better? We measure it!
We use validated questionnaires like the Hip Disability and Osteoarthritis Outcome Score (HOOS) or the International Hip Outcome Tool (iHOT-33) to quantify your symptoms and function. These tools ask about your pain levels, stiffness, daily activities, and more, giving us a numerical score we can track over time.
Beyond questionnaires, we assess real-world function through performance tests. Can you stand up from a chair repeatedly for 30 seconds? How far can you walk in 6 minutes? Can you balance on your affected leg? These objective measures help us document your progress and identify areas that still need work.
For our athletes, we go a step further with sport-specific assessments. Before getting you back on the field or court, we want to see not just pain-free movement but also restored power, agility, and movement quality. Typically, we look for at least 90% symmetry between your sides before clearing you for full return to sport.
At Evolve Physical Therapy + Sports Rehabilitation, we don't just treat symptoms - we measure outcomes to ensure you're truly getting better. This data-driven approach, combined with our hands-on expertise, means you're getting the most effective care possible for your anterior hip pain.
Evidence-Based Management & Prevention Strategies
Managing anterior hip pain effectively requires a custom approach based on the specific diagnosis, severity, and individual factors. Research supports a progressive, multimodal approach for most conditions.
Conservative Care for Anterior Hip Pain
For most cases of anterior hip pain, conservative management is the first-line approach. Here at Evolve Physical Therapy + Sports Rehabilitation in Brooklyn, we believe in treating the whole person, not just the symptoms. Our evidence-based strategies include a thoughtful blend of several approaches.
We often start with activity modification – not complete rest, but smart adjustments to your daily routine. This might mean temporarily scaling back on those deep squats at the gym or modifying your running schedule. Think of it as pressing the pause button, not stopping altogether. We'll help you find that sweet spot where you're still active but not aggravating your hip.
Our hands-on manual therapy techniques can work wonders for many patients. Whether it's gentle joint mobilizations to improve how your hip moves or targeted soft tissue work to release tight muscles, these techniques help restore normal mobility and decrease pain. Many patients find immediate relief after these sessions, which we typically recommend 1-3 times weekly over a 6-12 week period.
The cornerstone of our approach is therapeutic exercise – but not just any exercises. We prescribe specific movements custom to your condition. For tight hip flexors, we might start with gentle stretching and isometric holds, being careful not to overstretch already irritated tissues. Those deep hip stabilizers that often get neglected? We'll teach you how to activate them properly, which research shows can actually shift joint loads away from damaged areas.
Gluteal strengthening is particularly important – I often tell my patients that "your butt is your hip's best friend." Strong glutes help position your femur properly in the socket, reducing stress on sensitive structures. We'll make sure you're engaging those glutes correctly, not compensating with your hamstrings or back.
As you improve, we'll incorporate functional movement retraining to address those patterns that might have contributed to your pain in the first place. Whether it's correcting how you walk, squat, or perform sport-specific movements, this step is crucial for long-term success.
We may complement your treatment with therapeutic modalities like ultrasound or electrical stimulation when appropriate. These tools can help manage pain and facilitate healing, though they're always secondary to active treatments.
Perhaps most importantly, we emphasize education and self-management. Understanding your condition and learning how to manage it independently gives you control over your recovery. We'll teach you about pain mechanisms, proper ergonomics, and home exercises you can perform between sessions.
Throughout this process, we follow progressive loading principles – starting gently and gradually increasing challenges as your hip responds positively. We're always monitoring your symptoms to guide our next steps.
For more information about hip impingement, one of the common causes of anterior hip pain, check out our article on What is Hip Impingement?
When to Refer or Consider Surgical Options
While most people with anterior hip pain improve with conservative care, sometimes surgery becomes necessary. Knowing when to consider this option is important.
If you've been diligently following an appropriate therapy program for 3-6 months without significant improvement, it might be time to discuss other options. Similarly, if your symptoms are progressively worsening despite therapy or you're experiencing mechanical symptoms like locking or catching that severely limit function, an orthopedic consultation makes sense.
Common surgical interventions include hip arthroscopy for labral tears and impingement, with about 90% of patients returning to their activities for certain conditions. Younger patients without significant arthritis tend to have the best outcomes with this approach.
For those with acetabular dysplasia, a periacetabular osteotomy (PAO) might be recommended, especially for patients under 40 without advanced arthritis. This procedure improves the socket's coverage of the femoral head and can prevent early osteoarthritis.
In cases of advanced osteoarthritis, a total hip arthroplasty (replacement) may be the best option. While typically reserved for older adults or those with end-stage disease, modern techniques have made this procedure incredibly successful for pain relief and function restoration.
For stress fractures or acute fractures, fracture fixation may be necessary – particularly important for femoral neck stress fractures to prevent displacement.
At Evolve, we also provide comprehensive post-surgical rehabilitation for patients who undergo these procedures. Our protocols are customized to the specific surgical approach and your individual needs, ensuring optimal recovery.
Lifestyle, Exercise & Load-Optimization for Long-Term Prevention
Preventing recurrence of anterior hip pain is just as important as treating the initial problem. Long-term success requires addressing several modifiable factors.
Weight management plays a significant role in hip health. According to scientific research on hip OA management, every 1% weight loss reduces hip replacement risk by 3% – not just by reducing joint loading but also by decreasing systemic inflammation. When appropriate, we can help connect you with nutritional resources.
Smart exercise dosage is crucial. I often tell my patients that it's not just about what exercises you do, but how you do them and how you progress. We'll help you find the right balance of training loads, ensure adequate recovery between sessions, and incorporate cross-training to distribute stress across different structures. For competitive athletes, we'll discuss periodization strategies to optimize performance while minimizing injury risk.
Movement quality trumps quantity every time. We focus on proper technique rather than just piling on more reps or heavier weights. Finding the right balance between mobility and stability while addressing any compensatory patterns helps protect your hip long-term.
Don't underestimate the importance of proper footwear and equipment. The right athletic shoes for your specific activity, proper bike fitting for cyclists, and appropriate workout equipment adjustments can make a tremendous difference in how stress is distributed through your hip.
For many of us who sit at desks all day, workplace ergonomics matter enormously. We'll discuss proper sitting posture, desk setup, the importance of regular movement breaks, and whether options like standing desks might benefit your specific situation.
Finally, we believe in the value of an ongoing maintenance program – periodic "tune-up" sessions, progressive self-management strategies, and monitoring for early signs of recurrence before they become major problems.
At Evolve Physical Therapy + Sports Rehabilitation in Brooklyn, we see successful management of anterior hip pain as a journey that extends well beyond symptom resolution. Our goal is to empower you with the knowledge, skills, and strategies that support long-term hip health and get you back to doing what you love – whether that's running marathons or simply playing with your grandchildren without pain.
Frequently Asked Questions about Anterior Hip Pain
What activities commonly aggravate anterior hip pain?
If you're dealing with anterior hip pain, you've probably noticed certain movements or activities make it worse. This isn't random—specific movements tend to stress the front of the hip in predictable ways.
Activities involving deep hip flexion are often the biggest culprits. Think about sitting in a low chair, performing deep squats, or bringing your knee close to your chest during stretches. Many yoga poses, especially deep lunges, can also trigger discomfort.
High-impact activities are another common aggravator. Running (especially downhill), jumping, and sports that involve quick cutting movements can all flare up front hip pain. The repetitive impact sends forces through the hip joint that can irritate already sensitive structures.
Don't overlook how static positions affect your hip too. Many patients tell us their pain worsens after prolonged sitting, particularly in car seats. Standing with your weight shifted to one side for extended periods can also stress the anterior hip structures.
The way your hip moves during activities matters as well. Movements combining internal rotation with flexion often reproduce pain in people with impingement issues. Repetitive kicking motions in sports like soccer or martial arts, and quick acceleration or deceleration can also trigger symptoms.
At Evolve Physical Therapy in Brooklyn, we find that identifying your specific pain triggers provides valuable clues about what's happening in your hip. This information helps us create a more targeted treatment approach.
How long does it take to recover from a hip flexor strain?
Recovery from a hip flexor strain isn't one-size-fits-all—it depends on several factors including severity, your overall health, and how well you follow your treatment plan.
For mild (Grade 1) strains with minimal tissue damage, you might feel significantly better within 1-2 weeks. Many people can return to their normal activities, including sports, within 2-3 weeks if they're diligent about their rehabilitation.
Moderate (Grade 2) strains involve partial tearing of muscle fibers and typically take 3-6 weeks to heal properly. Most people can return to sports within 4-8 weeks, but rushing this process often leads to reinjury.
Severe (Grade 3) strains or complete tears are much more serious. Recovery typically takes 8-12 weeks at minimum, with return to high-level activities often delayed for 3-6 months. Some cases may require surgical intervention.
Your rehabilitation will progress through several phases, each with specific goals:
During the acute phase (first week), we focus on controlling pain and inflammation while protecting the injured tissues. We'll have you perform gentle movement and isometric exercises that don't increase your pain.
In the subacute phase (weeks 1-3), we'll gradually increase your range of motion and begin light strengthening. This is when manual therapy techniques can be particularly helpful in restoring normal tissue mobility.
The strengthening phase (weeks 2-6) involves progressive resistance training and reintroducing functional movement patterns. We'll address any biomechanical issues that might have contributed to your injury.
Finally, the return to activity phase (4+ weeks) focuses on sport-specific training and ensuring you can perform all necessary movements without pain or compensation.
Several factors can delay recovery, including continuing painful activities too soon, skipping the crucial early rest period, or failing to address underlying movement problems. That's why working with our physical therapists at Evolve gives you the best chance for a complete recovery—we'll help you steer each stage appropriately.
Can anterior hip pain be prevented in young athletes?
Yes! Many cases of anterior hip pain in young athletes are preventable with the right approach. At Evolve Physical Therapy, we work closely with young athletes to reduce their risk of developing these painful conditions.
Regular movement screenings are invaluable for catching potential problems early. We look for restricted hip mobility, muscle imbalances, and dysfunctional movement patterns that might increase injury risk. When we spot these issues, we can address them before they lead to pain.
Neuromuscular training forms the foundation of prevention. We teach athletes how to properly activate their core and hip stabilizers, improve their balance, and refine sport-specific techniques. This training helps distribute forces more evenly through the hip joint during athletic movements.
Smart training load management is especially crucial for growing athletes. During growth spurts, young athletes are particularly vulnerable to overuse injuries. We educate coaches and parents about appropriate training progression, the importance of adequate recovery time, and the benefits of cross-training to distribute stress across different tissues.
Different sports create unique demands on the hip. Dancers and gymnasts need proper turnout technique that comes from the hips rather than compensating at the knees and feet. Soccer and hockey players benefit from hip strengthening to control forces during kicking and skating. Runners need gradual mileage progression and technique refinement to reduce impact forces.
We also emphasize the importance of awareness during periods of rapid growth. Many parents don't realize that growth spurts increase injury risk, so we provide guidance on modifying training during these vulnerable times. Proper nutrition and adequate sleep are also essential components of injury prevention that we discuss with our young athletes.
Equipment choices matter too. We help athletes select appropriate footwear for their specific activities and consider how playing surfaces might affect hip loading.
By implementing these preventive strategies, we've helped many young athletes at Evolve Physical Therapy stay healthy and perform at their best while avoiding the frustration of anterior hip pain.
Conclusion & Next Steps
The journey to understanding and resolving anterior hip pain begins with knowledge. Throughout this guide, we've explored how hip pain can originate from many sources – from joint mechanics and soft tissue problems to bone structure issues and movement patterns that put stress on your hip.
Here's what we hope you'll take away from this comprehensive look at hip pain:
Anterior hip pain isn't just one condition – it represents a spectrum of possibilities from common arthritis and impingement to muscle strains and even pain referred from other body regions. Getting the right diagnosis matters enormously for your recovery.
Most people experiencing hip pain find significant relief through non-surgical approaches. Physical therapy, smart activity modifications, and properly progressed exercise often resolve even stubborn cases when properly custom to your specific condition.
Sometimes, despite our best conservative efforts, certain conditions may require surgical intervention. The good news is that modern surgical techniques have dramatically improved outcomes for many hip conditions.
Prevention really is the best medicine. By focusing on quality movement, appropriate exercise loading, and lifestyle factors that support hip health, you can often avoid recurrence and maintain an active lifestyle.
At Evolve Physical Therapy + Sports Rehabilitation in Brooklyn, we see hip pain cases every day. Our approach combines careful assessment with hands-on treatment and personalized exercise programs. We work with everyone from seniors managing arthritis to high-level athletes returning to competition after injury.
If you're dealing with anterior hip pain, don't wait until it becomes debilitating. Early intervention typically leads to better outcomes and helps prevent the domino effect where one painful area creates problems elsewhere in your body.
We've made accessing quality hip care convenient with locations throughout Brooklyn – in Marine Park, Gravesend, Midwood, Park Slope, and Mill Basin. At each location, you'll find therapists experienced in comprehensive hip rehabilitation who will create an individualized plan to get you back to living without limitations.
Don't let hip pain keep you from the activities and lifestyle you love. Reach out to Evolve Physical Therapy + Sports Rehabilitation today to schedule your evaluation and take that first important step toward resolving your anterior hip pain.
Recovery isn't just about following a cookie-cutter protocol – it's a partnership between you and your physical therapist. With expert guidance and your commitment, most people with anterior hip pain can achieve remarkable improvements and return to their favorite activities with confidence, armed with strategies to maintain their hip health for years to come.
Surgical Solutions for Scoliosis: What You Need to Know1Deep Research2Outline3Content
Understanding Surgical Options for Scoliosis

Scoliosis surgery is typically recommended when spinal curvature exceeds 45-50 degrees or continues to worsen despite non-surgical treatments. Here's what you need to know:
When it's considered: For curves >45° in mature patients or >40° in growing children
Main goals: Stop curve progression, reduce deformity, maintain trunk balance
Types: Spinal fusion (most common), growing rods (for young children), vertebral body tethering
Success rate: 60-100% curve correction depending on flexibility
Recovery time: Hospital stay of 3-4 days, return to school in 4-6 weeks, full activities in 2-6 months
Scoliosis surgery represents a significant decision for patients and families facing progressive spinal curvature. While many cases of scoliosis can be managed with observation or bracing, surgical intervention becomes necessary when curves reach a severity that threatens long-term health and quality of life.
The decision to pursue surgery isn't made lightly. Doctors typically recommend surgical treatment when curves exceed 45-50 degrees or continue to worsen despite other treatments. For growing children with curves above 40 degrees, the decision becomes even more important as these curves almost always continue to progress.
I'm Lou Ezrick, founder of Evolve Physical Therapy, and I've helped numerous patients through both pre-surgical preparation and post-operative rehabilitation following scoliosis surgery, developing specialized protocols that address the unique challenges these patients face during recovery.

Understanding Scoliosis & When Surgery Is Considered
When you hear the word "scoliosis," think of a spine that curves sideways instead of running straight down the back. This S-shaped or C-shaped curve must measure at least 10 degrees on an X-ray to be officially diagnosed as scoliosis. Though it sounds rare, scoliosis affects about 2% of teenagers, with girls being eight times more likely to develop significant curves than boys.
Scoliosis comes in several different forms, each with its own story:
Idiopathic scoliosis (about 80% of cases) appears without any known cause, typically during growth spurts
Congenital scoliosis happens before birth when the spine doesn't form properly
Neuromuscular scoliosis develops in people with conditions affecting muscle control, like cerebral palsy
Degenerative scoliosis shows up later in life as the spine naturally wears down with age
Doctors measure scoliosis severity using something called the Cobb method – essentially calculating the angle of the curve from X-rays. This number becomes incredibly important when deciding whether surgery might be necessary.
The science is clear on what happens with larger curves. Research shows that curves over 50 degrees in someone who's finished growing will still progress about 1 degree each year. Even more concerning, curves exceeding 60 degrees can reduce lung capacity to just 68% of normal, potentially causing breathing problems down the road.
A groundbreaking study in the Journal of Bone and Joint Surgery followed patients for over 40 years and found thoracic curves between 50-75 degrees progressed an average of 29.4 degrees over that time. This confirms what many surgeons already suspected – significant curves don't simply stop progressing once you're done growing.
Is scoliosis surgery always necessary?
Good news – the vast majority of scoliosis cases never require surgery! In fact, only about 5% of young people with scoliosis eventually need bracing or surgical intervention. Most mild curves (under 25 degrees) simply need regular check-ups to watch for changes.
For growing children with moderate curves between 25-40 degrees, bracing often works wonderfully. When worn consistently (16-23 hours daily), braces can stop curve progression in about 75% of adolescents with idiopathic scoliosis. It's not always easy wearing a brace as a teenager, but the results speak for themselves.
Here at Evolve Physical Therapy + Sports Rehabilitation, we offer specialized Schroth therapy – a three-dimensional exercise approach specifically designed for scoliosis patients. This therapy can be incredibly helpful for patients with mild to moderate curves, those preparing for or recovering from surgery, and anyone looking to improve posture and reduce scoliosis-related pain. More info about scoliosis treatment
The decision to try non-surgical approaches depends heavily on skeletal maturity. Once growth is complete (typically around 14 for girls and 16 for boys), curves under 45 degrees are much less likely to worsen rapidly.
Surgical indication checklist
How do doctors determine if scoliosis surgery is truly necessary? They consider several important factors:
Curve magnitude typically triggers surgical discussions when it exceeds 45-50 degrees in someone who's finished growing, or 40 degrees in someone still growing. Curve flexibility matters too – surgeons assess this through special bending or traction X-rays to predict potential correction. More flexible curves generally have better surgical outcomes.
While pain is rarely a major issue in adolescent idiopathic scoliosis, persistent discomfort that doesn't respond to conservative treatment might influence the surgical decision. Cosmetic concerns like visible deformity, rib humps, or uneven shoulders causing significant psychological distress are also valid considerations.
In rare cases, neurological symptoms like numbness or weakness might appear, requiring prompt surgical attention. Pulmonary function becomes important for severe thoracic curves that might compromise breathing. And of course, curves that continue progressing despite bracing often indicate surgery is needed.
As one orthopedic surgeon we collaborate with puts it: "The decision to operate isn't based solely on numbers. We consider the whole person—their age, curve pattern, symptoms, and how scoliosis affects their daily life and self-image."
At Evolve Physical Therapy, we work closely with surgical teams to support patients through their entire journey, whether that involves preparing for surgery or helping them avoid it altogether through targeted therapy approaches.
Scoliosis Surgery: Goals, Techniques, Bone Grafts
When it comes to scoliosis surgery, there are three main goals that guide the entire process:
Stop curve progression to prevent future deformity and related health issues
Reduce existing deformity by safely straightening the spine as much as possible
Maintain trunk balance while preserving the natural curves that should be there
Today's surgical techniques can typically improve scoliosis curves by 50-70%, with some more flexible curves seeing even better results. It's worth noting that surgeons aren't always aiming for a perfectly straight spine—instead, they're focused on creating balance, improving appearance, and enhancing overall function.

Main types of scoliosis surgery
If you or your child is facing scoliosis surgery, understanding the different approaches can help you feel more prepared for discussions with your surgical team.
Posterior Spinal Fusion is by far the most common approach, used in about 80-90% of cases. The surgeon makes an incision along the back of the spine, then uses rods, screws, and hooks to straighten the curve. Bone graft material is added to help the vertebrae fuse together over time. Most patients stay in the hospital for 3-4 days, and correction rates range from 60-100% depending on how flexible the curve is.
Anterior Spinal Fusion approaches the spine from the front or side of the body. This technique can sometimes preserve more motion segments in certain curve patterns, making it particularly useful for thoracolumbar or lumbar curves. Hospital stays are slightly longer (4-7 days), but the benefit is that fewer vertebrae may need to be fused.
For young children under 10 with progressive scoliosis, Growing Rod Techniques offer a way to control curves while allowing continued growth. The rods attach to the spine above and below the curve and are lengthened every 6-12 months as the child grows. This approach delays final fusion until the child is closer to skeletal maturity, allowing for an average spine length increase of 4.7 cm through these periodic adjustments.
Vertebral Body Tethering (VBT) represents a newer, fusionless option for growing children and adolescents. Rather than fusing the spine, VBT uses a flexible cord on the outside of the curve to guide growth, preserving motion and flexibility. The FDA approved this technique in 2019 specifically for idiopathic scoliosis.
Children with thoracic insufficiency syndrome may benefit from Vertical Expandable Prosthetic Titanium Rib (VEPTR), a specialized technique that increases thoracic volume while correcting scoliosis, improving breathing and lung development.
How does minimally invasive scoliosis surgery differ?
Minimally invasive scoliosis surgery (MISS) marks a significant evolution in how we approach spine correction. While traditional scoliosis surgery involves a long incision and substantial muscle dissection, MISS takes a gentler approach.
Instead of one long incision, surgeons make multiple smaller ones (typically 1-2 inches each). They use specialized tubular retractors that spread muscle fibers apart rather than cutting through them. Real-time X-ray imaging guides precise placement of implants. The benefits are substantial: less blood loss (824 ml versus 1,791 ml in traditional surgery), shorter hospital stays (typically 1-2 days less), and potentially faster recovery.
One specific minimally invasive approach is Video-Assisted Thoracoscopic Surgery (VATS), which uses small chest incisions, specialized cameras, and instruments to access the front of the spine.
Research published in the Journal of Spinal Disorders & Techniques found that patients who underwent minimally invasive procedures experienced less pain, needed fewer pain medications, and returned to school or work about two weeks earlier than those who had traditional open procedures.
That said, minimally invasive techniques aren't right for everyone. They typically work best for curves under 70 degrees, require surgeons with specialized training and equipment, and may not be suitable for all curve patterns. As one spine surgeon I work with puts it: "We need to balance the recovery advantages against the need for adequate correction. Not every patient is a candidate, but for those who are, the benefits can be significant."
You can learn more about these advanced techniques in this research on minimally invasive techniques.
Bone graft options & risks
Bone grafting plays a crucial role in spinal fusion, providing the biological material needed to create a solid bridge between vertebrae. There are several options to consider:
Autograft uses the patient's own bone, traditionally harvested from the pelvis (iliac crest). Surgeons often consider this the "gold standard" for fusion success because it contains living bone cells and growth factors. The downside? It requires an additional incision, can cause donor site pain, and offers limited quantity.
Allograft comes from bone banks and eliminates the need for that additional incision and donor site pain. The bone is carefully processed to reduce disease transmission risk, with infection risk being remarkably low—about 1 in 1 million for hepatitis and 1 in 10 million for AIDS.
For some patients, synthetic or biological alternatives may be appropriate. These include bone morphogenetic proteins (BMPs) that stimulate bone formation and synthetic calcium-based substitutes. These are often used in combination with autograft or allograft but are less commonly used in pediatric cases.
It's worth noting that pseudarthrosis—failure of the bones to fuse properly—occurs in up to 1% of children but is more common in adults, especially those who smoke. While initial stability happens relatively quickly, complete solid fusion typically takes 6-12 months.
At Evolve Physical Therapy + Sports Rehabilitation, we work closely with patients before and after scoliosis surgery to optimize outcomes and support the healing process. Our hands-on approach helps patients steer the challenges of recovery while building the strength needed for long-term success.
Getting Ready for Your Operation
Preparing for scoliosis surgery isn't just about the medical checklist—it's about setting yourself up for the best possible outcome. When my patients are getting ready for surgery, I walk them through a comprehensive preparation process that helps calm their nerves and optimize their recovery.
Your surgical team will conduct a thorough preoperative evaluation that typically includes several key components. You'll undergo a comprehensive physical examination to assess your overall health. The imaging portion is particularly important—standing full-spine X-rays give surgeons your baseline, while special side-bending or traction X-rays help determine how flexible your spine is (which affects how much correction can be achieved). Many surgeons also order an MRI to ensure there are no spinal cord abnormalities that could complicate surgery.

Blood work is another essential step—your surgical team will need a complete blood count, coagulation studies, and a metabolic panel to ensure you're healthy enough for surgery. You'll also meet with an anesthesiologist who will review your medical history and discuss the anesthesia plan. For patients with severe curves, pulmonary function tests may be ordered to check how the scoliosis affects breathing.
At Evolve Physical Therapy + Sports Rehabilitation, we've developed specialized programs to help our patients physically prepare for scoliosis surgery. We focus on strengthening your core muscles to support your spine during recovery and teach important breathing exercises that will help prevent post-surgical complications like pneumonia. One of the most practical skills we cover is proper log-rolling technique—trust me, you'll be grateful you learned this before surgery when you need to get in and out of bed without bending your spine!
"The physical therapy team at Evolve taught me exactly what to expect after surgery," shared Maya, one of our 16-year-old patients. "Learning how to log-roll and practice deep breathing beforehand made a huge difference in my recovery."
If you smoke, your surgeon will ask you to quit at least two weeks before surgery, as smoking significantly impairs bone healing. You'll also need to stop taking blood thinners, anti-inflammatories, and certain supplements that could increase bleeding risk. Good nutrition in the weeks before surgery can help support your body's healing process afterward.
Day-before checklist
The day before your scoliosis surgery is all about final preparations. You'll need to stop eating and drinking after midnight (or follow your surgical team's specific instructions). Take only medications that your surgeon has explicitly approved—this is really important, as some common medications can interfere with anesthesia or increase bleeding risk.
Some surgeons prescribe a bowel preparation protocol to follow, and you may be given an antimicrobial soap for showering. When packing for the hospital, think comfort: loose clothing that's easy to put on and take off, slip-on shoes (bending to tie laces won't be possible right after surgery), and personal hygiene items. Don't forget entertainment like books or a tablet—recovery involves a lot of downtime. A small pillow can make the ride home much more comfortable, and always bring all your regular medications in their original bottles.
Intra-op safety measures
Modern scoliosis surgery has become remarkably safe thanks to advanced monitoring techniques and protocols. One of the most important safety measures is neuromonitoring—continuous electrical monitoring of your spinal cord and nerve function throughout the procedure. This technology has reduced the risk of neurological injury to less than 1%, as surgeons receive immediate feedback if there's any change in nerve function.
You'll receive prophylactic antibiotics before the first incision and for about 24 hours afterward to prevent infection. Many hospitals use cell-saver technology, which collects, filters, and returns your own blood during surgery, reducing the need for transfusions. Your anesthesiologist will carefully manage your blood pressure using controlled hypotensive anesthesia to minimize blood loss, while also maintaining your body temperature at the optimal level for clotting and infection prevention.
Perhaps the most important safety factor is having an experienced surgical team. As one spinal surgeon I work with explains: "The advancements in neuromonitoring have dramatically improved safety. We receive immediate feedback if there's any change in nerve function, allowing us to adjust our approach before any permanent damage occurs."
At Evolve Physical Therapy, we coordinate closely with surgical teams to ensure our patients understand each step of this preparation process. This comprehensive approach not only improves surgical outcomes but also helps reduce the anxiety that naturally comes with preparing for such a significant procedure.
Recovery, Risks & Life After Surgery
Coming home after scoliosis surgery marks the beginning of an important healing journey. While every patient's experience is unique, most follow a similar path to recovery that unfolds over several months.
The first few days in the hospital are focused on pain management and getting you back on your feet. Most patients stay about 3-4 days, starting with a PCA (patient-controlled analgesia) pump on day one that lets you manage your own pain medication. You'll likely surprise yourself by sitting in a chair that very first day! By day two, you'll be taking your first steps with assistance and transitioning to oral pain medications. As days three and four approach, you'll be walking more independently, your digestive system will wake up, and the discharge planning begins.
Those first six weeks at home require some patience. You'll need to limit bending, twisting, and lifting anything heavier than a half-gallon of milk (about 5 pounds). Daily walking becomes your main activity, gradually increasing distance as you build strength. Most teens return to school part-time around the 4-6 week mark, often with some accommodations like elevator access or a second set of textbooks to avoid heavy backpacks.
As you move into the 6-week to 6-month phase, life starts feeling more normal. Physical therapy becomes a key part of your recovery, focusing on rebuilding strength and function. Most surgeons clear patients to drive around the 6-week mark (once you're off pain medications), and non-contact sports typically get the green light between 4-6 months.
The final stage of recovery happens between 6-12 months when your bone fusion fully matures. This is when most patients receive clearance to return to all activities, including contact sports if desired. Your surgeon will take final X-rays to confirm that your fusion is solid and complete.
One of the unexpected bonuses? Most patients gain about 1 to 1.5 inches in height after their curve is corrected!
While scoliosis surgery has an excellent track record, it's important to understand potential risks. Infection affects about 1-3% of patients. Some experience more blood loss than anticipated and may need a transfusion. Serious nerve injuries are quite rare (less than 1%) thanks to advanced monitoring techniques. Failed fusion (pseudarthrosis) can occur, though it's more common in adults than teens. Sometimes implants can cause issues like rod breakage or screw loosening. And over many years, the vertebrae above or below the fusion may experience accelerated wear and tear.
Managing pain & physical therapy
"The first two weeks were tough, but then each day got noticeably better," shares Emma, a former patient who had fusion surgery at age 14. This mirrors what most patients experience with post-surgical pain.
Pain management after scoliosis surgery follows a thoughtful progression. Initially, you'll have a PCA pump that lets you administer small, controlled doses of pain medication when needed. Around day 2-4, you'll transition to oral medications, typically including both opioids and muscle relaxants. By the time you're home, you'll be on a schedule of gradually decreasing pain medication, with most teens able to discontinue opioids within two weeks and transition to over-the-counter options.
At Evolve Physical Therapy + Sports Rehabilitation, we've developed specialized protocols for scoliosis recovery. Our approach begins with gentle, early mobilization—simply getting you moving safely as soon as possible. We then progress to rebuilding core strength, which provides crucial support for your healing spine. We pay special attention to your walking pattern and posture, helping you adapt to your new spinal alignment.
Our therapists incorporate elements of Schroth therapy, addressing the three-dimensional nature of scoliosis even after surgical correction. This specialized approach optimizes breathing, posture, and functional movement during your recovery.
"The physical therapists at Evolve truly understood what I was going through," says Sarah, who had spinal fusion at 15. "They knew exactly when to push me and when to let me rest. Six months after surgery, I was back to dancing, which I never thought would be possible."
Long-term outlook
The good news is that the long-term outlook after scoliosis surgery is overwhelmingly positive. Modern techniques achieve impressive correction—anywhere from 60-100% improvement depending on how flexible your curve was before surgery. More importantly, research consistently shows significant improvements in quality of life, self-image, and physical function.
Your corrected spine alignment typically remains stable over time, with minimal loss of correction (usually less than 5 degrees). While the fused segments no longer move, you'll retain sufficient motion in the unfused portions of your spine for nearly all activities. As one surgeon explains, "We aim to fuse the fewest segments possible while still achieving adequate correction."
Most patients return to their pre-surgical activity levels, including sports. While certain high-impact activities might need modification, few are permanently off-limits. For young women concerned about future pregnancy, it's reassuring to know that those who have undergone scoliosis surgery can have normal pregnancies and deliveries—the fusion doesn't typically interfere with childbearing.
Perhaps most importantly, surgical correction dramatically reduces the risk of future curve progression and its associated complications. A study published in Spine followed patients for 20 years after scoliosis surgery and found that 90% were satisfied with their results and would choose to have the surgery again if faced with the same decision.
At Evolve Physical Therapy, we're committed to supporting you through every phase of this journey, from pre-operative preparation through long-term recovery and return to the activities you love. Our specialized Schroth therapy program offers ongoing support even years after surgery to maintain optimal function and prevent secondary issues.
Alternatives, Innovation & FAQs
When it comes to addressing scoliosis, surgery isn't the only option on the table. While scoliosis surgery remains the most effective treatment for severe curves, medical science has developed several alternatives worth exploring.
At Evolve Physical Therapy + Sports Rehabilitation, we're passionate about offering comprehensive care options. Our certified Schroth therapists provide specialized physical therapy custom to each patient's unique curve pattern. This non-surgical approach can be remarkably effective for managing smaller curves or complementing surgical treatment for optimal outcomes.
Bracing technology has come a long way, too! Modern braces are more comfortable and effective than ever before. When worn consistently (16-23 hours daily), they can halt progression in up to 75% of adolescents with moderate curves. Many of our patients are pleasantly surprised by how today's braces can fit discreetly under clothing.
"The brace my daughter received was nothing like what I remembered from my childhood," shared one parent. "It was lightweight, custom-molded, and she could still participate in most activities."

The field of scoliosis treatment is constantly evolving with exciting innovations. Magnetically controlled growing rods represent a breakthrough for young children, allowing lengthening through external magnets rather than repeated surgeries. Meanwhile, robotic-assisted surgery is enhancing the precision of screw placement while reducing operative time and radiation exposure.
Speaking of radiation, the new EOS imaging systems reduce exposure by an impressive 50-85% compared to conventional X-rays, while providing superior 3D visualization of the spine. This technology is especially valuable for patients requiring frequent monitoring.
The financial aspect of scoliosis surgery deserves careful consideration. While costs vary depending on location, hospital, implants, and length of stay, most insurance plans cover the procedure when medically necessary. I always recommend working closely with your surgeon's office to understand insurance coverage and potential out-of-pocket expenses.
You're not alone on this journey. Both in-person and online support groups offer invaluable emotional support and practical advice. Organizations like the Scoliosis Research Society and the National Scoliosis Foundation can connect you with others who truly understand what you're going through.
Frequently Asked Questions about scoliosis surgery
What are the biggest risks of scoliosis surgery?
While scoliosis surgery has an excellent safety profile, it's important to understand the potential risks. Bleeding occurs in most surgeries, but advances like cell-saver technology have significantly reduced the need for transfusions (now required in less than 30% of cases).
Infection remains a concern with any surgery, with rates of approximately 1-3% for scoliosis procedures. Your surgical team will take multiple precautions, including prophylactic antibiotics and strict sterile technique, to minimize this risk.
Nerve injury is perhaps the most feared complication, but modern neuromonitoring has reduced the risk of major neurological injury to well under 1%. Minor numbness or tingling sensations are more common but typically resolve within weeks to months.
Pseudarthrosis (failure of the fusion to heal properly) occurs in up to 1% of children but is more common in adults (5-10%), particularly smokers. If detected, revision surgery may be necessary to ensure proper healing.
"The most serious complications are extremely rare," explains one spine surgeon I work with. "The vast majority of patients experience a smooth recovery with excellent outcomes."
Will my back be stiff after fusion?
This is one of the most common questions I hear from patients considering scoliosis surgery. Yes, the fused segments will no longer move, but several factors determine how this affects your daily life.
The extent of fusion matters tremendously. Surgeons aim to fuse the minimum number of vertebrae necessary, preserving as much natural motion as possible. The location of fusion also plays a role – lumbar fusions tend to affect forward bending more than thoracic fusions.
What many patients don't realize is how well the unfused portions of the spine adapt, often developing increased mobility to compensate for the fused segments. The human body is remarkably adaptable!
One of my patients, now 10 years post-fusion, puts it perfectly: "I honestly forget I have rods in my back most days. I can do everything I want to do—yoga, hiking, playing with my kids. The only thing I notice is that I bend differently to pick things up, but it's second nature now."
After fusion, we typically recommend avoiding extreme sports with high fall risk, using proper body mechanics for lifting, and maintaining core strength through regular exercise – all things we can help with at Evolve.
How soon can my child return to normal activities?
Recovery follows a predictable timeline, though individual experiences vary. Most patients return to school part-time at 4-6 weeks after scoliosis surgery. Driving is typically permitted at 6 weeks, once pain medications are no longer needed.
Swimming often becomes the first approved exercise at 6-8 weeks, offering gentle resistance without jarring impacts. Non-contact sports usually get the green light at 4-6 months, while contact sports and full activities are generally cleared at 6-12 months, once fusion is solid.
At Evolve Physical Therapy + Sports Rehabilitation, we collaborate closely with surgeons to create customized return-to-activity protocols based on each patient's recovery, fusion levels, and activity goals. We understand how important it is for young people to return to their passions.
The mother of one teenage dancer shared: "We were worried about her missing her entire dance season, but with the rehabilitation program at Evolve, she was back to modified dance at 4 months and performing fully by 7 months. The timeline they gave us was spot-on."
With proper planning, patience, and expert guidance, most patients can return to the activities they love – often with better posture and less pain than before surgery.
Conclusion & Next Steps
Scoliosis surgery marks a significant milestone in the journey of someone with severe spinal curvature. I've seen how today's advanced surgical techniques, paired with thoughtful rehabilitation, can transform lives and futures.
If you're standing at this crossroads with your child—or perhaps for yourself—I want you to know that while the decision feels enormous, you don't have to steer it alone.
Here at Evolve Physical Therapy + Sports Rehabilitation in Brooklyn, we walk alongside our scoliosis patients through every step of their surgical journey. We believe preparation is just as important as the recovery phase, which is why we focus on both pre-surgical conditioning and comprehensive post-operative rehabilitation.
What makes our approach different? We see beyond the spine. We understand that scoliosis surgery impacts not just your physical body, but your emotional wellbeing, your daily routines, and your return to the activities that bring you joy. Our specialized Schroth therapy protocols address the three-dimensional nature of scoliosis correction, while our hands-on techniques target the specific challenges that arise during recovery.
Before taking your next steps, consider:
Connecting with a surgeon who specializes specifically in scoliosis (not just general spine surgery). Their expertise makes a tremendous difference in surgical outcomes.
Getting that second opinion—especially for complex curves or unusual presentations. Different surgeons may offer different approaches.
Exploring all available options thoroughly. Sometimes surgery is clearly necessary, but understanding the full spectrum of treatments helps you make peace with your decision.
Building physical and emotional readiness before surgery. The stronger your body and mindset going in, the smoother your recovery tends to be.
Planning your rehabilitation pathway in advance. Knowing what to expect after surgery removes much of the anxiety from the recovery process.
Our team serves patients throughout Brooklyn—from Marine Park to Gravesend, Midwood to Park Slope, and Mill Basin—making specialized scoliosis care accessible across our community. We've guided countless patients from pre-surgical jitters to post-operative success stories, and we'd be honored to be part of your journey too.
While facing scoliosis surgery might feel overwhelming today, I want to leave you with this thought: the patients I work with consistently tell me that looking back, they wish they'd worried less. With proper preparation, skilled surgical care, and dedicated rehabilitation, the road ahead leads toward improved alignment, better function, and a quality of life that may have seemed out of reach before.
To learn more about how our Schroth scoliosis therapy program can support your surgical journey, visit our Schroth scoliosis physical therapy page or reach out to our office directly. We're here to help turn this significant medical intervention into a positive turning point in your life.

TMJ Trigger Points Unlocked: Your Essential Guide
Understanding TMJ Trigger Points: The Hidden Source of Jaw Pain
TMJ trigger points are hyperirritable knots in the muscles around your jaw that can cause pain, stiffness, and limited movement. These sensitive spots can refer pain to other areas, creating symptoms that might seem unrelated to jaw problems.
What Are TMJ Trigger Points?
Tight, sensitive knots in jaw and facial muscles
Can cause local pain and referred pain to teeth, ears, and head
Often activated by stress, teeth grinding, or jaw overuse
May lead to clicking, popping, and limited jaw movement
Can be treated with massage, physical therapy, and self-care techniques
If you've ever experienced unexplained jaw pain, headaches, or even ear discomfort that your dentist couldn't solve, TMJ trigger points might be the culprit. These tense muscle knots develop in the muscles of mastication—primarily the masseter, temporalis, and pterygoid muscles—and can refer pain to surprising areas like your teeth, sinuses, or even deep into your ear canal.
What makes these trigger points particularly troublesome is their ability to mimic other conditions. That tooth pain might not be a cavity at all, but referred pain from a masseter trigger point. The ringing in your ear? Possibly linked to tension in your jaw muscles rather than an ear infection.
TMJ trigger points commonly develop due to everyday habits many of us don't even notice: teeth clenching during stressful meetings, nighttime grinding (bruxism), poor posture while working at a computer, or even chewing gum excessively. The repetitive strain creates micro-trauma in the muscle fibers, leading to those painful knots that can persist for months or even years if left untreated.
I'm Lou Ezrick, and as a physical therapist specializing in chronic pain management, I've helped thousands of patients find relief from TMJ trigger points through targeted manual therapy techniques and individualized treatment plans that address both symptoms and underlying causes.

TMJ Trigger Points 101
Have you ever felt that tight, tender spot in your jaw that just won't go away? That's likely a TMJ trigger point – a small knot in your muscle tissue that can cause big problems. These trigger points are essentially taut bands within your muscles that have become hypersensitive and irritable.
Think of these trigger points as tiny muscle cramps that got stuck in the "on" position. When muscle fibers remain contracted for too long, they create a self-sustaining cycle of pain and tension. As the pioneering work of Dr. Janet Travell showed, these spots become painful when pressed and can send pain signals to completely different areas of your head and face.
TMJ trigger points come in two main varieties:
Active trigger points are the troublemakers – they hurt even when you're not touching them, refer pain to other areas in predictable patterns, and limit how wide you can open your mouth. These are the ones that might wake you up at night or distract you during the day.
Latent trigger points are the sneaky ones – they don't cause spontaneous pain but still create muscle tightness and restriction. They're like sleeping dragons that can awaken when you're stressed, overuse your jaw, or come down with an illness.
Why do these pesky trigger points develop in the first place? Many of my Brooklyn patients are surprised to learn that everyday habits are often the culprit. Constant gum chewing, nail biting, or even that chocolate-covered almond addiction can overwork your jaw muscles. Stress is another major factor – that jaw clenching during your morning commute or while focusing on work adds up over time.
Nighttime teeth grinding (bruxism) is perhaps the most damaging trigger point creator, as your jaw muscles can generate tremendous force while you sleep – completely unconsciously! Poor posture, especially that forward-head position many of us adopt while looking at our phones, places extra strain on the entire jaw-neck system. Even a minor car accident or a long dental procedure can set the stage for trigger point development.
As one of our patients at Evolve Physical Therapy recently shared: "For years, I thought I needed root canals because of the tooth pain. Turns out, it was my jaw muscles the whole time! Understanding these trigger points has been life-changing."
How TMJ Trigger Points Cause TMD
Temporomandibular disorder (TMD) isn't just about the jaw joint itself – it's a complex relationship between your joints, muscles, and nervous system. TMJ trigger points are often key players in this painful drama.
These trigger points contribute to TMD through several important mechanisms. First, they create micro-trauma in your muscles. Each time you clench or grind, you're causing tiny injuries to muscle fibers, especially in the powerful masseter and temporalis muscles. These micro-tears lead to inflammation, pain, and – you guessed it – more trigger points.
TMJ trigger points also throw off the balance between muscle groups. When certain muscles become shortened and overactive due to trigger points, their opposing muscles become lengthened and weakened. This neuromuscular imbalance is why many patients notice their jaw deviating to one side when they open their mouth.
Perhaps most concerning is how trigger points alter joint loading. When your jaw muscles don't contract normally, they create abnormal movement patterns that place excessive stress on your temporomandibular joint. Over time, this can lead to disc displacement (that clicking or popping sound), joint inflammation, and even arthritic changes.
Research confirms how central these muscle issues are – a study in the Journal of Oral & Facial Pain and Headache found that myofascial trigger points are the primary source of pain in up to 55% of TMD patients. That's why addressing these muscle knots is often the key to resolving jaw pain.
Typical TMJ Trigger Points Referral Map
One of the most fascinating (and frustrating) aspects of TMJ trigger points is how they can cause pain far away from the actual problem spot. This "referred pain" follows predictable patterns that we've mapped extensively at Evolve Physical Therapy.
Your masseter muscle – the powerful chewing muscle you can feel bulging when you clench your teeth – commonly refers pain to your upper and lower molars. This is why so many patients undergo unnecessary dental work! These trigger points can also send pain deep into your ear canal, creating sensations that mimic ear infections or even tinnitus.
Trigger points in your temporalis muscle (the fan-shaped muscle at your temple) typically refer pain to your temple, eyebrow, and upper teeth. Many patients come to us thinking they have chronic migraines, only to find their headaches are actually stemming from jaw muscle tension.
The pterygoid muscles are hidden heroes (or villains) in the TMJ story. Lateral pterygoid trigger points often cause pain in front of your ear, around the TMJ itself, and even into your sinus region. These are often responsible for that annoying jaw clicking. Medial pterygoid trigger points create deep pain inside your mouth and throat area.
Even your neck muscles can join the party – particularly the sternocleidomastoid (SCM). Though not technically a jaw muscle, SCM trigger points commonly refer pain to your cheek, eye area, and ear, perfectly mimicking TMJ problems.
Understanding these referral patterns helps both our therapists and patients identify the true source of pain. As we often say at Evolve, "Treat the cause, not just the symptom." By targeting these specific trigger points, we can provide relief where other approaches have failed.
Key Muscles That Develop TMJ Trigger Points
The jaw is a marvel of muscular teamwork, with several key players working together to help you talk, chew, and express yourself. When these muscles develop TMJ trigger points, they can create a surprising array of painful symptoms. Let's get to know the muscles behind your jaw troubles:
Masseter: The Power Chewer
Think of your masseter as the heavyweight champion of your jaw muscles. This powerful muscle connects your cheekbone to your lower jaw and generates incredible force when you bite down. It's actually one of the strongest muscles in your body relative to its size!
Your masseter has two layers working together – a larger superficial layer that provides raw power for jaw closure, and a deeper layer that helps with more precise movements and grinding. When TMJ trigger points develop here, they're notorious troublemakers.
These masseter trigger points are incredibly common, affecting more than half of people with jaw pain. They're masters of disguise too – often creating pain that perfectly mimics a toothache in your molars. Many patients tell us they've had unnecessary dental work because everyone (including their dentist) thought the problem was with their teeth!
Beyond tooth pain, tight masseter muscles can limit how wide you can open your mouth, cause jaw tenderness, refer pain up to your eyebrow, and even create deep ear pain or ringing. As one of our Brooklyn patients recently told us, "I spent two years thinking I had an ear infection until my physical therapist found these knots in my jaw muscle!"
Common culprits behind masseter trigger points include teeth grinding at night, daytime stress clenching (often unconscious during work or driving), excessive gum chewing, and even that forward-head posture many of us adopt while using our phones. For deeper insights into masseter pain, check out this scientific research on masseter pain.
Lateral & Medial Pterygoids: Hidden Culprits
If the masseter is the star of the show, the pterygoid muscles are the behind-the-scenes crew that rarely get enough credit. These muscles hide deep inside your jaw, making them difficult to reach but incredibly important to address.
The lateral pterygoid is your jaw-opening specialist. It helps you open wide, move your jaw side to side, and push your jaw forward. When trigger points develop here, you might notice clicking or popping when you open your mouth, pain right in front of your ear, or your jaw might even shift to one side when opening.
These trigger points love to develop in musicians (especially violin players who hold their instrument with their jaw), people who've had long dental procedures, and chronic teeth grinders. One professional violinist we treated at Evolve Physical Therapy was amazed when we addressed her pterygoid trigger points: "Twenty years of jaw pain, and it was coming from a muscle I'd never even heard of!"
The medial pterygoid works as a teammate to your masseter, helping close the jaw and create grinding movements. When this muscle develops trigger points, it creates some truly odd symptoms – pain deep inside your mouth and throat, difficulty swallowing, and sensations of ear fullness that no ear doctor can explain.
Treating these hidden muscles requires specialized skills. Sometimes we use external approaches, but for stubborn cases, gentle intra-oral techniques (working inside the mouth with gloved hands) can provide remarkable relief when nothing else has worked.
Neck & Shoulder Contributors
Your jaw doesn't exist in isolation – it's part of a connected system that includes your neck and shoulders. This explains why TMJ trigger points often appear alongside trigger points in these neighboring areas.
The sternocleidomastoid (SCM) is that rope-like muscle running from behind your ear down to your collarbone. When it develops trigger points, it can create pain in your cheek, around your ear, near your eye, and even in your sinuses. Many patients are shocked to find their "sinus headaches" are actually coming from this neck muscle!
Your upper trapezius – that large muscle spanning your shoulders and upper back – can refer pain upward to your jaw and temple when it harbors trigger points. It's a major contributor to tension headaches and can increase overall tightness throughout your head and neck.
Don't forget the suboccipital muscles – those small but mighty muscles at the base of your skull. When tight, they can send pain to the top of your head and behind your eyes, contributing to headaches and increasing tension throughout your jaw.
We often see a domino effect with these muscles. Trigger points in one area can activate "satellite" trigger points in related muscles. For example, that tight upper trapezius from hunching over your computer might create secondary trigger points in your jaw muscles, creating a complex pattern that needs comprehensive treatment.
"Tech neck" from looking down at phones and computers is one of the biggest contributors we see in our Brooklyn practice. As we often tell our patients at Evolve Physical Therapy, treating just the jaw without addressing these connected areas rarely solves the whole problem.
For more information about specialists who can help with this interconnected approach, visit our guide to TMJ Pain Providers.
Symptoms & Self-Assessment
Have you ever woken up with a jaw that feels like it went ten rounds in a boxing match? Or maybe you've noticed a clicking sound when you yawn that wasn't there before? These could be telltale signs of TMJ trigger points at work.
The tricky part about these symptoms is they often masquerade as other conditions, sending many people down expensive treatment rabbit holes before finding the true cause.
Most people with TMJ trigger points experience jaw pain that feels like a deep, persistent ache. This discomfort typically intensifies when you're chewing that crusty Brooklyn bagel or chatting with friends over coffee. You might also notice your jaw making clicking or popping sounds that can be alarming (and sometimes loud enough for others to hear!).
Opening wide becomes a challenge too. Maybe you've noticed you can't yawn fully anymore, or perhaps your jaw seems to open unevenly, shifting to one side. These are classic signs of muscle imbalance caused by those pesky trigger points.
What surprises many of our Brooklyn patients are the symptoms that seem unrelated to the jaw. Ear fullness, ringing, or even occasional dizziness can all stem from TMJ trigger points. Headaches, particularly around the temples or behind the eyes, are incredibly common companions to jaw issues as well.
"I spent thousands on dental work thinking I had tooth problems, only to find my pain was coming from trigger points in my jaw muscles," shared one of our Park Slope patients. "The relief I felt after just two physical therapy sessions was incredible."

Locating Your Own TMJ Trigger Points
Good news—you can do some detective work at home to find your own TMJ trigger points. Think of it as a treasure hunt, except instead of gold, you're finding the source of your discomfort (still valuable!).
Start with your masseter, the workhorse of your chewing muscles. After washing your hands, place your fingers on your cheeks just in front of your ears. Give a gentle clench of your teeth and feel that muscle bulge—that's your masseter saying hello. Now relax and begin pressing into the muscle with moderate pressure. Work your way from top to bottom, feeling for tender spots, nodules, or tight bands that feel like guitar strings under the skin.
When you find a spot that makes you wince, you've likely found a trigger point. Rate the pain on a scale from 0-10—a 7/10 is actually the sweet spot for treatment intensity. Too gentle won't create change, while too painful can cause your muscles to guard.
Next, explore your temporalis muscle by placing your fingers on your temples. This fan-shaped muscle can harbor trigger points that cause headaches and tooth pain in the upper jaw. Use small circular motions and pay special attention to the area near your eyebrows.
The pterygoid muscles are trickier to access but worth investigating. Place your finger just below your cheekbone in front of your ear and press inward and upward while slightly opening and closing your mouth. Tenderness here often signals pterygoid involvement, which commonly causes clicking jaws and ear pain.
True trigger points typically feel like a taut band or small nodule, are quite tender when pressed, and often reproduce your familiar pain pattern or cause pain to radiate elsewhere—like that mysterious earache that appears when you press a certain spot in your jaw.
Want more guidance on self-massage techniques? We've put together detailed instructions here: More info about TMJ Self Massage
When to Seek Professional Diagnosis
While exploring your own trigger points can be enlightening, certain symptoms warrant professional evaluation. Consider booking an appointment if you're experiencing:
Persistent pain lasting more than two weeks, especially if it's getting worse rather than better. Your body's telling you something needs attention.
Lock-jaw or catching sensations where your jaw gets stuck when opening or closing are red flags that shouldn't be ignored. This could indicate disc displacement within the joint itself.
When significant jaw movement limitations start affecting your ability to enjoy your favorite foods or communicate clearly, it's definitely time for professional help.
Tooth pain that has your dentist stumped might actually be referred pain from trigger points. If your dental x-rays look perfect but you're still hurting, consider a TMJ evaluation.
Tinnitus (ear ringing) or dizziness alongside jaw symptoms can be particularly disruptive to daily life and often respond well to proper TMJ treatment.
Severe headaches that coincide with jaw pain might be connected—many "tension headaches" or even "migraines" can actually stem from TMJ trigger points.
Changes in your bite where your teeth suddenly seem to meet differently can indicate muscle imbalances affecting jaw alignment.
Professional evaluation is crucial because several conditions can mimic TMJ trigger point pain. These include dental problems, trigeminal neuralgia, sinus infections, ear infections, salivary gland disorders, arthritis of the TMJ, and rarely, jaw tumors.
At Evolve Physical Therapy in Brooklyn, our evaluation goes beyond just looking at your jaw. We examine your posture, neck mobility, breathing patterns, and even stress levels to understand the full picture of what's happening. As Dr. Janet Travell, the pioneer of trigger point therapy, emphasized: "A thorough examination is essential, as myofascial pain can mimic many other conditions."
When you're ready to move beyond self-assessment, our team is here to help you steer the path to relief. We're experts at differentiating between primary trigger points and symptoms arising from other sources, ensuring you get the right treatment from the start.
Learn more about myofascial pain from this trusted source: Scientific research on myofascial pain
Evidence-Based Treatments & Home Care
Finding relief from TMJ trigger points doesn't have to be a painful journey. At Evolve Physical Therapy, we've seen countless Brooklyn residents transform their jaw pain through a combination of professional care and simple at-home techniques.
The most effective approach to treating TMJ trigger points combines several evidence-based treatments. Think of it as attacking the problem from multiple angles—what works best is rarely just one technique but rather a thoughtful combination custom to your specific needs.
Manual therapy forms the foundation of most successful treatment plans. This includes gentle hands-on techniques like trigger point release, where your therapist applies precise pressure to those knotted muscle fibers until they relax. Myofascial release techniques address the connective tissue surrounding your jaw muscles, while joint mobilization helps restore proper movement patterns.
"I was skeptical that someone's hands could fix what felt like such a complex problem," shares Maria, a patient from Williamsburg. "But after my first session, I could open my mouth wider than I had in months. It was like magic."
For deeper or more stubborn trigger points, specialized interventions like dry needling or acupuncture can be game-changers. Dry needling involves inserting thin filament needles directly into trigger points, creating a "reset" response in the muscle. TENS therapy uses gentle electrical stimulation to reduce pain and muscle tension, while ultrasound therapy delivers deep warmth to tight tissues.
For severe cases that haven't responded to other treatments, options like trigger point injections or Botox may provide relief. These medical interventions work by either reducing inflammation or temporarily limiting muscle overactivity.
Movement is medicine when it comes to TMJ trigger points. Your physical therapist will design a progressive exercise program including jaw relaxation techniques, controlled opening exercises, and movements that retrain your jaw to move properly. We'll also address any postural issues in your neck and shoulders that might be contributing to your jaw problems.

Recent research strongly supports this comprehensive approach. A 2021 study concluded that "conservative manual techniques of physical therapy, including massage, are highly beneficial in TMJD management, with significant improvements in pain relief and maximal mouth opening." This validates what we've seen at Evolve Physical Therapy—hands-on care combined with targeted exercises creates lasting relief.
Don't overlook the power of behavioral interventions. Stress management techniques, diaphragmatic breathing, and improved sleep habits can significantly reduce jaw tension. Some patients benefit from biofeedback, which helps you become aware of muscle tension you might not even realize you're holding.
More info about Physical Therapy Services for TMJ
Self-Massage & Stretch Routine
You don't have to wait for your next appointment to find relief from TMJ trigger points. These simple self-care techniques can make a huge difference when practiced regularly:
Start with your masseter—that powerful chewing muscle running along your jawline. Make a loose fist and use your knuckles to apply moderate pressure in small circular motions for about 30-60 seconds. This knuckle kneading technique helps break up tension without causing additional irritation.
Next, try some ischemic compression on tender spots. Use your fingertips to press firmly into painful areas until you feel what I call a "good hurt"—about 7 out of 10 on the pain scale. Hold for 30-60 seconds until you feel the tension melt away. The pressure temporarily reduces blood flow, and when released, fresh blood rushes in, bringing nutrients and removing waste products.
"I was amazed how something so simple could work so well," says Tom, a patient from Bay Ridge. "Finding those tender spots and holding pressure for just a minute gave me more relief than the muscle relaxers my doctor prescribed."
Don't forget your temporalis muscle! Use your fingertips to make small circles throughout your temple region, paying special attention to the area near your eyebrows where tension often accumulates.
Gentle stretching complements your massage work beautifully. Try this simple jaw opening stretch: place your thumbs on your bottom teeth and fingers on your top teeth, then gently guide your jaw open to a comfortable position. Hold for 10 seconds and repeat 5 times. This helps restore normal range of motion without forcing your jaw.
For lateral stretches, gently guide your lower jaw to the right until you feel a mild stretch, hold for 5 seconds, then repeat on the left. Five repetitions in each direction is usually enough to feel relief.
Diaphragmatic breathing might seem unrelated to jaw pain, but it's remarkably effective at reducing overall tension. Place one hand on your chest and one on your abdomen, then breathe deeply so your abdomen rises more than your chest. Practice for just 5 minutes, 2-3 times daily, and you'll likely notice less jaw clenching.
Heat and ice can be your best friends during flare-ups. Apply moist heat for 10 minutes before exercises to improve tissue flexibility, then use ice afterward to calm any inflammation. Some of my patients swear by alternating between the two for maximum relief.
More info about Massage for Teeth Grinding
In-Clinic Interventions That Work
While self-care is powerful, sometimes you need professional help to fully resolve TMJ trigger points. At Evolve Physical Therapy in Brooklyn, we offer several evidence-based treatments that provide significant relief.
Manual trigger point release is our bread-and-butter technique. Our physical therapists use specific pressure and release techniques that target the exact source of your pain. It's remarkably effective—many patients report immediate improvement in jaw movement and pain levels after just one session.
For stubborn trigger points that don't respond to manual techniques, dry needling offers a more direct approach. This isn't acupuncture (though that can help too!); it's a precise intervention where thin filament needles are inserted directly into trigger points to elicit a "local twitch response." This microscopic muscle contraction helps reset the dysfunctional area. Research backs this up—a single-blind, randomized controlled trial found that "deep dry needling increased pressure pain threshold and pain-free jaw opening in TMD patients compared to sham treatment."
"I was nervous about the needles," admits Sarah from Prospect Heights, "but I barely felt them going in. What I did feel was relief—for the first time in years, I could open my mouth without that awful clicking sound."
In cases where pain is severe or persistent, trigger point injections may be recommended. These injections deliver a small amount of local anesthetic (sometimes with corticosteroid) directly to the trigger point. Studies show that about 58% of patients report complete pain relief immediately after injection, with many others experiencing significant improvement.
For patients with severe muscle hyperactivity or teeth grinding, Botox therapy offers 3-6 months of relief by temporarily reducing muscle contractions. While we typically try more conservative approaches first, Botox can be life-changing for those who haven't responded to other treatments.
Therapeutic ultrasound uses sound waves to increase blood flow and promote healing in deeper tissues. It's particularly helpful for reaching the pterygoid muscles tucked away inside your mouth—areas that are difficult to access with manual techniques alone.
TENS therapy delivers mild electrical stimulation to reduce pain and muscle spasm. Many patients describe a pleasant tingling sensation during treatment, followed by noticeably reduced jaw tension. We often combine TENS with hands-on work for improved results.
Every patient at Evolve receives an individualized exercise program addressing their specific needs. These aren't generic handouts—they're carefully crafted progressions that build on your in-clinic treatments and help create lasting change in how your jaw functions.
At Evolve Physical Therapy, we believe in combining these approaches for optimal results. Our Mill Basin patient Mark puts it best: "After seeing three different specialists with no relief, the combination of manual therapy and dry needling at Evolve finally gave me my life back. For the first time in two years, I can eat without pain."
Prevention & Long-Term Management
Managing TMJ trigger points isn't just about addressing current symptoms—it's about creating lasting jaw health for the future. At Evolve Physical Therapy, we believe prevention is truly the best medicine.

Think of your jaw health as a house—you need a solid foundation to prevent problems from returning. That foundation starts with proper ergonomics. Something as simple as adjusting your computer monitor to eye level can prevent the forward head posture that strains your jaw muscles all day long. Many of our Brooklyn patients are surprised to learn that their desk setup was a major contributor to their jaw pain!
Working with your dentist is another crucial piece of the puzzle. A properly fitted night guard can significantly reduce the impact of nighttime teeth grinding. We regularly coordinate care with local dentists to ensure our physical therapy approaches complement any dental interventions you might need.
Stress management might sound cliché, but it's absolutely essential for TMJ trigger points. Your jaw is often where tension shows up first when you're stressed. Simple mindfulness practices, even just five minutes of focused breathing each day, can make a remarkable difference. One patient told us, "I never connected my jaw pain to my stressful job until my therapist at Evolve pointed it out. The breathing techniques she taught me have been life-changing."
Don't underestimate the power of good nutrition and quality sleep. Anti-inflammatory foods and proper hydration support muscle healing, while poor sleep can increase pain sensitivity and trigger muscle tension. We work with patients to identify specific dietary triggers and optimize sleep positions that reduce jaw strain.
As you recover, we'll help you gradually return to normal activities. That might mean slowly reintroducing chewy foods or monitoring how your jaw feels after long conversations. This measured approach prevents setbacks and builds confidence.
Regular "tune-up" sessions at Evolve can catch small issues before they become big problems. Research consistently shows that comprehensive management addressing multiple factors yields better long-term outcomes than quick fixes.
Lifestyle Hacks to Keep TMJ Trigger Points Away
The small daily habits often make the biggest difference in preventing TMJ trigger points from returning. Here's what works for our Brooklyn patients:
Your morning coffee might be working against you. Caffeine can increase muscle tension throughout your body, including your jaw muscles. Try cutting back gradually or switching to half-decaf to see if it helps.
That pack of gum in your purse? It might be time to find a new habit. Excessive gum chewing is like making your jaw muscles run a marathon every day. Instead, try sugar-free mints or simply sipping water throughout the day.
Your smartphone could be a major culprit too. When you look down at your phone, your head moves forward, putting strain on both neck and jaw muscles. Try holding your phone at eye level instead—your jaw will thank you! And for those long calls with friends or work colleagues, use a headset rather than cradling the phone between your ear and shoulder.
The "tongue-up, teeth-apart" position should become your new normal. When your jaw is relaxed, your tongue should rest lightly on the roof of your mouth with your teeth slightly separated. This simple position prevents unnecessary muscle tension. As one patient from Park Slope shared, "Just being aware of my jaw position throughout the day reduced my pain by at least 70%."
Take micro-breaks throughout your day. Set a 20-minute timer on your phone and use each alert as a reminder to check your jaw position, do a quick stretch, or practice the "yawn-sigh" technique (yawn gently, then exhale with a sigh to release tension).
Monitoring Progress Over Time
Keeping track of your improvement is both motivating and essential for long-term management of TMJ trigger points. Here's how to monitor your progress effectively:
Start a simple pain diary. You don't need anything fancy—just note your daily pain levels on a scale of 0-10, along with any activities that seemed to increase or decrease your symptoms. This information is incredibly valuable during follow-up appointments at Evolve, helping us pinpoint patterns you might not otherwise notice.
Measure your mouth opening regularly. Use a small ruler to track the distance between your upper and lower front teeth when you open as wide as comfortably possible. Normal opening is typically 40-50mm. Improvements in this measurement provide concrete evidence that your treatment is working.
Pay attention to functional improvements too. Can you now eat an apple without pain? Talk through a long meeting without jaw fatigue? These real-life victories are sometimes more meaningful than numbers on a scale.
Perform a weekly self-check of your key muscles. Using the palpation techniques we teach at Evolve, assess whether your trigger points are becoming less sensitive over time. This self-awareness becomes a powerful tool for early intervention if problems start to return.
Schedule quarterly check-ins with your physical therapist, even after your symptoms resolve. These "maintenance visits" allow us to adjust your home program based on your progress and catch any small issues before they become problematic. Think of these visits like dental cleanings—preventive care that saves you trouble down the road.
As a Williamsburg patient recently told us, "The tracking tools my therapist gave me helped me see my progress when I was feeling discouraged. Now I use them to make sure I stay on track and catch any flare-ups early."
More info about Temporomandibular Joint Dysfunction Relaxation Techniques
Frequently Asked Questions about TMJ Trigger Points
Do TMJ trigger points show on MRI or X-ray?
If you've ever wondered whether those painful knots in your jaw muscles would show up on medical imaging, you're not alone. The truth is, standard X-rays and MRIs typically don't capture TMJ trigger points. While these imaging techniques excel at showing bones, joints, and larger soft tissue structures, the tiny changes in muscle fibers that create trigger points are simply too small to appear.
"It's like trying to see grains of sand from an airplane," explains one of our physical therapists at Evolve. "We don't need expensive imaging to identify trigger points. Our hands are actually the most sensitive and specific tools for detecting these tender nodules in muscle tissue."
In research settings, some specialized techniques like elastography (which measures tissue stiffness) and certain MRI protocols can sometimes visualize trigger points, but these advanced methods aren't typically available in everyday clinical practice.
Instead, diagnosing TMJ trigger points relies on a combination of skilled manual examination by trained clinicians, your detailed symptom history, assessment of your jaw movement, and how you respond to treatment. This hands-on approach has proven to be both effective and reliable.
Can dental issues and TMJ trigger points coexist?
They absolutely can—and often do! This relationship typically works as a two-way street, with each condition potentially influencing the other.
When dental problems contribute to trigger points, it might be because an improper bite forces your jaw muscles to work unevenly. Dental pain can cause protective muscle guarding, while lengthy dental procedures can overload those same muscles. Even missing teeth can change how you chew, creating uneven muscle strain.
On the flip side, TMJ trigger points can wreak havoc on your dental health. Chronic muscle tension increases wear and tear on teeth, while referred pain from trigger points can feel remarkably similar to a toothache (leading to unnecessary dental work). The altered jaw mechanics from muscle dysfunction can affect your bite alignment, and increased clenching or grinding from muscle tension can damage teeth over time.
"My dentist and physical therapist communicated about my case, which made all the difference," shared a patient from Marine Park. "The night guard from my dentist and the trigger point therapy from Evolve worked together to finally solve my jaw pain."
This complex relationship highlights why we often collaborate with local dentists in Brooklyn to coordinate comprehensive care plans. By addressing both dental issues and muscle dysfunction, we can achieve outcomes that neither approach could accomplish alone.
Are trigger-point injections safe?
If you're considering trigger point injections, you'll be glad to know they're generally quite safe when performed by properly trained healthcare providers. That said, like any medical procedure, they do come with considerations worth discussing.
Most people experience only temporary soreness at the injection site—similar to what you might feel after a flu shot. Serious complications like infection, bleeding, or nerve injury are rare, and allergic reactions to the anesthetics used are uncommon but possible.
Some people aren't good candidates for injections, including those with bleeding disorders or who take blood thinners, those with an infection at the injection site, anyone with allergies to the injectable solutions, or people with significant needle phobia.
The good news? Research shows impressive results, with about 58% of patients reporting complete pain relief immediately after a trigger point injection. Most others experience significant improvement, with pain levels dropping dramatically. Some people need a series of injections for the best results.
Interestingly, studies suggest that the mechanical disruption of the trigger point with the needle itself (rather than the medication) may be the primary healing factor. This explains why both dry needling and various injection solutions can be effective.
At Evolve Physical Therapy in Brooklyn, we typically start with gentle, non-invasive approaches like manual therapy and targeted exercises, reserving injections for cases that don't respond to these conservative methods. Many of our patients achieve excellent results without ever needing an injection.
"I was terrified of needles but desperate for relief," one Williamsburg patient told us. "When more conservative treatments weren't enough, I finally tried a trigger point injection. The procedure was much less scary than I imagined, and the relief was almost immediate. I wish I hadn't waited so long!"
Conclusion
Finding relief from TMJ trigger points isn't just about treating symptoms—it's about addressing the root causes of your jaw pain for lasting comfort. Throughout this guide, we've explored how these tiny but troublesome muscle knots can create a cascade of pain that affects your daily life, from speaking and eating to sleeping and concentrating.
At Evolve Physical Therapy + Sports Rehabilitation in Brooklyn, we've seen countless patients walk through our doors frustrated after trying numerous treatments without success. Many have been to dentists, doctors, and specialists, only to be told, "We can't find anything wrong." The reality is that TMJ trigger points often fly under the radar of conventional testing, yet they're responsible for so much discomfort.
Our approach combines the science of physical therapy with the art of hands-on care. We don't just treat your jaw—we look at how your neck, shoulders, posture, and even daily habits contribute to your pain. This holistic perspective makes all the difference for our Brooklyn neighbors from Park Slope to Mill Basin.
One patient recently told us, "For the first time in three years, I can eat a sandwich without pain. I didn't realize how much my jaw problems were limiting my life until they were gone."
The journey to jaw comfort typically combines several key elements:
Professional manual therapy to deactivate painful trigger points
Personalized exercises that restore proper muscle balance
Practical lifestyle modifications that prevent recurrence
Stress management techniques that reduce unconscious jaw tension
Healing takes time and consistency. The muscles that developed TMJ trigger points didn't tighten overnight, and they won't completely release in a single session. But with the right approach, most of our patients experience significant improvement within 4-6 weeks.
Whether you're dealing with occasional jaw tension or chronic TMJ pain that's affected you for years, there's hope. Our team at Evolve Physical Therapy is passionate about helping you reclaim comfort and function in your daily life.
Ready to find relief from those stubborn TMJ trigger points? We're here to help you steer the path to recovery with expertise, compassion, and proven techniques that work.

Your Guide to Finding Myofascial Release Therapy in Your Area
Finding Relief: How to Locate Myofascial Release Therapy in Your Area
Looking for myofascial release therapy near me? Here's how to find qualified practitioners:
Use specialized directories: Search the John F. Barnes' Myofascial Release Therapist Directory (1,000+ therapists nationwide) or the National Association of Myofascial Trigger Point Therapists directory
Check credentials: Look for therapists with 100+ hours of specialized training
Search terms: Use "myofascial release therapist" + your city or "remote myofascial therapy" for telehealth options
Verify insurance: Ask if they provide receipts for out-of-network reimbursement
Initial consultation: Most qualified therapists offer a consultation to discuss your specific condition
If you're experiencing persistent pain, restricted movement, or tightness that won't resolve with conventional treatments, myofascial release therapy near me might be the solution you've been searching for. This specialized hands-on technique targets the fascial system—a three-dimensional web of connective tissue surrounding every muscle, nerve, organ, and cell in your body. When this tissue becomes restricted, it can exert up to 2,000 pounds of pressure per square inch on pain-sensitive structures, creating symptoms that often don't show up on standard medical tests.
Myofascial release therapy works differently than massage or standard physical therapy. Instead of focusing solely on muscles, it addresses the entire fascial network through gentle, sustained pressure applied directly to the skin without oils or creams. This approach allows therapists to detect restrictions and gradually release them, providing lasting relief where other treatments may have failed.
I'm Lou Ezrick, a physical therapist specializing in manual therapy techniques including myofascial release therapy near me in Brooklyn, where I've helped thousands of patients with chronic pain and mobility restrictions through customized treatment plans focused on addressing fascial restrictions at their root cause.

Understanding Myofascial Release Therapy
Have you ever felt like your pain has a life of its own, moving around your body and refusing to respond to typical treatments? The answer might be hiding in your fascia—the body's hidden web of connective tissue that most traditional treatments overlook.
Myofascial release therapy (MFR) is a specialized hands-on approach that works directly with this fascial system to eliminate pain and restore movement. At Evolve Physical Therapy, we see fascia as the missing piece in many pain puzzles.
"Think of fascia as the body's internal sweater," explains our physical therapy team at Evolve Physical Therapy + Sports Rehabilitation. "When it gets snagged in one place, it can pull and create tension everywhere else. Releasing these restrictions often becomes the breakthrough moment for patients who've tried everything else."
Fascia forms a continuous three-dimensional web from head to toe, surrounding every muscle, nerve, blood vessel, organ, and cell in your body. When healthy, it's flexible and fluid, allowing everything to glide smoothly as you move. But trauma, inflammation, surgery, poor posture, or even emotional stress can cause this tissue to tighten and restrict.
The most fascinating thing? These restrictions rarely show up on standard medical tests like X-rays or MRIs, yet they can exert up to 2,000 pounds of pressure per square inch on pain-sensitive structures—that's like carrying a small car on your tissues!
The Science Behind Fascia
What makes fascia so special is its unique composition—a beautiful arrangement of collagen and elastin fibers suspended in a gel-like ground substance. This structure gives fascia both incredible strength and flexibility, but also makes it vulnerable to getting "stuck."
Two key scientific properties make myofascial release particularly effective:
Piezoelectric effect: When gentle pressure is applied to fascia, it creates a small electrical charge that actually stimulates tissue healing and remodeling at the cellular level.
Viscoelastic flow: Unlike muscles that respond quickly to pressure, fascia changes states—from a more solid gel to a more fluid sol—when gentle pressure is applied over time. This is why the "time element" in myofascial release (3-5 minutes or longer per technique) is absolutely crucial for lasting change.
Conditions Myofascial Release Can Help
At our Brooklyn practice, we've seen myofascial release therapy near me transform lives by addressing conditions that haven't responded to conventional approaches:
Back and neck pain often resolves when we release the complex fascial restrictions along the spine that pull vertebrae out of alignment. Fibromyalgia symptoms frequently improve as we address the whole-body fascial tension patterns that contribute to widespread pain signals.
For TMJ dysfunction, releasing restrictions in jaw, face, and neck fascia can eliminate years of pain and clicking. Plantar fasciitis responds beautifully when we treat not just the foot, but the connected fascial lines running all the way up the leg.
Headaches and migraines often diminish or disappear when we address fascial restrictions in the neck, shoulders, and cranium. Post-surgical pain and scarring improves as we break down restrictive scar tissue that pulls on surrounding fascia.
Athletes with sports injuries recover faster and perform better once we restore fascial mobility. Carpal tunnel symptoms frequently resolve by releasing fascial restrictions not just in the wrist, but along the entire arm and shoulder pathway. Even chronic fatigue syndrome and pelvic pain respond to comprehensive fascial treatment.
One of our Brooklyn clients shared: "After my car accident, I lived with constant neck pain for three years. Every doctor told me I'd just have to live with it. After my third myofascial release therapy session at Evolve, I finally felt that deep, stuck feeling melt away. It was addressing something that all my previous treatments had completely missed."
Want to learn more about manual therapy approaches? Check out More info about manual therapy or explore the Scientific research on fascia mechanics to understand the growing evidence behind this approach.
How Myofascial Release Works & Why It's Different
When you're searching for myofascial release therapy near me, it's important to understand what makes this approach so unique. Unlike traditional therapies that might focus only on where you feel pain, myofascial release addresses the entire interconnected web of fascia throughout your body.
The magic happens through gentle, sustained pressure applied directly to your skin without oils or lotions. This skin-to-skin contact allows your therapist to feel the subtle restrictions in your fascia and follow them to their true source—which is often nowhere near where you're experiencing pain!
"Many of our clients are surprised to learn that the pain in their shoulder might actually stem from restrictions in their hip or lower back," explains our physical therapy team at Evolve. "That's the fascinating thing about fascia—it's all connected, so problems can manifest far from their origin."
What truly sets myofascial release apart is its respect for your body's natural healing timeline:
The time element is crucial—gentle pressure is maintained for 3-5 minutes or longer, giving your fascia the chance to soften and release through what we call "viscoelastic flow." Your body isn't rushed or forced.
Direct skin contact without slippery products enables your therapist to accurately detect even the subtlest fascial restrictions and changes.
By following the fascial system rather than just focusing on painful spots, we address the true cause of your discomfort, not just the symptoms.
Your conscious awareness of sensations during treatment actually helps facilitate release—this is a collaborative process between you and your therapist.
The whole-body approach recognizes that treating isolated areas often misses the bigger picture of how fascia connects everything in your body.
Gentle Sustained Pressure vs Deep Tissue
"But isn't this just deep tissue massage?" We hear this question frequently, and the answer is a definite no. While both approaches have their place, they work on entirely different principles.
Deep tissue massage typically uses firm, sometimes uncomfortable pressure and strokes to break up muscle tension directly. It's like pressing hard to smooth out a wrinkle in fabric.
Myofascial release, by contrast, uses gentle to moderate sustained pressure that works with your body's natural responses. As one of our Brooklyn clients perfectly described: "I was surprised that such gentle pressure could create such profound changes. It didn't hurt during treatment like deep tissue massage often does, yet the results were much more lasting."
The key difference is that myofascial release allows your tissues to unwind and release naturally, rather than forcing change. It's like holding the wrinkled fabric under gentle tension until it naturally relaxes and smooths out.
At Evolve Physical Therapy + Sports Rehabilitation, we find this gentler approach often yields better long-term results, especially for chronic conditions where aggressive treatment might actually trigger more pain.
Safety and Evidence
Good news—myofascial release therapy is generally very safe when performed by a qualified practitioner. Because we use gentle pressure and work with your body's natural responses rather than forcing change, the risk of injury is minimal.
Some patients experience what we call a "healing crisis" or "therapeutic pain"—a temporary increase in symptoms that typically lasts 2-3 days as your body adjusts to fascial changes. Though it might sound concerning, this is actually a positive sign that the treatment is creating meaningful change in your tissues.
Research on myofascial release continues to grow stronger, with studies showing impressive effectiveness for conditions like fibromyalgia pain, chronic low back pain, plantar fasciitis, post-mastectomy pain, and tension headaches.
One aspect that surprises many clients is the importance of hydration. Water helps your fascia maintain its optimal gel-like state, making it more responsive to treatment. We recommend drinking 12-16 eight-ounce glasses of water daily when undergoing myofascial release therapy. Think of it as helping your fascia stay pliable and responsive to the changes we're creating.

Myofascial Release Therapy Near Me: Step-by-Step Search Strategy
Looking for myofascial release therapy near me doesn't have to feel overwhelming. I've helped hundreds of patients find the right care, and I'm happy to share my insider approach to connecting with qualified practitioners who can truly help you heal.
Let's break down the search process into manageable steps that anyone can follow:
First, start with specialized directories that focus specifically on myofascial practitioners. The John F. Barnes' Myofascial Release Therapist Directory lists over 1,000 therapists nationwide who have completed his specific training methodology. Similarly, the National Association of Myofascial Trigger Point Therapists Directory features practitioners with extensive training—many with 100+ to 600+ hours of specialized education. These resources help ensure you're finding therapists with proper training rather than those who might casually list myofascial release as a service.
Don't forget to explore local resources too! A simple Google search for "myofascial release therapy near me" plus your city name can yield valuable results. Your primary care physician might also have trusted referrals, and local chronic pain support groups often share recommendations based on personal experiences. Here in Brooklyn, you can always contact us at Evolve Physical Therapy + Sports Rehabilitation to discuss our myofascial release services.
"When I first started looking for help, I felt completely lost," shares Maria, one of our patients. "Finding someone through a specialized directory saved me months of trial and error with practitioners who weren't properly trained."
If you live in an area without qualified therapists nearby, consider telehealth options. Search for "remote myofascial therapy" or "telehealth myofascial release" to find practitioners who offer virtual sessions focused on teaching self-treatment techniques you can perform at home.
Criteria for Choosing a Qualified Therapist
Not all myofascial release therapists bring the same level of expertise to the table. When evaluating potential practitioners, look for these key qualifications:
A current state license in physical therapy, massage therapy, or another healthcare profession forms the foundation. Beyond basic licensure, specialized training makes all the difference—seek therapists with John F. Barnes Myofascial Release seminars (ideally 100+ hours), Certification in Myofascial Trigger Point Therapy (CMTPT), or advanced training in fascial techniques.
Experience with your specific condition is invaluable. Don't hesitate to ask if they've successfully treated others with similar issues. Patient reviews and testimonials offer real-world insights into their effectiveness, while a professional approach should include a thorough evaluation and customized treatment plan.
As one of our Brooklyn patients noted, "When I was searching for 'myofascial release therapy near me,' I found that therapists' training varied widely. Finding someone with advanced John Barnes training made all the difference in my treatment outcomes."
How to Verify "myofascial release therapy near me" Listings
Trust but verify! Here's how to confirm a therapist's credentials before booking:
Most state licensing boards offer online verification systems where you can check a practitioner's current status. Legitimate therapists typically maintain memberships in recognized professional associations, which you can verify through organization websites.
Before committing to a full treatment plan, schedule a consultation. Most qualified therapists welcome this opportunity to discuss your condition and explain their approach. During this meeting, ask specific questions about their training—when and where they trained, their continuing education, and their experience with your particular issues.
Red Flags to Avoid
While searching for myofascial release therapy near me, stay alert for warning signs that might indicate less-than-ideal practitioners:
Be wary of anyone promising instant cures or miraculous results—genuine healing takes time. Qualified therapists always perform thorough hands-on evaluations before treatment. They should clearly explain their approach and treatment plan in terms you can understand.
Watch out for practitioners who can't demonstrate specific training in myofascial techniques or who use high-pressure sales tactics to sell package deals. And of course, numerous negative reviews or complaints should give you pause.
Finding the right therapist is worth the effort. Your body deserves care from someone who truly understands the complex nature of fascial restrictions and how to effectively release them.
Preparing for Your First Session & Maximizing Results
Found your perfect myofascial release therapy near me practitioner? Fantastic! Now let's make sure you get the most from your sessions. A little preparation goes a long way toward helping you achieve the relief you're seeking.
What to Wear and Bring
Myofascial release works best with direct skin contact—no slippery oils or lotions involved. This helps your therapist accurately feel fascial restrictions and apply the right amount of pressure.
For clothing, think comfort and accessibility:
"We recommend our Brooklyn patients wear comfortable, minimal clothing that allows access to treatment areas while maintaining modesty," our team at Evolve Physical Therapy + Sports Rehabilitation often tells new patients. "Many clients find that athletic wear works well."
Women typically feel most comfortable in shorts and a sports bra, a two-piece swimsuit, or comfortable underwear with a bra. Men usually opt for gym shorts or comfortable underwear. The key is wearing something that lets your therapist access the areas needing treatment while ensuring you feel at ease.
Don't forget to bring a water bottle—hydration is crucial before and after treatment! And it's best to skip lotions, oils, or heavy perfumes on treatment day, as they can make it harder for the therapist to work effectively with your fascia.
What to Expect During Your First Visit
Your initial appointment is about building the foundation for successful treatment. Most first visits follow a similar pattern:
First, your therapist will conduct a comprehensive evaluation, taking time to understand your history, symptoms, and goals. This typically includes both conversation and hands-on assessment to map out fascial restrictions throughout your body.
Next comes the treatment explanation, where your therapist will share what they've finded and outline their proposed approach. This is a great time to ask questions and make sure you understand the process.
Most practitioners include an initial treatment during your first visit, giving you a taste of the technique and beginning the healing process right away.
Before you leave, you'll receive home care instructions—simple techniques you can perform between sessions to improve your progress. These might include gentle stretches, self-massage with therapy balls, or movement practices.
Plan for 60-90 minutes for your first appointment. This longer duration allows adequate time for both thorough assessment and the slow, sustained pressure that makes myofascial release so effective.

Number of Sessions, Costs, Insurance
"How many sessions will I need?" is probably one of the first questions on your mind. The honest answer is: it depends on your unique situation.
For recent or minor issues, you might find significant relief in just 1-3 sessions. That sprained ankle from last month or tension headache that started last week? These often respond quickly to treatment.
Chronic or complex conditions typically require more time—often 6 or more sessions. If you've been dealing with back pain for years or fibromyalgia for decades, your fascia has likely developed complex patterns of restriction that take longer to unwind.
Many therapists recommend an initial series of 3 visits within a 2-week period. This gives them enough time to assess how your body responds and adjust their approach accordingly.
As for costs, myofascial release sessions typically range from $100-$200 per hour, depending on your location and your therapist's credentials. Many practitioners offer package deals that provide savings when you book multiple sessions.
Insurance coverage varies widely. Many myofascial release specialists operate as out-of-network providers but can provide detailed receipts for you to submit for possible reimbursement. At Evolve Physical Therapy + Sports Rehabilitation in Brooklyn, we're committed to transparency about costs and helping patients maximize their insurance benefits whenever possible.
At-Home Self-Care Between Visits
What happens between sessions can be just as important as the treatment itself. Your therapist will likely recommend several self-care practices to maintain and improve your progress:
Hydration tops the list—aim for 12-16 glasses of water daily. Water helps keep your fascia supple and responsive to treatment. As one of our Brooklyn patients put it, "I never realized how much better I'd feel just by upping my water intake!"
Self-treatment techniques give you tools to address tension between appointments. Your therapist might recommend specific uses for foam rollers or therapy balls, or teach you gentle stretches targeted to your unique restrictions.
Developing body awareness helps you catch tension before it becomes problematic. Many patients find they've been unconsciously clenching their jaw, hunching their shoulders, or holding their breath—simple awareness can help break these patterns.
Stress management practices like deep breathing, meditation, or gentle movement help prevent tension from rebuilding in your fascia. Even five minutes of mindful breathing can make a difference.
Temporary activity modifications might be suggested to give your body space to heal. This doesn't mean stopping everything you love, but perhaps adjusting how you perform certain movements or taking short breaks during activities that typically aggravate your condition.
"I teach all my Brooklyn patients specific self-care techniques," says our physical therapy team. "Those who consistently practice these between sessions typically see faster and more lasting results."

By preparing properly for your sessions and following through with recommended self-care, you'll be giving yourself the best chance for lasting relief. Healing isn't just something that happens to you—it's a process you actively participate in, with your therapist as your skilled guide along the way.
Frequently Asked Questions about Myofascial Release Therapy
Is myofascial release therapy safe for everyone?
When you're searching for myofascial release therapy near me, safety is naturally a top concern. The good news is that myofascial release is generally very gentle and safe for most people. That said, certain conditions do require some special consideration:
Pregnancy isn't a deal-breaker—many pregnant women benefit greatly from modified myofascial techniques that help with changing body mechanics. If you're undergoing cancer treatment, it's best to have a conversation with your oncologist first, as they can advise on timing and appropriate modifications.
"Safety is always our primary concern," explains our team at Evolve Physical Therapy. "We adapt our approach based on each person's unique health situation, which is why that initial evaluation is so important."
For those with recent injuries, osteoporosis, or who take blood-thinning medications, don't worry—treatment is still possible! We'll simply adjust our pressure and techniques to ensure your comfort and safety. The key is open communication—always share your complete health history with your therapist so they can tailor the treatment specifically for you.
How many sessions before I feel results?
This might be the question I hear most often in our Brooklyn clinic! The honest answer is: it depends on your unique situation. Most people notice some kind of change after their very first session—sometimes it's dramatic relief, other times it's more subtle.
Here's what typically happens:
After your first session, you might experience an "ah-ha" moment where your body feels different—perhaps lighter or more balanced. By sessions 2-3, most people notice more substantial improvements that actually last. If you're addressing a complex or long-standing issue, sessions 4 and beyond often bring progressive, deeper changes as we work through layers of fascial restrictions.
One of our clients at Evolve put it perfectly: "I'd been dealing with shoulder pain for years. After my first myofascial release session, I felt something shift—it wasn't gone, but it was different. By my fourth visit, I had 80% less pain and could finally sleep through the night again."
The timeline varies based on how long you've had the problem (newer issues generally resolve faster), how complex your condition is, and how consistently you follow the self-care recommendations between sessions. Your body's natural healing rate plays a role too—we're all unique!
Can I combine MFR with other treatments?
Absolutely! In fact, myofascial release often works beautifully alongside other therapies, creating a synergistic effect. At Evolve Physical Therapy in Brooklyn, we frequently combine myofascial release therapy near me with complementary approaches for comprehensive care.
Myofascial release can prepare your body to respond better to exercise therapy by improving tissue mobility first. Many clients find great success pairing MFR with chiropractic adjustments—the fascia release makes the adjustments more effective and longer-lasting. Acupuncture, yoga, Pilates, and traditional massage can all work harmoniously with myofascial techniques.
The key is communication. Let all your healthcare providers know about your full treatment plan so they can coordinate their approaches. This team approach often leads to the best outcomes, addressing your health from multiple angles.
What if I feel worse after treatment?
Don't panic if you feel a bit sore or experience shifting sensations after your session! This temporary response, sometimes called a "healing crisis" or "therapeutic pain," is actually quite normal. It typically lasts 24-72 hours and is your body's way of adjusting to the fascial changes we've introduced.
"I always prepare my clients for the possibility of post-treatment sensations," shares our physical therapy team. "Think of it like spring cleaning—sometimes things look messier while you're in the middle of reorganizing, but the end result is worth it."
To manage any post-treatment discomfort, stay super hydrated (water helps your fascia maintain its optimal state), take a warm bath, move gently, and rest as needed. If anything feels concerning or lasts longer than a few days, reach out to your therapist—we're here to guide you through the process.
How is myofascial release different from regular massage?
When you're looking for myofascial release therapy near me, understanding this key difference helps set appropriate expectations. While both treatments involve hands-on care, they operate on fundamentally different principles.
Traditional massage primarily targets muscles using rhythmic strokes, kneading, and usually involves oils or lotions. The therapist typically moves relatively quickly from area to area, focusing on muscle relaxation and circulation.
Myofascial release, in contrast, works with your body's connective tissue system using gentle, sustained pressure applied directly to the skin without lubricants. Your therapist might hold a single position for 3-5 minutes or longer—this time element is crucial for allowing the fascia to respond and release.
"The first time I experienced myofascial release, I was surprised how different it felt," recalls a regular client at our Brooklyn clinic. "It wasn't the typical 'pressure and move on' approach I was used to. My therapist stayed in one spot where I felt tightness until I could actually feel something melting and releasing. The results lasted so much longer than regular massage."
While massage feels wonderful and has many benefits, myofascial release specifically targets restrictions in the fascial system that might be creating pain patterns throughout your body. Many people find value in both approaches, either at different times or as complementary treatments in their wellness routine.
Conclusion
Finding effective myofascial release therapy near me can truly be life-changing when you've been struggling with persistent pain or limited movement that just won't respond to conventional treatments. After helping thousands of Brooklyn residents find relief through fascial techniques, I've seen how this specialized approach often provides the missing piece in many healing journeys.
At Evolve Physical Therapy + Sports Rehabilitation, we take pride in offering expert myofascial release therapy that goes beyond simply addressing symptoms. Our hands-on approach looks at your body as an interconnected whole, targeting the underlying fascial restrictions that might be creating pain in seemingly unrelated areas.
"The most rewarding part of practicing myofascial release is watching patients refind activities they thought were lost to them forever," shares our physical therapy team. "Whether it's a grandmother who can finally pick up her grandchild again or an athlete returning to their sport after a stubborn injury, these victories make all the difference."
If you're in Brooklyn—whether you call Marine Park, Gravesend, Midwood, Park Slope, or Mill Basin home—our team is ready to help you move better and feel better through personalized myofascial techniques custom to your unique needs and goals.
Successful treatment involves several key elements: finding a properly trained therapist with specialized fascial training, committing to your recommended treatment plan, practicing your self-care techniques between sessions, and maintaining open communication with your provider about your progress.
The journey to lasting pain relief often begins with a single step. Your fascial system has an amazing capacity to heal when given the right environment and techniques. As one of our long-term patients recently told us, "I wish I'd found myofascial release years ago—it's the difference between managing pain and actually healing."
Ready to experience the benefits of myofascial release therapy for yourself? Contact Evolve Physical Therapy + Sports Rehabilitation today to schedule your initial evaluation. Our Brooklyn team is ready to help you take that first step toward lasting relief and improved function. Your body has been talking to you—now it's time to listen and respond with the care it deserves.

7 of the Best Massage Services in Brooklyn
Brooklyn's Best Massage Therapy Options
Massage therapy Brooklyn offers a wide range of specialized services to help you relieve pain, reduce stress, and improve your overall wellness. Here's a quick overview of the top massage services available in Brooklyn:
Massage Type Best For Average Cost Top-Rated Providers Deep Tissue Chronic pain, tension $120-160/hr Highly-rated clinics (4.9/5 stars) Swedish Relaxation, stress relief $90-130/hr Wellness centers in Williamsburg Prenatal Pregnancy discomfort $160-220/hr Specialized prenatal centers (4.5/5 stars) Sports Athletic recovery $120-150/hr Park Slope wellness studios (4.5/5 stars) Myofascial Release Chronic pain, limited mobility $140-180/hr Specialized myofascial clinics Lymphatic Drainage Swelling, detox $130-170/hr Physical therapy centers Trigger Point Specific pain areas $120-160/hr Evolve Physical Therapy
Finding the right massage therapist in Brooklyn can transform your approach to self-care and pain management. Whether you're dealing with chronic back pain, recovering from a sports injury, or simply need to de-stress after a hectic work week, Brooklyn's diverse massage therapy scene has something for everyone.
The borough's massage offerings range from specialized clinical treatments at physical therapy practices to relaxing spa experiences with extended hours. Many Brooklyn massage centers provide customized sessions that combine multiple techniques to address your specific needs.
I'm Lou Ezrick, founder of Evolve Physical Therapy, with nearly two decades of experience in physical therapy and rehabilitation in Brooklyn, specializing in integrating massage therapy Brooklyn techniques with comprehensive treatment plans for lasting pain relief and improved mobility.
What to Expect on Your First Visit
If you're new to massage therapy Brooklyn, your first appointment will typically begin with a consultation. This is your opportunity to discuss your health history, current concerns, and treatment goals with your therapist. At Evolve Physical Therapy + Sports Rehabilitation, we take this initial conversation seriously, as it helps us create a personalized treatment plan.
You'll be asked to fill out an intake form covering your medical history, current medications, and specific areas of pain or discomfort. Don't hold back—the more your therapist knows, the better they can help you.
Once the consultation is complete, your therapist will leave the room so you can undress to your comfort level. Professional draping techniques ensure you're always covered appropriately, with only the area being worked on exposed. Standard sessions typically last 60, 75, or 90 minutes, though 30-minute targeted sessions are also available at many Brooklyn locations.
"During your first session, communication is key," explains one of our senior therapists at Evolve. "Don't hesitate to provide feedback about pressure, comfort, or areas that need special attention. This helps us tailor the experience to your specific needs."
Qualifications & Credentials to Look For
When seeking massage therapy Brooklyn services, it's important to verify proper credentials. In New York State, massage therapists must be licensed (LMT), which requires completing an accredited program (typically 500-1,000 hours) and passing the state board examination.
For massage provided within a physical therapy practice like ours at Evolve, look for board-certified physical therapists who have specialized training in soft tissue mobilization techniques. Many Brooklyn therapists also hold additional certifications in specialized modalities like prenatal massage, sports massage, or manual lymphatic drainage.
Increasingly important in today's healthcare landscape is trauma-informed training. Therapists with this additional education understand how to work with clients who have experienced physical or emotional trauma, creating a safe and supportive environment.
At Evolve Physical Therapy + Sports Rehabilitation, all our practitioners are fully licensed and certified, with ongoing continuing education to stay current with the latest techniques and approaches in both physical therapy and massage therapy.
Massage Therapy Brooklyn: Deep Tissue Mastery

When it comes to massage therapy Brooklyn, deep tissue work is often the go-to solution for those stubborn aches and pains that just won't quit. Picture this: you've been hunched over your laptop for weeks, and that knot between your shoulders has become your unwelcome companion. That's where deep tissue mastery comes in.
Unlike the gentle, flowing strokes of relaxation massage, deep tissue work means business. At Evolve Physical Therapy + Sports Rehabilitation, our therapists use deliberate pressure, focused forearm glides, and targeted techniques to reach those deeper muscle layers where tension likes to hide. We're essentially having a serious conversation with your muscles, telling those knots it's time to pack up and leave.
"I love watching clients' faces when they stand up after their first deep tissue session," says one of our senior therapists. "That look of surprise when they can turn their head fully for the first time in months? That's why we do this work."
The beauty of deep tissue massage isn't just in the immediate relief (though that certainly feels wonderful). The real magic happens as your body responds over the next few days – improved mobility, decreased pain, and a sense of lightness that makes everyday movements easier.
Want to dive deeper into the specifics of this technique? Check out our detailed guide to Deep Tissue Massage in Brooklyn. And if you're the type who appreciates scientific backing, this research on deep tissue benefits explains why it's more than just a feel-good treatment.
Who Benefits & Why
The list of people who can benefit from deep tissue work is surprisingly diverse. That office worker with the tech neck from endless Zoom meetings? Absolutely. The weekend warrior athlete whose hamstrings scream after Sunday's basketball game? Definitely. But it goes much deeper than that.
Deep tissue work is particularly valuable for those dealing with chronic pain conditions. By breaking up adhesions (those sticky spots between muscle layers) and releasing trigger points, we can help restore normal function to areas that have been compromised for months or even years.
Post-surgical recovery patients often find deep tissue techniques essential for addressing scar tissue. As one client recovering from shoulder surgery shared, "I was shocked at how much mobility I gained after just three sessions focusing on the scar tissue around my incision."
Deep tissue work isn't always comfortable in the moment – there's often that "hurts so good" sensation as we work through restricted areas. But our therapists at Evolve are experts at finding that sweet spot between therapeutic pressure and unnecessary pain. We're constantly checking in, reading your body's signals, and adjusting our approach.
What makes our approach to massage therapy Brooklyn unique is how we integrate deep tissue techniques with our physical therapy expertise. We're not just addressing symptoms – we're looking at movement patterns, posture, and daily habits that might be contributing to your discomfort. This comprehensive approach means longer-lasting results and fewer recurrences of those stubborn problems.
Whether you're dealing with chronic back pain, recovering from an injury, or simply want to move through your day with less discomfort, deep tissue massage might be the missing piece in your wellness puzzle. Your muscles have been working hard – isn't it time you gave them the attention they deserve?
Prenatal & Postpartum Bliss
Pregnancy transforms a woman's body in remarkable ways, and our massage therapy Brooklyn specialists have crafted techniques specifically for mothers-to-be and new moms. Think of prenatal massage as a sanctuary where expectant mothers find relief while nurturing their changing bodies.
At Evolve Physical Therapy + Sports Rehabilitation, we've designed our prenatal massage to address those all-too-common pregnancy discomforts – the nagging lower back pain, sciatic nerve flare-ups, swollen ankles, and that distinctive round ligament pain that can catch you by surprise. Our therapists use specially designed side-lying support systems and cushions that cradle your body safely while allowing for effective treatment.
"What many people don't realize is that prenatal massage goes well beyond physical relief," shares one of our prenatal specialists. "It helps balance those wild pregnancy hormones, calms anxiety, and can significantly improve sleep quality – something every expectant mom treasures."
The journey doesn't end with delivery. Our postpartum massage services help new mothers recover from childbirth's physical demands. We address those upper back and neck tensions that develop from hours of nursing or bottle-feeding, and support your body's gradual return to pre-pregnancy alignment.
Throughout Brooklyn, you'll find dedicated prenatal massage providers with stellar ratings (4.5+ stars from numerous reviews) through trauma-informed, evidence-based perinatal massage approaches. These specialized centers have become trusted havens for expectant mothers across the borough.
Safety & Positioning
When it comes to prenatal massage, safety isn't just important – it's everything. Our Evolve therapists receive specialized training in positioning techniques that accommodate your changing body:
During the first trimester, while some providers avoid massage altogether due to miscarriage concerns, we take a gentler approach with appropriate modifications based on your specific needs and medical history.
As you move into your second and third trimesters, we typically use side-lying positions with supportive cushioning that keeps pressure off your abdomen and major blood vessels – ensuring both comfort and safety.
In late pregnancy, we introduce additional modifications to accommodate increased discomfort and reduced mobility, always prioritizing your comfort.
Working with a certified prenatal massage therapist is essential. Our specialists understand pregnancy's physiological changes and know which techniques to avoid. For instance, we never apply deep pressure on the legs (due to increased blood clot risk) and carefully avoid certain acupressure points that might stimulate uterine contractions.
At Evolve, we ensure our prenatal clients receive care that's not just effective but completely safe for both mother and baby. We maintain open communication throughout your session and adjust our approach based on your comfort level and medical considerations. Our inclusive care approach welcomes all mothers-to-be, regardless of where you are in your pregnancy journey.
For more comprehensive information about our services, visit our More info about Massage Therapy Brooklyn page.
Sports Recovery Power
Brooklyn's runners, cyclists, CrossFitters, and weekend warriors have finded a powerful secret for better performance and faster recovery: sports massage. This specialized form of massage therapy Brooklyn goes beyond relaxation to address the unique demands active bodies face, whether you're training for the Brooklyn Half Marathon or just trying to keep up with your kickball league.
Unlike traditional massage, sports massage is strategically timed around your activity schedule. At Evolve Physical Therapy + Sports Rehabilitation, we customize each session based on whether you're preparing for competition, recovering from an intense workout, or maintaining peak condition between training sessions.
"The beauty of sports massage is how it adapts to your athletic calendar," explains our sports recovery specialist. "When scheduled before an event, we focus on warming tissues and optimizing blood flow. After competition, our techniques shift to clearing out those metabolic waste products that cause that dreaded day-after soreness."
Regular sports massage creates a powerful ripple effect throughout your training: your muscles recover faster between workouts, that stubborn post-exercise stiffness diminishes, and your range of motion improves noticeably. Many clients report their fascia—the connective tissue surrounding muscles—feels more hydrated and pliable, which translates to smoother movement patterns.
Even more impressive? Athletes who incorporate sports massage consistently tend to experience fewer overuse injuries and enjoy the mental relaxation benefits that come from dedicated recovery time.
Integrated Stretch + Massage Approach
At Evolve, we've developed a comprehensive approach that pairs targeted massage with specialized stretching techniques—a combination that delivers results traditional massage alone can't match.
Our therapists are experts in PNF stretching (that's Proprioceptive Neuromuscular Facilitation for the science-minded), a technique that involves gentle muscle contractions and relaxations to achieve deeper, more effective stretches. We complement this with cutting-edge tools like professional-grade percussive devices that deliver rapid pulses deep into muscle tissue, breaking up adhesions and improving circulation.
For athletes dealing with inflammation, we often incorporate contrast therapy, alternating heat and cold applications to reduce swelling and speed recovery. This integrated approach proves particularly effective for addressing sport-specific problems like the notorious IT band syndrome in runners or the shoulder impingement patterns common in overhead athletes.
"What makes our approach different is that we're not just working on relaxing muscles—we're reprogramming movement patterns," says our lead therapist. "When an athlete leaves our table, they're not just feeling better; they're moving better."
Evidence-Based Performance Boost
The benefits of sports massage aren't just anecdotal—they're backed by solid research. Studies published in the Journal of Athletic Training have demonstrated significant reductions in perceived pain and improved muscle function following exercise-induced muscle damage when sports massage is applied.
Additional research in the Journal of Strength and Conditioning Research found that post-exercise massage improved blood flow and reduced muscle fatigue compared to passive recovery methods, translating to better performance in subsequent training sessions.
At Evolve, we're committed to evidence-based practices, continuously updating our protocols based on the latest sports medicine research. This science-driven approach is why so many Brooklyn athletes—from professional competitors to dedicated amateurs—trust us with their recovery and performance needs.
Our physical therapists and massage therapists collaborate closely to create comprehensive treatment plans that address both immediate recovery needs and long-term performance goals. Whether you're looking to shave minutes off your marathon time or simply want to enjoy your weekend activities without Monday morning pain, our sports recovery massage services deliver results you can feel.
Lymphatic Drainage Detox
Ever noticed how some areas of your body just seem puffy or swollen, even when you're doing everything right? That's where lymphatic drainage massage comes in—one of the most gentle yet surprisingly effective forms of massage therapy Brooklyn practitioners offer.
Unlike the deep pressure you might expect from a typical massage, lymphatic drainage uses feather-light, rhythmic strokes that follow your body's natural lymphatic pathways. The touch is so gentle you might wonder if anything's happening at all—but don't be fooled by its subtlety!
"The magic of lymphatic drainage is in its gentleness," explains our lymphatic specialist at Evolve. "We're not forcefully pushing fluid around—we're creating subtle pressure differentials that encourage your lymph system to do what it naturally wants to do, just more efficiently."
Your lymphatic system works as your body's natural detoxification highway, but sometimes it needs a little help, especially after surgery, injury, or when you're feeling under the weather. The light, rhythmic strokes help move excess fluid, reduce swelling, and support your immune function.
At Evolve Physical Therapy + Sports Rehabilitation, our clients see remarkable benefits from lymphatic sessions, including:
Reduced post-surgical swelling that won't seem to go away on its own Relief from chronic sinus pressure and congestion Decreased puffiness around the face and eyes Improved immune function during cold and flu season Support for general detoxification and wellness
Most sessions last 60-90 minutes, and while you won't feel the muscle soreness associated with deeper work, you might notice increased trips to the bathroom afterward (that's the excess fluid leaving your system!) and a surprising level of relaxation.
Medical vs. Spa Lymphatic Sessions
It's worth understanding that not all lymphatic drainage services are created equal. Here in Brooklyn, you'll find two main approaches:
Medical lymphatic drainage is typically performed by specially certified physical therapists or massage therapists with advanced training. This clinical approach is essential for people dealing with specific medical conditions like post-mastectomy lymphedema, severe post-surgical swelling, or chronic venous insufficiency.
At Evolve, our physical therapists offer this medical-grade lymphatic work, sometimes incorporating compression bandaging as part of a complete decongestive therapy protocol. This comprehensive approach is particularly valuable for oncology patients or those recovering from major surgeries.
Spa-based lymphatic treatments focus more on general wellness and temporary cosmetic improvements. While less medically intensive, these can still offer wonderful benefits for reducing facial puffiness, improving the appearance of cellulite, addressing water retention, and promoting relaxation.
"Many clients start with a spa lymphatic treatment for general wellness, then seek out medical lymphatic drainage when they're dealing with a specific health concern," notes our lymphatic specialist. "Both have their place in a comprehensive wellness routine."
Brooklyn offers excellent options for both approaches. For serious medical conditions like lymphedema, specialized physical therapy centers provide medical lymphatic drainage. Meanwhile, several day spas throughout the borough offer gentler lymphatic facial massages and body treatments focused on cosmetic improvements and general wellness.
Curious to learn more about how lymphatic drainage might help with your specific concerns? Check out our detailed guide to lymphatic drainage massage in Brooklyn for a deeper dive into this fascinating and beneficial therapy.
Myofascial Release Freedom

If you've ever felt "stuck" in your body, like your muscles just won't let go no matter how much you stretch, myofascial release might be your ticket to freedom. This powerful approach has become one of the most sought-after techniques in massage therapy Brooklyn clinics offer, and for good reason.
Myofascial release focuses on something most of us have never heard of but affects everything we do: fascia. This remarkable connective tissue wraps around every muscle, bone, nerve, and organ in your body like an intricate spider web. When healthy, fascia glides and moves with ease. But injuries, stress, inflammation, and even poor posture can cause it to become tight, sticky, and restricted—creating a domino effect of pain and limited movement throughout your body.
"I often explain fascia to my clients using the orange analogy," says our senior therapist at Evolve. "Imagine the thin white membrane that surrounds each orange segment. That's similar to how fascia surrounds your muscles and organs. When that membrane gets tight or twisted in one area, it pulls on everything connected to it."
This whole-body perspective makes myofascial release uniquely effective for conditions that haven't responded to other treatments. At specialized myofascial clinics in Brooklyn, therapists have helped thousands of patients find relief from persistent pain. Many people find that the source of their pain isn't actually where they feel it—it's a fascial restriction pulling from somewhere else entirely.
Myofascial release can be transformative for people dealing with:
Chronic back and neck pain that persists despite other treatments Headaches and jaw tension related to TMJ dysfunction Post-surgical scarring that limits movement and causes discomfort Sports injuries that haven't fully healed with traditional approaches General stiffness that makes you feel older than your years
Beyond just pain relief, clients often report feeling "lighter," more balanced, and more connected to their bodies after sessions. Many describe a sense of release that goes beyond physical—as if emotional tension stored in the tissues has also been set free.
Tools & Techniques
What makes myofascial release different from regular massage? For starters, there's the time factor. While Swedish massage typically uses rhythmic strokes, myofascial work involves sustained pressure held for 3-5 minutes on restricted areas. This gentle but firm pressure gives the fascia time to soften and release naturally, rather than forcing change.
"We're not trying to muscle through restrictions," explains our therapist at Evolve. "We're creating the right conditions and giving the body time to let go on its own terms. It's like slowly melting ice rather than trying to crack it."
Therapists skilled in myofascial release use a variety of approaches. Some use skin rolling techniques, gently lifting and rolling the skin to free up superficial fascial layers. Others employ Instrument Assisted Soft Tissue Mobilization (IASTM), using specialized tools made of materials like stainless steel or jade to detect and treat fascial restrictions with precision.
The benefits don't stop when you leave the clinic. At Evolve, we teach clients foam rolling and self-myofascial release techniques they can use at home to maintain progress between sessions. These simple but effective tools help you become an active participant in your healing process.
Sessions typically last 60-90 minutes and may leave you feeling taller, more open, and more integrated in your movement. While you might experience some tenderness during treatment (we call this "good hurt"), the results are worth it—improved flexibility, reduced pain, and a greater sense of freedom in your body.
For more detailed information about our approach to myofascial release, visit our Myofascial Release Brooklyn page.
Trigger Point & Dry Needling Precision
When you're dealing with persistent pain that just won't quit, trigger point therapy might be exactly what you need. This targeted approach to massage therapy Brooklyn zeros in on those stubborn knots in your muscles that can cause both local pain and referred pain elsewhere in your body.
Think of trigger points as tiny troublemakers within your muscles – tight bands or knots that become hypersensitive. Press on one, and you might feel pain shoot to a completely different area of your body in predictable patterns. That knot in your upper trapezius? It could be the culprit behind your persistent headaches. The tight spot in your glutes? It might be mimicking sciatica symptoms.
At Evolve Physical Therapy + Sports Rehabilitation, we approach trigger point therapy like detectives solving a mystery. Our specialists carefully map your pain patterns, feeling for characteristic tissue changes, and systematically release the points that reproduce your symptoms.
"Understanding the difference between active and latent trigger points helps us target treatment more effectively," explains our lead therapist. Active trigger points cause constant pain and can produce surprising symptoms like goosebumps or watering eyes even when not being touched. Meanwhile, latent trigger points only hurt when pressed directly but still silently limit your movement and weaken muscles.
This specialized therapy works wonders for tension headaches, jaw pain, shoulder and neck issues, lower back discomfort, tennis elbow, knee pain, and even plantar fasciitis. Many of our Brooklyn clients walk out feeling immediate relief, though lasting results typically require multiple sessions to fully resolve the underlying issues.
What Happens During a Session
Your trigger point session at Evolve begins with a thorough assessment to locate those problematic spots. Your therapist will carefully palpate your muscles, feeling for tight bands and tender areas while asking for your feedback about pain and any referred sensations you might experience.
The treatment itself may include several approaches. Manual compression is the cornerstone technique, where we apply sustained pressure directly to trigger points using fingers, thumbs, or elbows. We typically hold this pressure for 30-90 seconds until we feel the tissue release.
For more stubborn trigger points, dry needling might be recommended. This technique, performed by our specially trained physical therapists, involves inserting thin filiform needles directly into trigger points. When the needle hits the spot just right, you might feel a brief "twitch response" – a momentary contraction that signals we've found the trigger point. While this might cause a second of discomfort, it's often followed by immediate muscle relaxation.
We may also incorporate spray and stretch techniques, using a cooling spray followed by gentle stretching to deactivate trigger points, or reciprocal inhibition, which leverages the neurological principle that when one muscle contracts, its opposite relaxes.
Unlike full-body massage sessions, trigger point therapy typically lasts 30-60 minutes and focuses specifically on your most problematic areas. It's targeted, efficient, and designed to give you the most relief in the least amount of time.
After-Care & Prevention
Don't be surprised if you feel a bit sore for a day or two after your trigger point therapy – it's completely normal and similar to how you might feel after a good workout. This temporary soreness is actually part of the healing process as your tissues recover from treatment.
To maximize your results, we'll send you home with specific after-care instructions:
Hydration is absolutely essential after treatment. Drinking plenty of water helps flush out the metabolic waste that gets released from trigger points during therapy. We recommend carrying a water bottle with you for the next 24 hours.
Apply heat for 15-20 minutes several times throughout the day to help maintain muscle relaxation. A warm shower, heating pad, or microwavable heat pack all work well.
Incorporate gentle stretching of the treated muscles to prevent them from tightening up again. We'll show you exactly which stretches will benefit you most based on your specific trigger points.
Pay attention to your posture and ergonomics since poor positioning is often what created those trigger points in the first place. Small adjustments to your workstation, driving position, or sleeping arrangement can make a huge difference.
Learn self-treatment techniques to maintain results between sessions. We might recommend tools like tennis balls or foam rollers to help you address trigger points at home.
"The key to lasting relief isn't just treating trigger points but preventing them from coming back," our specialist emphasizes. "We work closely with clients to identify and modify the activities, postures, and movement patterns that contribute to trigger point formation."
Many of our Brooklyn clients find that scheduling monthly maintenance sessions becomes an essential part of their wellness routine, preventing the return of problematic trigger points and keeping pain at bay. As with many things in health, consistency is key to long-term success.
For more information about our comprehensive approach to massage therapy Brooklyn and physical therapy services, check out our detailed service page.
Holistic Spa Serenity

While Brooklyn offers plenty of medically-focused treatments, sometimes what your body truly craves is pure, blissful relaxation. The borough's spa-based massage therapy Brooklyn experiences provide the perfect counterbalance to our city life, focusing on total-body serenity rather than targeting specific pain points.
Many wellness centers in Williamsburg embody this philosophy beautifully. With extended hours seven days a week, these establishments have made professional relaxation accessible to even the busiest Brooklynites. Their core belief that "self-care is a lifestyle, not a luxury" resonates deeply with locals who understand that regular relaxation isn't indulgent—it's essential.
At the heart of most spa experiences is the classic Swedish massage. This traditional technique uses those long, flowing strokes that feel like heaven on tired muscles. Your therapist will incorporate gentle kneading and circular movements that improve circulation while melting away tension. Unlike deep tissue work, Swedish massage keeps things lighter, perfect for when you need mental decompression as much as physical relief.
"Swedish massage is like pressing the reset button for your nervous system," explains one of our Evolve therapists. "It's not just about the physical benefits—it's about giving your mind permission to completely let go."
Brooklyn spas often improve the basic Swedish experience with sensory elements that deepen your relaxation journey. Hot stone therapy places smooth, warmed basalt stones strategically along your body, allowing heat to penetrate muscle tissue before your therapist even begins hands-on work. The result? Deeper relaxation with gentler pressure.
Many clients at Evolve tell us they particularly love aromatherapy additions to their massages. Whether it's calming lavender to quiet an anxious mind or invigorating eucalyptus to clear congested sinuses, essential oils engage your sense of smell to improve therapeutic benefits. Some Brooklyn spas complete the sensory experience with sound therapy—think gentle singing bowls or carefully curated playlists that help quiet mental chatter.
At Evolve Physical Therapy + Sports Rehabilitation, we understand that healing happens best when both body and mind are addressed. That's why we often incorporate relaxation elements even into our more clinically-focused sessions. That mind-body connection isn't just wellness jargon—it's a powerful healing tool.
Building an Affordable Self-Care Routine
Let's be real—regular massage offers tremendous benefits, but Brooklyn prices can make consistent care seem out of reach. Thankfully, there are smart ways to make this essential self-care more budget-friendly.
Membership plans have revolutionized how many Brooklynites approach massage. Many wellness centers in Park Slope and surrounding neighborhoods offer monthly programs that significantly reduce per-session costs. You'll typically get one monthly massage at a reduced rate, plus member pricing on additional sessions.
Package bundles make perfect sense if you know you'll be coming back. Most Brooklyn massage establishments offer 10-20% savings when you purchase multiple sessions upfront. At Evolve, we've created package options specifically designed to make regular therapeutic massage more accessible to those who need ongoing care.
Gift cards aren't just for giving—they're also perfect for receiving! Don't be shy about suggesting massage gift certificates when friends and family ask what you'd like for special occasions. Many of Brooklyn's pioneering massage wellness centers have built substantial businesses around people sharing the gift of massage with loved ones.
For those with Health Savings Accounts (HSA) or Flexible Spending Accounts (FSA), there's excellent news. When massage is deemed medically necessary and prescribed by a healthcare provider, you can often use these pre-tax dollars to cover sessions. Our team at Evolve is happy to provide appropriate documentation for clients looking to use these funds.
Service Type Average 60-Min Price Monthly Membership Price Package Discount (6+ sessions) Swedish Relaxation $110-150 $85-95 15-20% off Hot Stone $140-180 $110-130 10-15% off Aromatherapy Add-On $15-25 $10-15 Often included free Couples Massage $220-280 $190-230 10-15% off
"The magic happens with consistency," shares our wellness coordinator. "Even monthly sessions create noticeable differences in how people move through their lives—physically and emotionally."
Many of our Brooklyn clients find their ideal self-care routine combines targeted clinical massage for specific issues with regular relaxation-focused sessions for maintenance. This balanced approach addresses both immediate physical concerns and long-term stress management, creating a sustainable wellness practice that supports your busy Brooklyn lifestyle.
Frequently Asked Questions About Massage Therapy Brooklyn
How much does massage therapy Brooklyn typically cost?
When exploring massage therapy Brooklyn options, one of the first questions on most people's minds is about cost. Brooklyn offers a wide range of pricing depending on what you're looking for.
Specialized treatments naturally come with a higher price tag. If you're seeking prenatal massage, lymphatic drainage, or medical massage, expect to pay premium rates compared to a standard Swedish massage. Session length plays a big role too—standard sessions typically run from 60 minutes ($90-160) to more indulgent 90-minute sessions ($130-220).
Where you receive your massage matters just as much. Hospital-based or clinical settings often charge more than your neighborhood day spa or standalone studio. And just like in any profession, experience commands a premium—therapists with years of specialized training and certifications typically charge more for their expertise.
From my years working with clients across Brooklyn, I've observed these general price ranges:
Basic relaxation massage will set you back about $90-130 for an hour of blissful Swedish techniques. If you're dealing with deeper issues, deep tissue or sports massage typically ranges from $120-160 for the same time. Expectant mothers should budget $160-220 for prenatal massage sessions, while specialized treatments like lymphatic drainage or myofascial release generally fall between $130-180.
Good news for first-timers—many Brooklyn massage providers offer special introductory rates. For example, many wellness centers in Williamsburg welcome new clients with 60-minute sessions at competitive rates, whether you choose Swedish massage, deep tissue, or facial services.
At Evolve Physical Therapy + Sports Rehabilitation, we understand budget concerns. That's why we work with clients to determine if their insurance might partially cover massage therapy when it's part of a physical therapy treatment plan. Our team is always happy to help steer those sometimes confusing coverage options.
How do I choose the right clinic for massage therapy Brooklyn?
Finding your perfect massage therapy Brooklyn match doesn't have to feel overwhelming. Think of it as dating—you're looking for the right fit for your specific needs and preferences.
Start by checking reputation and reviews. In our digital age, this is easier than ever—look for practices with strong Google ratings that suggest consistent quality care. Many physical therapy clinics in Brooklyn maintain impressive ratings based on hundreds of client reviews, which speaks volumes about their service quality.
Consider specialization next. Are you pregnant? Look for a specialized practice that offers custom prenatal care addressing the unique challenges of pregnancy. Struggling with chronic pain? Seek out clinics with experience helping patients with limited mobility find relief.
Credentials matter tremendously in massage therapy. Always verify that your therapist holds a valid New York State massage therapy license (LMT). If you're seeking specialized services like prenatal massage or lymphatic drainage, ask about specific training in those areas.
Think about the atmosphere that helps you relax. Some people prefer a clinical setting focused on therapeutic outcomes, while others want the dim lighting and soft music of a spa-like environment. There's no wrong answer—just what works best for you.
Practical considerations like location, hours, and booking policies can make or break your massage routine. Many wellness centers in Williamsburg, for example, offer extended hours seven days a week, making it easier to fit massage into even the busiest Brooklyn schedule.
Pay attention to communication style during your initial contact. Does the practice listen carefully to your concerns? Do they clearly explain their approach? This early interaction often reveals how you'll be treated throughout your care.
At Evolve Physical Therapy + Sports Rehabilitation, we always encourage potential clients to call with questions before booking. This helps ensure we're truly the right fit for your specific needs—because massage therapy works best when there's a good match between client and provider.
Can massage therapy be combined with other treatments?
Absolutely! In fact, massage therapy Brooklyn often delivers its most powerful results when combined with other treatments. Think of massage as part of your wellness orchestra rather than a solo performer.
At Evolve Physical Therapy + Sports Rehabilitation, we regularly integrate massage with other approaches for improved outcomes. Our physical therapists often refer to massage as "soft tissue mobilization" and strategically incorporate it into broader treatment plans. This prep work helps relax tight tissues before joint mobilization and therapeutic exercise, making these interventions significantly more effective.
Many Brooklyn wellness centers offer both massage and acupuncture—a powerful combination that works through different body systems. Massage relaxes muscles before acupuncture, creating ideal conditions for effective needle placement. The two modalities complement each other beautifully, often delivering results neither could achieve alone.
For the fitness enthusiasts among us, massage between strength training sessions can be transformative. It improves recovery times, reduces soreness, and maintains tissue quality—a particular benefit for athletes and regular gym-goers who put significant demands on their bodies.
Those dealing with stress and anxiety often find remarkable relief when combining massage with mindfulness practices, yoga, or counseling. This comprehensive approach addresses both physical tension and its mental/emotional components.
The science backs up this integrated approach. A notable study published in the Annals of Internal Medicine found that massage therapy combined with standard medical care produced better outcomes for low back pain than standard care alone.
"We consistently see the best outcomes when massage is part of a comprehensive plan," our clinical director often tells new clients. "The hands-on work of massage complements the active engagement of exercise and the structural approach of joint mobilization."
At Evolve, our collaborative team works together to create treatment plans that leverage multiple approaches, maximizing your results and getting you back to the activities you love more quickly.
Conclusion
Massage therapy Brooklyn has truly evolved into a diverse wellness landscape, offering something for everyone—whether you're nursing a nagging sports injury, easing pregnancy discomfort, or simply needing a mental reset from Brooklyn's non-stop pace. The seven specialized services we've explored throughout this guide represent just how sophisticated and varied massage therapy has become in our borough.
What makes Brooklyn's massage scene so special isn't just the variety of techniques available, but the passionate practitioners behind them. From clinical therapists with advanced medical training to intuitive healers who seem to find tension you didn't even know you had, Brooklyn's massage community reflects the borough itself—diverse, skilled, and always evolving.
At Evolve Physical Therapy + Sports Rehabilitation, we take pride in being part of this vibrant wellness ecosystem. Our approach integrates these various massage techniques into comprehensive care plans that address not just your immediate pain points, but the underlying patterns that created them in the first place. We believe that hands-on care creates a foundation for lasting change in how your body moves and feels.
The beauty of massage therapy Brooklyn is that it can be whatever you need it to be—an occasional luxury when stress peaks, a regular part of your athletic training regimen, or a crucial component of recovering from injury or surgery. Many of our clients begin with a specific issue and find that regular massage becomes an essential part of how they care for themselves.
We often tell our clients that your body carries your life story—the sports you played as a kid, the way you sit at work, the stress you hold in your shoulders. Massage therapy gives you a chance to rewrite some of those patterns and create new possibilities for how you move through the world.
Ready to find which massage approach might be right for you? We'd love to help you steer the options. Visit our Massage Therapy Brooklyn services page to learn more about our specific offerings and how they might fit into your wellness journey. Your path to feeling better doesn't have to be walked alone—we're here to support every step.

Senior Balance Boost: Exercises to Keep You Upright
Why Balance Training Matters for Seniors
Balance training for seniors is a series of specialized exercises designed to improve stability, prevent falls, and maintain independence as we age. Here's what you need to know:
Quick Guide to Balance Training for Seniors
Recommended frequency: 3 sessions per week, 45+ minutes each Basic exercises: Weight shifts, single-leg stands, heel-to-toe walking Safety first: Always have a chair or wall nearby for support Start with: 5-10 repetitions of each exercise, gradually increasing Medical clearance: Check with your doctor before beginning
Falls are the number-one cause of injuries among older Americans, with an older adult falling every single second in the United States according to the CDC. What's encouraging is that a 2016 study found that older adults who performed balance exercises for just 6 weeks significantly improved their stability and confidence.
The good news? Much of the balance decline we experience isn't inevitable—it's often due to inactivity and can be reversed with proper training.
Balance naturally deteriorates as we age due to:
Weakening muscle strength
Changes in vision and inner ear function
Reduced joint flexibility
Slower reaction times
Medication side effects
Starting a consistent balance routine can dramatically reduce your fall risk while improving your overall quality of life.
I'm Lou Ezrick, a physical therapist with nearly two decades of experience specializing in balance training for seniors at Evolve Physical Therapy, where I've helped thousands of older adults regain their stability and confidence through evidence-based balance programs.
Why Balance Training Matters After 60
That moment when you suddenly wobble while reaching for something on a high shelf—it's more than just a fleeting scare as we age. It's a warning sign our bodies are changing.
According to the CDC, more than one in four older adults falls each year, yet fewer than half mention it to their doctor. Even more alarming, falls have become the leading cause of injury-related deaths among adults 65 and older.
"I used to think falls were just part of getting older," shares Margaret, a 72-year-old who visits our Brooklyn facility. "After working with the team at Evolve, I realized most falls can actually be prevented with the right exercises and awareness."
Several natural changes make balance training for seniors so crucial:
Sensory Loss affects how we perceive our surroundings. Vision changes, hearing problems, and decreased foot sensitivity all make it harder to steer even familiar spaces safely.
Muscle Weakness happens gradually but significantly. After 30, we naturally lose 3-5% of muscle mass each decade—a process that speeds up after 60. This means less strength to catch ourselves when we stumble.
Medical Conditions common in older adults often impact balance. High blood pressure affects over 63% of adults over 60 and can cause lightheadedness. About 25% of seniors have Type 2 diabetes, which often leads to peripheral neuropathy—that troublesome numbness in feet and hands that makes it hard to feel the ground properly.
Perhaps most concerning is the Fear of Falling cycle that develops. After one fall or near-miss, many seniors begin limiting their activities out of fear, which leads to further deconditioning and muscle weakness—ironically increasing their fall risk even more.
The good news? Research from 2019 shows that regular balance exercises not only reduce fall risk but also improve overall quality of life and cognitive function. Systematic reviews suggest properly designed balance programs may reduce fall rates by an impressive 46%-48%.
For more information on fall statistics and prevention strategies, see the CDC's comprehensive guide on older adult falls.
Main Causes of Balance Problems in Older Adults
Understanding what's behind unsteadiness helps us address it more effectively:
Your vision changes significantly with age. Depth perception weakens, peripheral vision narrows, and adapting to different lighting becomes harder. Since vision provides about 70% of the sensory input we use for balance, these changes dramatically impact stability.
Your vestibular system—that complex network in your inner ear—gradually loses sensitivity. By age 70, we've typically lost about 40% of the hair cells in this system that help detect movement and position.
"Many clients don't realize their dizziness when turning or looking up relates to age-related vestibular changes," explains Dr. Sarah Chen, one of our physical therapists at Evolve. "Specific exercises can help compensate for these natural losses."
Joint degeneration and arthritis affect proprioception—your body's ability to sense its position without looking. When joints become stiff or painful, they send less accurate information to your brain about where your body is in space.
Medication side effects often include dizziness or lightheadedness. At Evolve, we frequently coordinate with our clients' physicians to review medications that might be contributing to balance problems.
Top Benefits of Consistent Balance Work
Committing to regular balance training for seniors creates remarkable improvements:
Reduced Fall Risk is the most immediate benefit. Studies consistently show that proper balance training can decrease fall likelihood by up to 40%—a life-changing improvement.
Faster Reaction Time develops as you practice. Your body learns to respond more quickly to unexpected movements or position changes, helping you catch yourself before a fall happens.
Stronger Legs and Core naturally develop through balance exercises. These key muscle groups provide the foundation for stability in all daily activities, from walking to reaching to climbing stairs.
Sharper Cognition is an often-overlooked benefit. Research indicates that balance training activates multiple brain regions simultaneously, potentially improving memory and decision-making.
Mood Boost comes from regained confidence. When you feel steady on your feet, you're more likely to participate in social activities and maintain independence—both crucial for mental health.
Robert, a 78-year-old client, recently told us: "After six weeks of balance training at Evolve, I went from being afraid to walk to the corner store to confidently taking my grandchildren to the park. The improvement in my quality of life has been remarkable."
With scientific research on fall prevention continuing to show the effectiveness of targeted balance programs, there's never been a better time to focus on staying steady on your feet.
Balance Training for Seniors: How Often and How Safe?
Finding the sweet spot for balance training for seniors comes down to consistency, not intensity. According to guidelines from the American College of Sports Medicine (ACSM) and the National Institute on Aging, aim for:
Balance sessions 2-3 times weekly, though 3 or more days gives optimal results. Each session should last about 45 minutes, and you'll want to stick with your program for at least 8 weeks to see meaningful improvements.
At Evolve Physical Therapy, we've found something interesting with our Brooklyn clients – adding quick daily "balance snacks" of just 5-10 minutes between longer formal sessions helps people progress noticeably faster.
"Think of balance training like brushing your teeth," says Maria, one of our physical therapists. "A little bit every day creates the habit your body needs to rebuild those stability pathways."
Your balance workout should flow through three phases:
Start with a 5-7 minute warm-up – gentle marching in place, ankle circles, and shoulder rolls wake up your muscles and prepare your joints. Then move into your main balance exercises for 30-35 minutes, mixing both static holds and movement-based exercises. Finally, finish with a 5-minute cool-down of gentle stretching and deep breathing to bring your heart rate back to normal.
What you wear on your feet matters tremendously for safety. Skip the slippers and opt for shoes with non-slip soles and low, wide heels. Make sure they fit properly – not too loose where they might slip off, not too tight where they pinch. Good arch and ankle support are also essential for stable footing.
Setting up your home practice space properly prevents accidents:
Clear away clutter and cords from your exercise area. Ensure you have bright, even lighting so you can clearly see your surroundings. Always keep a sturdy chair or counter within arm's reach for support if needed. Have your phone nearby in case of emergency, and remember to sip water before, during, and after your exercises to stay hydrated.
While balance training is generally very safe, be alert to warning signs that tell you to stop: severe dizziness or spinning sensations, chest pain or pressure, unusual shortness of breath, sudden headache, or nausea with cold sweats. If you experience any of these, stop immediately and consult your doctor.
Precautions Before You Start
Safety first is our motto at Evolve when it comes to balance training for seniors. Before jumping in, take these important precautions:
Get medical clearance, especially if you have a history of falls, high blood pressure, heart conditions, severe osteoporosis, neurological conditions like Parkinson's, or you've recently had surgery or joint replacement. Your doctor knows your specific health situation and can offer personalized guidance.
Check your blood pressure before exercising, particularly if you take medications that might cause dizziness. Many of our clients keep a simple log of their pre-exercise readings to track patterns.
Do a quick dizziness check each time: stand up slowly from sitting and notice if you feel lightheaded. If you do, we'll modify your exercises to keep you safe.
"One of the biggest mistakes I see is people rushing into advanced balance exercises before they're ready," notes Alex, our physical therapist at the Marine Park location. "Balance training isn't a race – it's about building a solid foundation first."
Take a critical look at your home environment. We often help clients spot hidden hazards like loose rugs, poor lighting on stairs, missing grab bars in bathrooms, cluttered walkways, or electrical cords crossing walking paths. Simple fixes can prevent accidents before they happen.
If you use a cane or walker, don't set it aside for your balance exercises. Instead, we'll show you how to safely incorporate it into your routine. As your balance improves, we can gradually reduce your dependence on these devices – but always at a pace that prioritizes your safety.
Equipment & Support You May Need
The beauty of balance training for seniors is its simplicity. You don't need fancy equipment or an expensive gym membership to get started. Here's what we recommend to our Brooklyn clients:
A sturdy chair becomes your best friend when starting balance work. Choose one without wheels, preferably with armrests if you're a beginner. Make sure it's heavy enough that it won't slide when you hold it for support. The dining room chairs in most homes work perfectly.
Your kitchen countertop or a solid wall provides excellent support for standing exercises. At our Park Slope facility, we start many clients along our therapy room walls before progressing to more challenging environments.
A non-slip yoga mat creates a defined space for your practice while providing cushioning for floor exercises. The slight padding also helps reduce impact on your joints.
Light resistance bands add challenge to many balance exercises while strengthening supporting muscles. They're inexpensive, portable, and incredibly versatile.
Once you've mastered the basics, a balance pad (a specialized foam cushion) creates an unstable surface that challenges your balance systems in new ways.
"My client Dorothy started with just a kitchen chair and her hallway wall," shares Lou from our clinical team. "Six months later, she's confidently using a balance pad while doing light hand weights. The progression has been remarkable, and it all started with the simplest equipment."
Other helpful items include a stopwatch to track how long you can hold positions, a full-length mirror to check your posture, and some athletic tape to create floor markers for stepping exercises.
When it comes to physical therapy for balance disorders, starting simply is the key to long-term success. As your confidence grows, we can gradually introduce new challenges to keep improving your stability and independence.
6 Essential Balance Exercises You Can Do Today
Ready to start your balance training for seniors journey? These six exercises form the cornerstone of what we recommend to our clients at Evolve. Each one targets different aspects of balance and stability that naturally decline with age.
The beauty of these exercises is their simplicity—you can begin today with minimal equipment and still see meaningful results. Our physical therapists have carefully selected this sequence based on both scientific research and years of clinical experience.
Aim to practice these exercises three times weekly, gradually building your confidence and capability before progressing to more challenging variations.
Weight Shifts
Think of weight shifts as the foundation of all balance work. This exercise teaches your body to control its center of gravity—exactly what you need to prevent falls in everyday life.
How to perform:
Stand with feet hip-width apart near a counter or sturdy chair for support
Shift your weight onto your right foot, gently lifting your left foot slightly off the floor
Hold this position for 30 seconds, focusing on stability
Return to center, then repeat on the left side
Complete 6 repetitions on each side
"Most of my clients are surprised by how challenging simple weight shifts can be," says Dr. Rachel Kim from our Midwood facility. "This exercise teaches your body to make those tiny adjustments that prevent falls during daily activities like reaching for something in the kitchen."
For best results, keep your core engaged and your posture tall. Fix your gaze on something that doesn't move, and remember to breathe normally throughout. Once you've mastered the basic version, try it without holding onto support, or challenge yourself further by standing on a folded towel to create an unstable surface.

Heel-to-Toe Walk
Remember the childhood game of walking on an imaginary tightrope? The heel-to-toe walk brings that concept into your balance training routine. This exercise improves dynamic balance while walking—essential for navigating narrow spaces like crowded restaurants or busy sidewalks.
How to perform:
Stand near a wall or in a hallway where you can reach for support if needed
Place the heel of your right foot directly in front of the toes of your left foot
Focus on a point in front of you at eye level
Take 10 steps forward in this heel-to-toe pattern, moving deliberately
Turn around carefully and repeat in the other direction
Doris, one of our 83-year-old clients, shared her experience: "The heel-to-toe walk was frustrating at first—I could barely take three steps without losing my balance. After practicing for a month, I can now do 20 steps without touching the wall. It's given me so much more confidence when walking in crowded places."
As you practice, keep your posture tall with shoulders relaxed. This isn't a race—slow, controlled movements build better balance. When you're ready for more challenge, try crossing your arms over your chest or counting backward from 100 by 7s while walking.
Single-Leg Stand
Standing on one leg might seem simple, but it's a powerful exercise that strengthens ankle, knee, and hip stabilizers while challenging your balance system. It's particularly valuable because it mimics real-life situations like stepping into a bathtub or walking up stairs.
How to perform:
Stand behind a sturdy chair or counter, holding lightly for support
Shift your weight to your right foot
Slowly lift your left foot off the floor, bending the knee
Hold for 10 seconds, then lower your foot
Repeat on the opposite side
Complete 3 repetitions on each leg
"The single-leg stand is often where we see the most dramatic improvements," notes Dr. James Wilson from our Gravesend location. "When clients first start, they might need to grip the chair tightly for just a few seconds. Within weeks, many can balance hands-free for 30 seconds or more."
Focus your gaze on a non-moving object and keep your standing knee slightly bent, not locked. As you progress, try increasing your hold time to 30 seconds or attempting a "tree pose" variation by placing the sole of your foot on the opposite inner calf.
For our more advanced clients, we often turn this into a dual-task challenge: "How long can you stand on one leg while naming as many states as possible?" This approach improves both balance and cognitive function simultaneously—a powerful combination for fall prevention.
For more information about how physical therapy can help prevent falls, visit our physical therapy for fall prevention page.
Sit-to-Stand
This functional exercise targets one of the most dangerous moments in daily life—the transition between sitting and standing, when many falls occur. Beyond improving balance, sit-to-stands strengthen the quadriceps and gluteal muscles essential for mobility and independence.
How to perform:
Sit in a sturdy chair with feet flat on the floor, hip-width apart
Scoot forward until you're sitting near the edge of the chair
Lean slightly forward from the hips (this momentum helps with standing)
Push through your heels to stand up slowly
Pause in the standing position, ensuring you're stable
Slowly lower yourself back to sitting
Complete 10 repetitions
"Sit-to-stand is perhaps the most functional balance exercise we teach," says Maria Lopez, DPT at our Mill Basin location. "We all need to get up from chairs dozens of times daily. Strengthening this movement pattern prevents a significant percentage of falls in older adults."
If you find this exercise challenging, it's fine to use your hands at first. As you get stronger, try hovering your hands near the armrests without actually touching them. For an added challenge, hold the standing position for 5 seconds before sitting, or add a biceps curl with light weights once standing.
Side Steps & Grapevine
While we spend plenty of time walking forward, lateral (side-to-side) movement often gets neglected. Yet sideways stability is crucial for preventing falls when turning or stepping to the side—like getting in and out of the shower or navigating around furniture.
How to perform:
Stand with feet together, holding onto a counter if needed
Step to the right with your right foot
Bring your left foot to meet the right
Take 10 steps to the right, then 10 steps to the left
For the grapevine variation: Step right with your right foot, then cross your left foot behind your right, then step right again, then cross your left foot in front
"Lateral stability is often the first to decline with age," explains Dr. Michael Chang at our Brooklyn location. "Yet it's essential for navigating crowded spaces or stepping around obstacles. The side step and grapevine exercises specifically target this crucial movement pattern."
Research from the American Heart Association supports the effectiveness of lateral walking exercises for improving hip strength and overall balance in seniors. For more information, check out the American Heart Association's guide on balance exercises.
As you become more confident, try adding a resistance band loop around your thighs just above the knees for an extra challenge to your hip muscles.
Chair Tai Chi/Yoga Flow
This gentle flowing sequence brings mindfulness into your balance training for seniors routine. By combining elements of tai chi and yoga, you'll improve dynamic balance while also reducing stress and enhancing body awareness.
How to perform:
Sit tall in a sturdy chair with feet flat on the floor
Begin with deep breathing: inhale for 4 counts, exhale for 6 counts (3 times)
Slowly raise both arms out to the sides and up overhead while inhaling
Lower arms back down while exhaling
Gently turn your upper body to the right while extending your left arm across your body
Return to center and repeat on the opposite side
Continue this flowing sequence for 5 minutes
"The mindfulness component of tai chi and yoga movements amplifies their balance benefits," notes Dr. Emily Patel at Evolve. "When clients focus on the mind-body connection, they become more aware of subtle shifts in their center of gravity and respond more quickly to prevent falls."
A 2016 systematic review found that tai chi is particularly effective for balance training, with some studies showing up to a 50% reduction in fall rates among regular practitioners. As you become comfortable with the seated version, try performing the same movements while standing behind a chair for support.
Consistency is key with balance training for seniors. Even five minutes of practice daily will yield better results than an hour-long session once a week. Start where you are, use support when needed, and celebrate each small improvement along the way.
Adapting Balance Work for Different Ability Levels
At Evolve Physical Therapy + Sports Rehabilitation, we firmly believe that balance training for seniors should be accessible to everyone. Your unique health situation shouldn't prevent you from improving your stability and confidence—it simply means we need to customize your approach.
"I've seen remarkable progress in clients with significant physical challenges," shares Dr. Jessica Martin, who leads our specialized senior programs. "The key is meeting people where they are, then building gradually from that foundation."
For those with arthritis, joint pain can make balance work seem intimidating. We recommend performing exercises in our therapeutic pool where warm water reduces joint stress while providing gentle resistance. Many clients find their morning stiffness improves when they schedule sessions later in the day, and using chairs with supportive armrests creates confidence during standing exercises.
Seniors with osteoporosis need special consideration to protect their bone health. We emphasize proper alignment in all positions, avoiding excessive forward bending that might strain the spine. Instead, we focus on gentle weight-bearing exercises that actually strengthen bones while improving balance. Tai chi movements are modified to minimize twisting motions while maintaining their balance benefits.
Post-stroke recovery presents unique challenges that respond beautifully to specialized balance work. We typically begin with seated balance exercises to rebuild core stability, often using a gait belt with therapist assistance when transitioning to standing work. Many stroke survivors have asymmetrical strength and sensation, so we deliberately focus on weight shifting to the affected side, using mirror therapy to improve body awareness and neural reconnection.
For clients with Parkinson's Disease, we've developed specific approaches to address the freezing and shuffling that often compromise balance. Visual cues like colorful floor markers or laser pointers help overcome movement initiation problems. We incorporate rhythmic activities with music to improve timing and flow of movement. Most importantly, we schedule sessions when medication effectiveness is at its peak.
"The change in our Parkinson's clients has been incredible," notes physical therapist Alex Rivera. "One gentleman who could barely stand when he started now confidently performs tai chi sequences that would challenge people half his age."
Peripheral neuropathy creates balance challenges through reduced foot sensation. For these clients, we emphasize visual feedback—often having them watch their feet in a mirror during exercises. Textured mats provide improved sensory input that helps compensate for diminished foot sensation. We place special focus on ankle strengthening exercises and progress very gradually with close supervision.

When to Dial It Back—or Step It Up
Recognizing when to modify your balance training for seniors program is essential for both safety and progress. Your body provides clear signals when you need to make adjustments.
Listen to your body when it suggests you should dial back intensity. Pain during or after exercises (beyond mild muscle soreness) is never something to push through. Excessive fatigue that doesn't improve with rest indicates you may be doing too much too soon. If you notice increased unsteadiness or near-falls, that's your balance system telling you it's overwhelmed. Flare-ups of chronic conditions or feelings of anxiety about exercises are equally important warning signs.
"Many seniors have been taught to 'push through the pain,' but that's outdated and dangerous advice for balance work," explains Dr. Robert Chen at our Marine Park location. "The sweet spot is feeling challenged but confident."
When warning signs appear, we recommend returning to a previous, more comfortable level of exercise. Reduce your repetitions, add more support like a sturdy chair or wall, take frequent rest breaks, and focus on deep, relaxing breaths. There's no shame in stepping back temporarily—it's often the fastest path to long-term progress.
On the flip side, your body also tells you when it's ready for greater challenges. Exercises that feel too easy or boring indicate your balance systems have adapted and need new stimulation. When you can maintain proper form throughout all repetitions without fatigue, and you feel confident and stable after consistent practice for 2-3 weeks, it's time to progress.
Ready to advance? Try these proven techniques for challenging your balance systems:
Eyes-closed challenges eliminate visual input, forcing your vestibular and proprioceptive systems to work harder. Start with just 5 seconds of closed eyes while holding onto support, gradually increasing duration as you gain confidence.
Unstable surfaces like foam pads, pillows, or balance discs create controlled instability that strengthens your balance responses. One client, Margaret, age 75, began by standing on a folded towel and progressed to performing her entire routine on a specialized balance pad.
Dual-task training adds a cognitive component while balancing—try counting backward by 3s or naming animals while performing your exercises. This mimics real-world situations where you need to think and balance simultaneously.
Speed variations between slow and moderate movements during balance exercises help prepare you for unexpected situations in daily life. Start with deliberate, measured movements, then gradually introduce sections of slightly faster (but still controlled) motion.
"Finding your personal balance edge is what creates progress," says physical therapist Sarah Johnson. "At Evolve, we help you find exactly where that edge is—challenging enough to stimulate improvement but safe enough to build confidence rather than fear."
Tracking Your Progress & Knowing When to Seek Help
Watching your balance improve over time can be incredibly motivating. At Evolve, we've seen how tracking progress not only keeps our seniors engaged but also helps them recognize when they're ready for more challenges.
"Last month, I could barely stand on one leg for 3 seconds," shared Eleanor, one of our 68-year-old clients. "Yesterday, I hit 15 seconds! Seeing those numbers improve each week keeps me coming back to my exercises."
Here are simple, effective ways to monitor your balance training for seniors journey:
The 4-Stage Balance Test recommended by the CDC offers a straightforward assessment you can perform weekly. Start with feet side by side (easiest), progress to semi-tandem stance (heel of one foot beside the big toe of other foot), then to tandem stance (heel-to-toe), and finally to single-leg stance (most challenging). Using a stopwatch, record how long you can hold each position, aiming for up to 30 seconds.
The Timed Up and Go (TUG) Test measures functional mobility. Time yourself as you rise from a chair, walk 10 feet, turn around, return to the chair, and sit down. This simple test is remarkably revealing—healthcare professionals consider times over 12 seconds as potentially indicating increased fall risk.
Keeping a Fall Diary might sound discouraging, but tracking any stumbles, near-falls, or actual falls (noting where they happened and what might have contributed) can help identify patterns and specific situations to work on. Many of our clients at Evolve find that most of their balance challenges occur in predictable scenarios—like reaching for items on high shelves or walking on uneven sidewalks.
A simple Exercise Log documenting which exercises you completed, how many repetitions, and any difficulties encountered helps you and your physical therapist fine-tune your program as you progress.
Balance Test Initial Assessment After 4 Weeks After 8 Weeks Goal Single-leg stand 5 seconds 10 seconds 15 seconds 30 seconds Heel-to-toe walk 5 steps 10 steps 15 steps 20 steps TUG Test 14 seconds 12 seconds 10 seconds Under 10 seconds Sit-to-stand (30 sec) 8 repetitions 10 repetitions 12 repetitions 15 repetitions
"The numbers are helpful, but the real victory is in everyday life," explains Dr. Sarah Johnson at our Park Slope location. "When clients tell me they confidently steerd a crowded farmer's market or handled those tricky steps at their grandchild's school without a second thought—that's when I know our balance training for seniors program is truly working."
Consulting a Professional
While home-based balance exercises provide tremendous benefits, partnering with a physical therapist can take your progress to new levels. At Evolve Physical Therapy + Sports Rehabilitation, our specialists provide expert assessment of your specific balance challenges, create customized exercise programs, offer hands-on guidance for proper form, safely progress difficulty levels, and integrate balance work with other aspects of fitness.
"Many people don't realize that balance training isn't one-size-fits-all," notes Dr. Rodriguez, our Clinical Director. "What works beautifully for your neighbor might not address your specific challenges. A physical therapist can identify exactly which balance systems need the most attention in your case."
We recommend consulting with a physical therapist if you:
Have experienced a fall in the past year. Even a single fall significantly increases your risk of falling again. Early intervention can break this cycle.
Use a mobility aid like a cane or walker. We can help you maximize stability with your device while potentially working toward reduced dependence.
Feel unsteady during everyday activities. That feeling of unsteadiness is your body's warning system—don't ignore it.
Live with conditions affecting balance. Conditions like neuropathy, Parkinson's disease, stroke, or vestibular disorders benefit from specialized approaches.
Take multiple medications. Many common medications can affect balance, and a PT can help develop strategies to counteract these effects.
Pay particular attention to these red-flag symptoms that warrant immediate professional attention: sudden severe dizziness, a new pattern of falling consistently in one direction, falls without awareness, loss of consciousness, or significant fear that's limiting your daily activities.
"I always tell my clients that balance training for seniors is most effective as prevention rather than rehabilitation," Dr. Rodriguez emphasizes. "Why wait until after a serious fall to seek help? The work we do proactively can save so much hardship down the road."
For those unable to visit our Brooklyn locations in person, we offer telehealth options where we can observe your balance exercises, make real-time corrections, and progress your program remotely. Technology has made professional guidance more accessible than ever—something our clients particularly appreciated during the pandemic.
Improved balance isn't just about preventing falls—it's about maintaining independence, confidence, and quality of life as you age. And that's a goal worth tracking.
Frequently Asked Questions about Balance Training for Seniors
How soon will I notice improvement?
When clients first come to Evolve for balance training for seniors, they often ask how quickly they'll see results. The good news is that most people notice small improvements within 2-4 weeks of consistent practice. Those initial victories might be as simple as feeling more confident when reaching for something on a high shelf or navigating a curb without hesitation.
The more significant changes, however, typically emerge after 8-12 weeks of regular training. This timeline mirrors what researchers found in a 2019 study, where older adults practicing balance exercises three times weekly showed measurable stability improvements at the six-week mark, with continued gains through their 12-week program.
"Balance improvement follows a pattern similar to strength training," explains Dr. Lisa Chen from our Park Slope location. "You'll likely notice small changes quickly as your nervous system adapts, followed by more substantial improvements as neural pathways strengthen and muscles respond to the new demands."
Many of our clients keep a simple balance journal, noting little victories along the way—like standing on one leg for five seconds longer or walking heel-to-toe across the entire living room. These incremental improvements build both physical stability and psychological confidence.
Can strength, flexibility, and cardio replace balance drills?
I hear this question frequently in our Brooklyn clinics. While strength, flexibility, and cardiovascular exercises are essential pieces of the fitness puzzle for seniors, they don't specifically target the complex neural pathways and sensory integration needed for optimal balance.
"I often see clients who faithfully lift weights at the gym three times a week but still struggle with balance," notes Dr. James Wilson from our Gravesend facility. "That's because balance is a specific skill that requires targeted training of the proprioceptive, visual, and vestibular systems all working together."
Think of it this way: strength gives you the power to recover from a wobble, flexibility allows your joints to move through necessary ranges, and cardiovascular fitness provides the endurance for daily activities. But balance training for seniors teaches your brain how to integrate information from your eyes, ears, and body to maintain stability in the first place.
The most effective approach combines all these elements in a comprehensive program. At Evolve, we design personalized plans that address each component, with particular emphasis on the specific balance challenges each person faces. For some, that might mean more vestibular exercises; for others, proprioceptive training takes priority.
Is it safe to train balance if I use a cane or walker?
Absolutely! In fact, balance training for seniors who use assistive devices isn't just safe—it's especially valuable.
"Using a cane or walker doesn't mean you should avoid balance training—quite the opposite," emphasizes Dr. Maria Gonzalez at our Mill Basin location. "With proper supervision and modifications, balance exercises can help reduce dependence on assistive devices or ensure they're used more effectively and safely."
Margaret, an 81-year-old client who came to us after a hip replacement, was initially concerned that her walker made balance exercises impossible. We started with seated activities and supported standing exercises, always keeping her walker within reach. Six months later, she steers her apartment with just a cane and uses her walker only for longer outdoor excursions.
At Evolve, we take a thoughtful, graduated approach for clients with assistive devices:
We begin with seated balance exercises and fully supported standing activities, ensuring complete safety. As confidence builds, we progress to exercises performed while holding the assistive device, then practice short periods of standing near (but not holding) the device while maintaining safety. Throughout this process, we gradually extend the duration and complexity of exercises based on individual progress.
Some clients ultimately reduce their reliance on assistive devices, while others maintain their use but with greater confidence and stability. Both outcomes represent success in our view—the goal is always improved quality of life and independence, whatever form that takes for each individual.
Conclusion
There's something truly empowering about taking control of your balance and stability as you age. After working with thousands of seniors at Evolve Physical Therapy + Sports Rehabilitation, I've witnessed how balance training for seniors transforms lives—not just by preventing falls, but by restoring confidence and independence.
Think of balance training as an investment in your future self. Like Margaret, who at 79 told me, "I used to think my unsteady days were just part of getting older. Now I'm more stable than I was at 70!" Her story isn't unusual among our Brooklyn clients who commit to regular practice.
The journey to better balance isn't complicated, but it does require commitment:
Start exactly where you are today—not where you think you "should" be. If that means holding onto a chair for every exercise, that's perfectly fine. Safety always comes first, and progress builds from a foundation of confidence.
Consistency truly is the secret ingredient. Even short 10-minute balance sessions three times weekly yield remarkable results over time. As one of our Mill Basin clients puts it, "It's like compound interest for your body—small deposits of effort that create big returns."
Your balance training should evolve as you do. When exercises begin feeling comfortable, that's your body's signal that it's ready for the next challenge. Those moments of progression—when you first stand on one leg without support or walk heel-to-toe across the room—deserve celebration!
What makes me most passionate about our work at Evolve is seeing how improved balance extends beyond physical stability. Our clients report sleeping better, experiencing less anxiety, and participating more fully in family activities. One gentleman recently told me he finally felt confident enough to dance at his granddaughter's wedding—a moment he'd been dreading missing.
While the exercises we've outlined provide an excellent starting point, personalized guidance often makes the difference between good results and transformative ones. Our physical therapists throughout Marine Park, Gravesend, Midwood, Park Slope, and Mill Basin specialize in tailoring balance programs to individual needs, especially for those with specific health concerns or fall history.
Eleanor, an 84-year-old client who started with us after a hip fracture, captures the essence of successful balance training for seniors: "I don't just have better balance now—I have my life back. I garden, shop, and play with my great-grandchildren without that constant fear of falling. These simple exercises have given me freedom I thought was gone forever."
Your journey to better balance starts with a single step—and we're here to ensure it's a steady one. Whether you're proactively working to prevent falls or recovering from a balance-related incident, our team at Evolve Physical Therapy + Sports Rehabilitation is ready to support you with evidence-based, hands-on guidance that builds both stability and confidence.
For more information about our specialized balance programs or to schedule an assessment, contact us today. Your fall-free future is within reach—and it's so worth the effort.
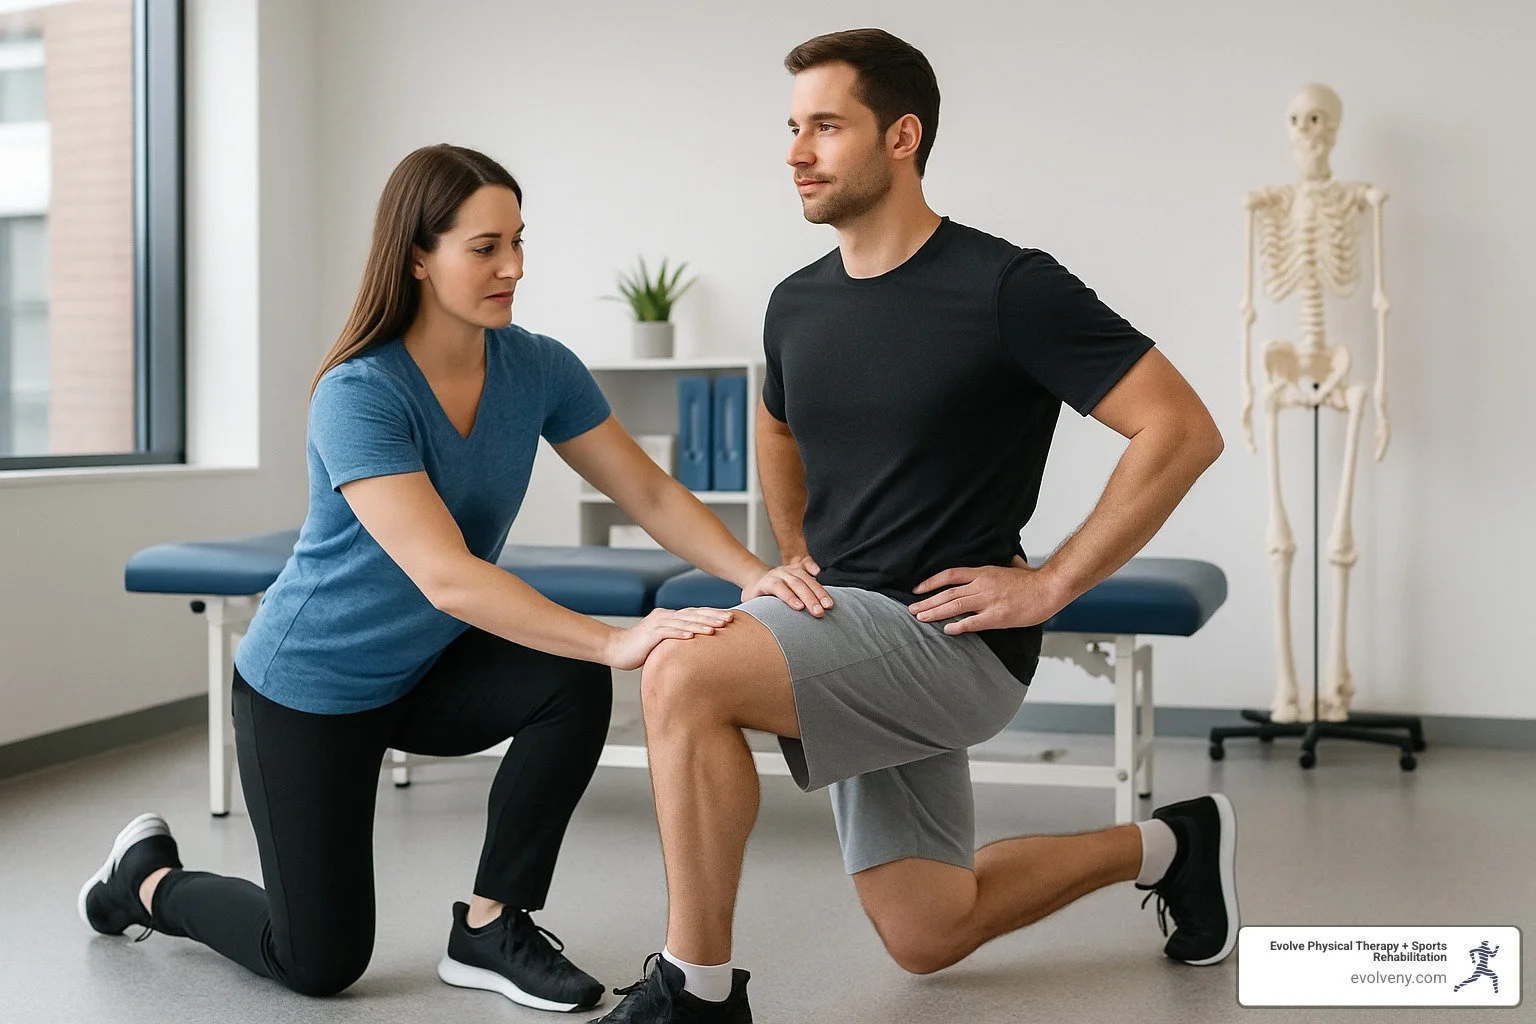
Strengthen and Stretch: Exercises for Hip Labral Tears
Understanding Hip Labral Tears and Recovery
Here are the most effective physical therapy exercises for labral tear hip rehabilitation:
Early Phase (Weeks 1-4)
Hip flexor stretches (30 sec holds, 3x daily)
Glute bridges (10 reps, 3 sets)
Isometric hip exercises
Intermediate Phase (Weeks 5-7)
Single-leg bridges (10 reps/side)
Standing hip abduction with band (3 sets of 10)
Wall sits with clam shells (60-sec holds)
Advanced Phase (Weeks 8-12)
Fire hydrants with resistance (12 reps, 3 sets)
Monster walks (15-20 steps each direction)
Side plank clam shells (8-10 reps/side)
Physical therapy exercises for labral tear hip conditions are vital for recovery, whether you're managing symptoms conservatively or rehabilitating after surgery. A hip labral tear affects the cartilage ring (labrum) that lines your hip socket, potentially causing pain, clicking, and limited mobility. While this might sound alarming, the good news is that many labral tears respond well to targeted exercise therapy.
Contrary to what you might expect, hip labral tears are actually quite common. Studies show that up to 40% of people in their 20s and 30s have labral tears with no symptoms at all. For those experiencing pain, a structured rehabilitation program typically spans 8-12 weeks, focusing on strengthening the muscles around the hip, improving mobility, and restoring proper movement patterns.
The key to successful recovery lies in following a progressive exercise protocol that respects tissue healing timelines while gradually challenging the hip joint. Most importantly, exercises should never cause sharp pain—if they do, it's a sign to modify or consult your healthcare provider.
I'm Lou Ezrick, founder of Evolve Physical Therapy, where I've spent nearly two decades developing specialized physical therapy exercises for labral tear hip rehabilitation programs that have helped thousands of patients return to pain-free activity without surgery.

Standing Hip Abduction
If you're recovering from a hip labral tear, the standing hip abduction exercise might just become your new best friend. This movement specifically targets your gluteus medius—a key muscle that helps stabilize your hip and takes pressure off your injured labrum during everyday activities.
"I recommend this exercise to almost all my hip labral tear patients," says Lou from our physical therapy team at Evolve. "When your lateral hip muscles are strong, they help keep your femoral head properly positioned in the socket, which can significantly reduce labral stress and pain."
Here's how to perform this physical therapy exercise for labral tear hip rehabilitation correctly:
Stand tall with your feet hip-width apart, maintaining good posture
Place a resistance band around your ankles or just above your knees
Shift your weight onto your stronger leg (or less painful side)
Slowly move your other leg out to the side about 12-18 inches
Hold for 2-3 seconds at the top position
Lower your leg with control
Complete 3 sets of 10 repetitions on each side, resting 30-60 seconds between sets
Balance is crucial here—don't hesitate to lightly touch a wall or chair for support if needed. The most common mistake I see patients make is hiking their hip during the movement. The motion should come purely from your hip joint, not by tilting your pelvis.
Keep your toes pointing forward throughout the exercise and maintain a slight bend in your supporting knee to protect the joint. As you lift your leg, you should feel the work happening along the outside of your hip—that's your gluteus medius saying hello!
Sarah, one of our regular patients who came to us with a labral tear from running, shared: "This exercise felt awkward at first, but after consistently doing it for two weeks, I noticed I had way less pain walking up the subway stairs. It was like my hip finally had the support it needed."
Ready to challenge yourself? Once you've mastered the basic movement, try increasing the resistance band strength, holding the abducted position longer, or performing the exercise on a foam pad to improve your balance and proprioception.
This exercise should never cause sharp pain in your hip—a mild burn in the muscles is normal, but anything more intense means you should modify your technique or consult with one of our physical therapists at Evolve.
Single-Leg Bridge
Looking for a powerful physical therapy exercise for labral tear hip rehabilitation that won't aggravate your symptoms? The single-leg bridge deserves a special place in your recovery program.
This exercise is a true multitasker for your posterior chain—those essential muscles running along the back of your body. It specifically targets your glutes and hamstrings while being gentle on the front of the hip where most labral tears occur.

What makes the single-leg bridge so valuable for hip recovery? For starters, it improves pelvic stability during everyday movements like walking and climbing stairs. It also strengthens your hip extensors without compressing the sensitive anterior hip. Perhaps most importantly, it helps establish proper muscle activation patterns that actually protect your labrum from further irritation.
"Many of our patients with labral tears show weakness in their gluteal muscles," explains our physical therapy director at Evolve. "This forces other structures to pick up the slack, potentially worsening the tear. The single-leg bridge addresses this imbalance while keeping the hip in a safe, non-impinging position."
Here's how to do it right:
Lie on your back, knees bent, feet flat on the floor about hip-width apart
Rest your arms at your sides with palms down for stability
Engage your core by gently drawing your belly button toward your spine
Extend one leg straight out while keeping both thighs parallel
Press through the heel of your planted foot, lifting your hips toward the ceiling
At the top, give your glutes a good squeeze, forming a straight line from shoulders to extended knee
Hold this position for 2-5 seconds, breathing normally
Lower with control—no dropping!
Complete 10 repetitions before switching sides
Aim for 3 sets with about 2 minutes of rest between them
When you're ready for more challenge, we often introduce the single-leg bridge with box variation at Evolve. Simply place one foot on a sturdy box or step (12-18 inches high) and extend your other leg. Push through the heel on the box to lift your hips. This increases both the range of motion and the work for your glutes.
One quick but important tip: keep your pelvis level throughout the exercise. If you notice it rotating or tilting as you lift, that's a sign to reset your form. And if you feel any pinching in the front of your hip, lower the height of your bridge or return to regular double-leg bridges until you build more strength.
As Michael, a 45-year-old patient recovering from a labral tear, shared with us: "The single-leg bridge was a game-changer for me. After three weeks of consistent practice, I noticed I could walk longer distances without the nagging pain in my hip. Plus, my balance improved dramatically!"
Fire Hydrants
Ever watched a dog lift its leg at a fire hydrant? That's exactly the movement we're mimicking with this exercise—and it's one of the most effective physical therapy exercises for labral tear hip rehabilitation you can do.
Fire Hydrants target your gluteus medius and external hip rotators, which are crucial muscles for hip stability. These muscles help position your femur (thigh bone) properly in the hip socket, taking pressure off your labrum where it's often irritated.
"I recommend Fire Hydrants to almost all my hip patients," says Lou Ezrick, founder of Evolve Physical Therapy. "They build strength in exactly the right places to help decompress the hip joint where labral tears typically occur."
Here's how to do Fire Hydrants correctly:
Start on all fours in a quadruped position with your hands under your shoulders and knees under your hips
Brace your core—imagine pulling your belly button toward your spine
Keeping your knee bent at 90 degrees, lift one leg out to the side
Raise until your thigh is roughly parallel to the floor (or as high as comfortable without pain)
Hold briefly at the top, then lower with control
Complete 12 repetitions before switching sides
Aim for 2-3 sets total
The key to getting the most benefit is proper form. Keep your weight evenly distributed between both hands and your supporting knee. Your pelvis should stay level throughout—resist the urge to shift your body as you lift your leg. Think about initiating the movement purely from your hip joint.
"After six weeks of doing Fire Hydrants daily, I could finally cross my legs again without that painful catching sensation," shares Mike, a 42-year-old patient recovering from a labral tear. "It was the first exercise where I really felt those side hip muscles working."
For those progressing well, try adding a mini resistance band just above your knees. This increases the challenge to your external rotators and can accelerate strength gains. You can also experiment with extending your leg straight out to the side at the top of the movement for an additional challenge.
Remember to breathe normally throughout the exercise. While you might feel a gentle stretch sensation, sharp pain is a sign to modify or stop. Always prioritize quality over quantity—a few perfect repetitions will benefit you more than many sloppy ones.
Wall Sit with Clam Shell
Remember those wall sits your gym teacher made you do in school? We're bringing them back—but with a therapeutic twist that makes them incredibly effective for hip labral tear recovery!
The Wall Sit with Clam Shell is one of my favorite combination exercises because it works multiple muscle groups simultaneously. This efficient movement strengthens your quadriceps through the isometric wall hold while also targeting those critical external hip rotators that help protect your labrum. As a bonus, your core gets a great workout as it stabilizes your pelvis throughout the exercise.
"What makes this exercise so valuable for my patients with labral tears is how it trains the hip muscles in a functional, weight-bearing position," explains Lou, our director at Evolve. "This translates much better to everyday activities than exercises done lying down."
Here's how to perform this exercise correctly:
Stand with your back flat against a wall
Place a mini resistance band just above your knees
Walk your feet forward about 18-24 inches, keeping them shoulder-width apart
Slide down the wall into that invisible chair position, with knees bent at about 45-60 degrees
While holding this position, slowly open one knee outward against the band
Hold for 2-3 seconds, then return to start
Alternate legs for 10 repetitions per side
Aim to maintain the wall sit for 60 seconds per set
Complete 3 sets, resting between each
Important technique tips: Keep your back flush against the wall and your weight in your heels, not your toes. Don't let your knees collapse inward or push forward beyond your toes. Your feet should stay firmly planted as you open your knees—no rotating!
Too challenging? No problem. Start with a higher wall sit position (less knee bend) and gradually work your way down as you build strength. You can also begin without the resistance band and add it when you're ready for more of a challenge.
I've seen remarkable progress in patients who consistently incorporate this exercise. Jennifer, a 38-year-old dancer with a labral tear, told me: "The Wall Sit with Clam Shell gave me back my confidence. After six weeks, I could finally return to basic dance movements without feeling like my hip might give way."
This physical therapy exercise for labral tear hip rehabilitation is particularly effective because it trains proper muscle activation patterns while in positions that mimic real-life movements—exactly what you need for long-term healing and prevention of future injuries.
Horizontal Squat Stretch
There's something wonderfully restorative about the Horizontal Squat Stretch when you're dealing with a labral tear. This gentle mobility exercise has become one of our patients' favorites at Evolve Physical Therapy because it offers relief while promoting healing.
What makes this stretch so perfect for physical therapy exercises for labral tear hip rehabilitation is how it creates space in the joint. Unlike many stretches that can compress the labrum, this position actually decompresses the hip joint while gently opening up your inner thighs and hip rotators.
"I recommend the Horizontal Squat Stretch to almost all my labral tear patients," shares our lead hip specialist at Evolve. "It's like hitting a reset button for tight hips without aggravating the tear."
Here's my simplified approach to getting this stretch just right:
Start on all fours with your hands directly under your shoulders. Spread your knees wider than your hips—wider than your hands too. Keep your feet in line with your knees, not turned in or out. Now for the magic: slowly sink your hips back toward your heels, moving backward until you feel that "ahh" stretch sensation in your inner thighs. Hold this sweet spot for 30-60 seconds, breathing deeply. Return to start and repeat three times.
The beauty of this stretch is its adaptability. If you're feeling particularly tight, don't force it—just reduce the width between your knees. For those more flexible folks looking for a deeper release, try gently rocking side to side while in the stretched position.
"Before finding this stretch, I couldn't put on my socks without pain," David, our 45-year-old hiking enthusiast patient told me. "After doing the Horizontal Squat Stretch daily for two weeks, not only could I dress without wincing, but the constant clicking in my hip started to disappear."
For knee comfort, I often suggest placing a folded towel underneath for cushioning. If your wrists complain, try lowering to your forearms or using yoga blocks for support.
This stretch works best when you're already a bit warmed up, so consider it after a short walk or gentle movement. Consistency is key—aim to include it in your daily routine for the best results. Your hips will thank you with improved mobility and decreased discomfort as you continue your labral tear recovery journey.
Kneeling Hip Flexor Stretch
If you've been dealing with a hip labral tear, you're probably familiar with that nagging pain in the front of your hip. That's where the Kneeling Hip Flexor Stretch comes to the rescue—it's truly one of the most effective physical therapy exercises for labral tear hip rehabilitation in our toolkit at Evolve.
This stretch targets those pesky iliopsoas muscles (your hip flexors) that tend to get tight and cranky, especially if you spend hours sitting at a desk. When these muscles tighten up, they can actually pull the head of your femur forward in the socket, putting unwelcome pressure right where your labral tear is trying to heal. No wonder it hurts!
"I often tell my patients that tight hip flexors are like a constant tug-of-war on your hip joint," says our hip specialist. "This simple stretch can provide almost immediate relief by releasing that forward pressure."
Here's how to do this stretch properly:
Start in a half-kneeling position with one knee on the floor
Position your other foot flat on the floor in front of you, knee at a 90-degree angle
Place a cushion or folded towel under your kneeling knee (your joints will thank you!)
Keep your torso upright with your core gently engaged
The magic happens when you tuck your tailbone under (posterior pelvic tilt) while gently shifting weight forward
You'll feel a stretch along the front of your hip and thigh on the kneeling leg
Hold for 30 seconds, breathing normally
Release and repeat 3 times on each side

The most common mistake I see patients make is arching their lower back instead of tucking the pelvis. It's not about leaning forward—it's about that subtle pelvic tilt that targets the right muscles.
One of our patients, Lisa, works full-time at a computer and was diagnosed with a labral tear after months of hip pain. "This stretch has been a game-changer for me," she shared. "I do it three times a day, especially after long meetings. The relief is almost immediate, and that annoying clicking sound has significantly decreased."
For those of you who've mastered the basic version, try raising the arm on the same side as your kneeling leg overhead. This creates a gentle spinal rotation and deepens the stretch through your entire front body chain.
To get the most benefit, consistency trumps intensity. We recommend performing this stretch at least three times daily, especially after you've been sitting for a while. Your hip flexors will gradually lengthen, taking pressure off that sensitive labral area.
This stretch should feel good—a gentle pulling sensation is normal, but if you feel any sharp pain, ease up and consult your physical therapist about modifying your technique.
Monster Walks
If you've ever seen someone shuffling sideways with a mini-band around their legs looking a bit like Frankenstein's monster, you've witnessed one of the most valuable physical therapy exercises for labral tear hip rehabilitation in action!
Monster Walks are a fan favorite at Evolve Physical Therapy because they target those crucial hip stabilizers—particularly the gluteus medius and minimus—that often become weak in patients with labral tears. These muscles are your hip's natural "security guards," keeping your femur properly centered in the socket where the labrum lives.
"What makes Monster Walks so effective is that they train your hip muscles in a functional, weight-bearing position," explains our hip specialist. "Unlike isolated exercises where you're lying down, Monster Walks challenge your hip stabilizers while you're upright and moving—just like in real life."
Here's how to perform this exercise with proper form:
Loop a resistance band just above your knees (for beginners) or around your ankles (for more challenge)
Stand with feet hip-width apart, creating slight tension in the band
Bend your knees slightly and hinge forward at the hips about 15-20 degrees
Engage your core—imagine drawing your belly button toward your spine
Step sideways with one foot while maintaining tension in the band
Follow with your other foot, keeping the same distance between your feet
Continue stepping sideways for 15-20 steps in one direction
Reverse direction and return to your starting point
Complete 2-3 sets in each direction
Remember to keep your toes pointing forward throughout the movement—no duck-walking allowed! The resistance should feel challenging but not painful. If your knees start collapsing inward or your form breaks down, it's a sign the band resistance might be too strong.
"I recommend Monster Walks to almost all my labral tear patients," says our PT director. "They're simple but incredibly effective for improving hip stability and proprioception—your body's ability to know where it is in space."
One of our patients, James, a 40-year-old recreational basketball player, found Monster Walks particularly helpful: "After six weeks of consistent Monster Walks, I noticed a huge difference when playing basketball. That feeling of my hip 'giving way' when I changed direction disappeared almost completely."
As you progress, we can make this exercise more challenging by increasing band resistance, adding a backward walking component (taking diagonal steps backward), or performing the exercise in a deeper squat position. The key is consistent practice—aim for Monster Walks 3 times per week, focusing on quality over quantity.
For optimal results, pair Monster Walks with the other exercises in your hip labral tear rehabilitation program. Together, they create a comprehensive approach that strengthens all the muscle groups supporting your hip joint, potentially speeding your recovery and preventing future issues.
Side Plank Clam Shells
If you're looking for a challenge that really ties your hip and core strength together, Side Plank Clam Shells might just become your new favorite exercise. This movement combines two powerhouse exercises into one advanced physical therapy exercise for labral tear hip rehabilitation.
Think of this as the graduate-level exercise in your hip recovery journey – one that simultaneously works your hip rotators and core stability in a way that mimics real-life movements.
"What I love about Side Plank Clam Shells is how they teach your body to coordinate between core and hip strength," explains our hip specialist at Evolve. "In everyday life, your core and hips don't work in isolation – they work together. This exercise trains that connection."
Here's your step-by-step guide to performing Side Plank Clam Shells correctly:
Start in a side plank position, resting on your forearm with elbow directly under your shoulder
Stack your feet, knees, hips, and shoulders in one straight line
Place a mini resistance band just above your knees (optional for beginners)
Bend both knees to about 45 degrees
While maintaining your side plank position, slowly lift your top knee away from the bottom one
Keep your feet touching throughout the movement (this is key!)
Hold at the top for a brief 1-2 second count
Lower with control back to the starting position
Aim for 8-10 repetitions before switching sides
Complete 2-3 sets per side
Your body will try to find the path of least resistance during this exercise – don't let it! Keep your body in a straight line from head to feet, engage your core throughout, and resist the urge to rotate your hips backward as you lift your knee. Your shoulder should stay stable too – don't let it roll forward.
"I remember struggling with this exercise when I first tried it," shares Emma, a 32-year-old yoga instructor who came to us with a labral tear. "But it became a turning point in my recovery. Once I mastered Side Plank Clam Shells, I could return to challenging yoga poses that had previously triggered my hip pain."
If you find this movement too difficult at first, don't worry! We recommend mastering regular side planks and standard clam shells separately before combining them. You can also modify by keeping your bottom knee bent on the floor for extra support.
This exercise typically enters your routine during the advanced phase of rehabilitation (around weeks 8-12), once you've built a solid foundation of hip and core strength. One perfect rep is worth more than ten sloppy ones – focus on quality over quantity.
At Evolve Physical Therapy, we've found that this exercise particularly helps patients preparing to return to more demanding activities like sports, dance, or advanced fitness classes. The combination of anti-rotation core work with hip external rotation creates the perfect preparation for multidirectional movements in daily life and athletic activities.
Physical Therapy Exercises for Labral Tear Hip: Progression & Safety
Moving through hip labral tear rehabilitation is a bit like climbing a mountain—you need the right pace, equipment, and strategy to reach the summit safely. At Evolve Physical Therapy, we've guided countless patients through this journey using evidence-based approaches that respect your body's healing timeline.
"The biggest mistake I see patients make is rushing through their rehab," shares Lou Ezrick, our clinical director. "Recovery isn't about racing through exercises—it's about thoughtfully loading the hip to encourage proper healing while listening to your body's feedback along the way."
When should you progress to the next phase of physical therapy exercises for labral tear hip rehabilitation? We follow these clear guidelines:
Your pain should stay at 3/10 or less during and after exercises. Think of pain as a traffic light—mild discomfort is a yellow light (proceed with caution), while sharp pain is definitely a red light (stop).
There shouldn't be a "pain hangover" the next day. If Tuesday's exercises leave you limping on Wednesday, that's your body saying "too much, too soon."
Quality matters more than quantity. Before adding weight or repetitions, make sure your form is spot-on. As my grandmother used to say, "If something's worth doing, it's worth doing right!"
Your range of motion should be stable or improving—never decreasing. Backwards progress is a clear sign to reassess.
Daily activities like walking and climbing stairs should feel progressively easier. These functional improvements are the true measure of successful rehabilitation.
Research published in the Journal of Orthopaedic & Sports Physical Therapy backs our approach, recommending a 10-12 week phased protocol for conservative management of labral tears. The key insight? Your body's response—not the calendar—should guide your progression. For more detailed information on hip labral tear healing timelines, you can review Mayo Clinic's comprehensive guide on hip labral tears.
While we're eager to get you back to your favorite activities, certain movements are definite no-gos during early healing. Avoid the FADIR position (flexion, adduction, internal rotation), which can pinch the labrum. Skip prolonged sitting without breaks, high-impact exercises, and aggressive stretching that causes pain.
When to Begin Physical Therapy Exercises for Labral Tear Hip
"When can I start exercising?" is often the first question patients ask after a labral tear diagnosis. The answer depends on several factors we carefully evaluate at Evolve Physical Therapy.
For non-surgical management, you can typically begin gentle exercises soon after diagnosis, once initial pain management strategies are in place. We look for your ability to bear weight on the affected leg with minimal pain—a good indicator that basic exercises won't overwhelm the joint.
We'll start with isometric exercises—gentle muscle contractions without joint movement—which strengthen surrounding muscles without stressing the labrum. As your symptoms allow, we'll carefully introduce more dynamic movements.
If you've had surgery, your timeline will follow your surgeon's specific protocol. Most patients begin protected weight-bearing and gentle range of motion exercises within days after surgery. The type of procedure matters too—a labral repair typically requires more protection than a debridement.
"What many people don't realize," explains our hip specialist, "is that the average person experiences symptoms for over two years before receiving a proper diagnosis. During this time, your body develops compensatory movement patterns that need to be addressed alongside the tear itself."
Your starting point will be influenced by whether your injury is fresh or long-standing, how much swelling is present in the joint, and your weight-bearing status. This is why cookie-cutter exercise programs often fall short—your rehabilitation should be as unique as you are.
Red Flags: Stop Physical Therapy Exercises for Labral Tear Hip If...
While some muscle soreness is normal during rehabilitation, certain symptoms are like warning lights on your car's dashboard—ignore them at your peril.
Contact your healthcare provider immediately if you experience:
Sharp, catching pain in the groin that feels like something is being pinched inside the joint. This could indicate the labrum is getting caught between bone surfaces.
Locking or giving way of the hip joint, which might suggest a mechanical problem that needs medical attention.
Increasing night pain that interrupts your sleep. Rehabilitation should improve sleep, not worsen it.
Progressive loss of motion despite consistent exercises. You should be gaining mobility, not losing it.
Pain radiating down your leg, which might signal nerve involvement beyond the labral issue.
Noticeable swelling around the hip joint, potentially indicating inflammation that needs to be addressed.
Pain that hangs around more than 24 hours after exercise or causes you to limp.
"There's a big difference between productive discomfort and problematic pain," notes our senior therapist. "Productive discomfort feels like muscles working hard and fades relatively quickly. Problematic pain feels sharp, lingers for hours, and often causes you to alter how you move."
If these red flags appear, temporarily modify or pause your exercise program and check in with your physical therapist. Sometimes we need to adjust your plan or your physician might want additional imaging to ensure optimal healing.
Listening to your body isn't being weak—it's being wise. The most successful recoveries come from patients who partner with their healthcare team and respect the healing process every step of the way.
Frequently Asked Questions about Hip Labral Tear Rehab
How long does conservative recovery usually take?
When patients first learn they have a hip labral tear, their most pressing question is almost always about timeline. At Evolve Physical Therapy, we typically see conservative recovery taking 8-12 weeks with dedicated physical therapy exercises for labral tear hip rehabilitation.
That said, recovery isn't one-size-fits-all. Your personal journey depends on several factors: the size and location of your tear, whether it happened suddenly or developed gradually, any underlying hip conditions like impingement or dysplasia, plus your age, activity level, and overall health. And let's not forget one of the biggest factors – how consistently you perform your home exercise program!
"The labrum will take approximately 8-12 weeks to heal on its own in a perfect world with conservative management and physical therapy," I often tell my patients. I always make sure to explain that the labrum has limited blood supply, which is why patience is so important during recovery.
The good news? Many of our patients at Evolve start noticing significant symptom improvement within 4-6 weeks of beginning appropriate exercises, even though the tissue itself is still healing. Research published in the American Journal of Sports Medicine found that about two-thirds of patients with labral tears became symptom-free with conservative treatment including physical therapy – that's encouraging!
I've noticed over my years of practice that the patients who consistently show up for themselves – doing their exercises regularly and respecting activity modifications – tend to recover more quickly than those who take a more casual approach to their rehab program.
Which movements should I avoid early on?
During early rehabilitation, certain movements can put extra stress on your healing labrum. Think of these as the "not yet" movements – ones you'll likely return to eventually, but need to avoid while healing begins.
Deep squatting beyond 90 degrees of hip flexion is a common culprit for irritation. Similarly, excessive hip rotation, especially when combined with flexion, can aggravate a labral tear. I always caution my patients to temporarily pause high-impact activities like running or jumping, as these can delay healing.
"Sitting is the new smoking" takes on extra meaning with labral tears – prolonged sitting without position changes can increase pressure on the labral tissue. Set a 30-minute timer to remind yourself to stand and move around. Also on the avoid list: heavy lifting that causes hip strain, aggressive stretching that produces groin pain, and pivoting or cutting motions on your affected leg.
"The position that typically reproduces labral symptoms combines flexion, adduction, and internal rotation – what we call the FADIR position," I explain to patients. "Listen to your body – avoid hip motions that create intense pain or pinching."
The good news is that as your rehabilitation progresses, we can gradually reintroduce many of these movements under proper guidance. Your physical therapist will help determine when it's safe to begin challenging your hip in more demanding positions.
When is surgery the better option?
While many hip labral tears respond beautifully to conservative management with physical therapy exercises for labral tear hip rehabilitation, there are situations where surgery may be the better path forward.
If you've diligently completed 3-6 months of appropriate physical therapy without significant improvement, it might be time to consider surgical options. Similarly, large, unstable tears – especially those causing mechanical symptoms like catching or locking – often respond better to surgical intervention.
Tears associated with significant bony abnormalities, such as severe femoroacetabular impingement (FAI) or hip dysplasia, frequently benefit from addressing both the labral tear and the underlying structural issue. High-level athletes sometimes opt for surgical repair to facilitate a quicker return to their sport. And if your symptoms are progressively worsening despite appropriate conservative management, that's another indication surgery might be warranted.
"There's no one-size-fits-all answer here," I explain to my patients at Evolve. "The decision between conservative care and surgery should be individualized based on your specific tear characteristics, activity goals, and response to initial treatment. Surgery isn't necessarily better or worse—it's about matching the right treatment to the right patient."
If you're weighing surgical options, I recommend consulting with both a hip preservation specialist (orthopedic surgeon) and a physical therapist experienced in hip rehabilitation to understand all your options. Many patients benefit from "prehabilitation" physical therapy even when surgery is planned – stronger muscles and better movement patterns before surgery often lead to better outcomes afterward.
Conclusion
Rehabilitating a hip labral tear is a journey that demands patience, consistency, and a thoughtful approach to exercise. The physical therapy exercises for labral tear hip rehabilitation we've explored together form a comprehensive roadmap to recovery that addresses all the key elements: restoring mobility, building stability, developing strength, and relearning functional movement patterns.
As you work through your own rehabilitation process, keep these essential principles close to heart:
First and foremost, listen to your body and respect pain signals. A good challenge feels productive, but sharp pain is your body's way of saying "not yet." Quality always trumps quantity—one perfect bridge is worth more than ten sloppy ones. Consistency beats intensity every time; your hip will respond better to daily gentle care than occasional heroic efforts.
"The most common mistake I see patients make is rushing to advanced exercises before mastering the basics," shares our senior therapist at Evolve. "Your rehabilitation is a staircase, not an elevator—and each step needs to be solid before you climb to the next."
Your glutes are your greatest allies in this recovery. These powerful muscles, when properly engaged, take tremendous pressure off your labrum during everyday activities. Equally important is maintaining balanced mobility; regular, gentle stretching prevents the compensatory patterns that can reinforce pain cycles.
At Evolve Physical Therapy + Sports Rehabilitation in Brooklyn, we've guided countless patients through this exact journey. Our approach isn't just about treating the tear—it's about understanding how your entire body moves and creating personalized treatment plans that address the root causes of your pain.
"I came in thinking I needed surgery," recalls Michael, a 43-year-old runner we treated. "Six weeks later, I was back on the trails. The team at Evolve didn't just fix my hip—they taught me how to move better than I did before the injury."
Research consistently shows that many labral tear patients become completely symptom-free with dedicated physical therapy alone. Whether you're hoping to avoid surgery or recovering from a procedure, the structured exercise program we've outlined provides a proven path forward.
Your journey to recovery begins with understanding your condition and committing to the process. By following the principles and exercises we've shared, you're already taking meaningful steps toward restored hip health and pain-free movement.
For personalized guidance custom to your unique needs and goals, contact Evolve Physical Therapy + Sports Rehabilitation to schedule an evaluation with our specialized team. We're here to help you move beyond your hip labral tear and back to the activities you love.

What's Behind Your Front Hip Pain? Causes and Solutions
Understanding the Source of Your Discomfort
Front hip pain is a common condition that affects the anterior region of your hip, often interfering with everyday activities like walking, sitting, climbing stairs, or exercising. This discomfort typically occurs in the area where your thigh meets your pelvis.
Common Causes of Front Hip Pain:
Hip flexor strain or tendinopathy - From overuse during activities like running or kicking
Labral tears - Damage to the cartilage ring that cushions the hip joint
Femoroacetabular impingement - Bone overgrowth causing pinching
Osteoarthritis - Wear and tear of joint cartilage
Bursitis - Inflammation of fluid-filled sacs that reduce friction
Stress fracture - Small cracks in bone from repetitive force
Most front hip pain can be managed with a combination of rest, gentle stretching, strengthening exercises, and over-the-counter pain medication. However, persistent pain lasting more than two weeks warrants professional evaluation.
"Hip pain in the front of the joint is like shin splints - a regional description that can have multiple underlying causes," explains physical therapist Dean Somerset. Understanding the specific source of your pain is crucial for effective treatment.
I'm Lou Ezrick, founder of Evolve Physical Therapy, with nearly two decades of experience treating front hip pain through specialized manual therapy techniques and personalized rehabilitation programs. My approach focuses on identifying the root causes of front hip pain rather than just treating symptoms, helping patients regain mobility and return to their active lifestyles.

Front Hip Pain 101: What It Is and Why It Happens
When we talk about front hip pain, we're referring to that uncomfortable sensation right where your leg connects to your torso. This discomfort can show up as anything from a persistent dull ache to sharp, knife-like pain that might travel down the front of your thigh or radiate into your groin area.
Your hip joint is pretty remarkable - it's one of the largest and most stable joints in your entire body. Think about it: this ball-and-socket joint supports your body weight while allowing smooth movement in multiple directions. It's built to last, but like any well-used machine, it can develop problems over time. Whether from years of use, athletic activities, or simply the aging process, the cartilage can wear down, muscles can get overworked, and sometimes even the bone itself can suffer damage.
One of the trickiest things about front hip pain is that it's often confused with groin pain, and sometimes the actual source isn't even in your hip! As we often see at Evolve Physical Therapy, patients might spend months treating an area that isn't actually the root cause of their discomfort. Pain can be referred from your lower back, pelvis, or even internal organs, making proper diagnosis crucial.
Anatomy of the Anterior Hip
To really understand what's happening with your front hip pain, let's look at the key structures involved:
Acetabulum: This is the socket part of your hip joint, formed by your pelvic bones. Think of it as the "cup" that holds the ball.
Femoral head: The ball portion of your joint - the rounded top of your thigh bone (femur) that fits snugly into the acetabulum.
Labrum: This ring of cartilage surrounds your acetabulum, deepening the socket and creating a suction-like seal for added stability.
Iliopsoas: Your primary hip flexor muscle group that helps you lift your knee toward your chest. It includes both the iliacus and psoas muscles.
Bursae: These are small, fluid-filled sacs that act like cushions between tissues, reducing friction. The iliopsoas bursa sits at the front of your hip.
Hip joint capsule: A strong sleeve of ligaments that wraps around your joint, providing stability and keeping everything in place.
Defining "front hip pain"
When we're specific about front hip pain, we're talking about discomfort in a particular region that extends:
From the middle of your pelvis (pubic symphysis)
Out to the bony prominence you can feel at the front of your hip (anterior superior iliac spine)
Up slightly into your lower abdomen
Down about 2-4 inches into the front of your thigh
You might notice this pain most during everyday activities that engage your hip flexors. Getting up from a chair can suddenly become a challenge. Walking upstairs might trigger a sharp twinge. Even simple things like putting on socks or getting in and out of your car can become painful ordeals. Sitting through a long meeting or movie? That might leave you stiff and sore too.
Functionally, front hip pain can really limit your movement. You might struggle to lift your knee toward your chest, rotate your hip, or put full weight on the affected leg. Many patients tell us they've given up beloved activities like running, yoga, or playing with their kids because of this persistent discomfort.
Understanding exactly where your pain is coming from and what movements trigger it helps us at Evolve Physical Therapy pinpoint the underlying cause so we can develop a targeted treatment plan that addresses the root of your discomfort - not just the symptoms.
The 10 Most Common Causes of Front Hip Pain
When patients walk through our doors at Evolve Physical Therapy, they often share stories of front hip pain that's been bothering them for weeks or even months. This discomfort can arise from various structures and conditions, each with its own signature pattern and treatment needs.
Let's explore the most common culprits we encounter in our Brooklyn practice:
1. Hip Flexor Strain & Tendinopathy
The iliopsoas and rectus femoris muscles help you lift your knee toward your chest. When these muscles work overtime—especially during activities like sprinting or soccer—they can develop micro-tears or inflammation. You'll typically feel this pain when climbing stairs or bringing your knee toward your chest. Many weekend warriors experience this after suddenly increasing their exercise intensity without proper preparation.
2. Labral Tears
The acetabular labrum is that crucial ring of cartilage that deepens your hip socket and creates stability. When torn, it often causes clicking, locking, or a feeling of hip instability. Many patients describe a specific moment when they felt or heard a "pop" followed by pain. This injury is particularly common in dancers, hockey players, and golfers due to the rotational forces these activities place on the hip.
3. Femoroacetabular Impingement
FAI occurs when the ball and socket of your hip don't fit together perfectly, causing pinching during movement. There are three types: cam (ball-shaped abnormality), pincer (socket overhang), or combined. Many patients with this condition report deep pain when squatting or sitting for long periods. This condition often develops gradually and can lead to labral tears if left untreated.
4. Hip Osteoarthritis
As we age, the cartilage in our hip joint can wear down, leading to front hip pain, stiffness, and reduced range of motion. This condition typically affects adults over 50 and tends to worsen gradually. Morning stiffness that improves with movement is a classic sign. Despite its prevalence, many effective management strategies can help maintain quality of life.
5. Iliopsoas & Iliopectineal Bursitis
The bursa is a fluid-filled sac that reduces friction between tissues. When inflamed, it causes pain and tenderness in the front of the hip. Many patients with this condition also experience a "snapping" sensation when walking or standing from a seated position. Repetitive activities and certain anatomical variations can increase your risk of developing this condition.
6. Stress Fracture & Osteoporosis
Small cracks can form in the hip bones due to repetitive stress, particularly in runners, military recruits, and older adults with osteoporosis. The telltale sign is pain that worsens with weight-bearing and often aches at night. Women after menopause are particularly vulnerable to these fractures due to hormonal changes affecting bone density.
7. Nerve Compression Syndromes
Conditions like meralgia paresthetica involve compression of nerves that supply the front of the thigh, causing numbness, tingling, or burning pain. This can happen from tight clothing, pregnancy, or weight gain. The pain typically follows specific dermatome patterns and may be accompanied by sensory changes rather than just pain.
8. Sports Hernia & Core Muscle Injury
This condition involves strain or tear of the muscles or tendons of the lower abdomen or groin. Despite its name, it's not a true hernia but rather a core muscle injury. Athletes in sports requiring quick directional changes (like soccer or hockey) are most susceptible. The pain typically worsens with activity and improves with rest.
9. Osteitis Pubis
This inflammatory condition affects the pubic symphysis—the joint connecting the pubic bones. It's common in runners and athletes who perform repetitive kicking or pivoting movements. Recovery can be frustratingly slow, often taking months of dedicated rehabilitation to resolve completely.
10. Referred & Visceral Causes
Sometimes front hip pain isn't coming from the hip at all. Conditions like kidney stones, gynecological issues (including endometriosis), or hernias can refer pain to the hip region. These conditions often have additional symptoms beyond hip pain and require different treatment approaches.
Understanding the specific cause of your front hip pain is essential for effective treatment. At Evolve Physical Therapy, we conduct thorough evaluations to pinpoint the exact source of your discomfort before creating a personalized treatment plan. Whether you're dealing with overuse injuries from your Brooklyn running club or age-related changes, identifying the true culprit is the first step toward relief.
For more detailed information about conditions like hip bursitis, you might find this scientific research on hip bursitis helpful. And if you're specifically dealing with anterior hip pain, check out our detailed guide: More info about hip flexor pain.
1. Hip Flexor Strain & Tendinopathy
Ever felt that sharp twinge at the front of your hip when you're running or climbing stairs? You might be dealing with a hip flexor strain – one of the most common causes of front hip pain we see at Evolve Physical Therapy.
Your hip flexors are powerful muscles that work overtime during activities like sprinting, kicking, and climbing. When these muscles (primarily the iliopsoas) get overworked or stretched beyond their capacity, micro-tears can develop in the muscle fibers or tendon attachments, leading to pain and limited mobility.
"A lot of people experience 'hip flexor pain'," notes physical therapist Dr. Alison Grimaldi. "Are you doing the best exercises to help it—or are your go-to stretches actually contributing to your pain?"
When you strain your hip flexors, you'll typically notice pain when lifting your knee toward your chest or stretching your hip backwards. Many patients describe feeling tenderness when pressing on the front of the hip, and discomfort that intensifies as they continue their activities.
Medical professionals classify hip flexor strains into three grades:
Grade I: Mild discomfort with minimal strength loss – you can usually keep moving but with some awareness of the pain.
Grade II: Moderate pain with noticeable weakness and some tissue damage – you'll definitely feel limited in your movements.
Grade III: Severe pain with significant weakness and possibly a complete tear – these can be quite debilitating and may require more intensive treatment.
I recently worked with a dedicated runner who came to Evolve unable to train for his upcoming marathon. He experienced sharp pain whenever he increased his stride length. Through a combination of targeted manual therapy techniques and a progressive strengthening program custom specifically for his needs, he was back to full training within three weeks.
The good news? Most hip flexor issues respond well to proper rehabilitation. The key is identifying whether you're dealing with an acute strain or chronic tendinopathy, as this distinction guides our treatment approach. More info about hip flexor pain can help you understand your specific condition better.
2. Labral Tears
The labrum is a ring of cartilage that surrounds the acetabulum (hip socket), creating a deeper socket and improving joint stability. Think of it as the hip's built-in cushion and suction cup – when it tears, your hip loses some of its natural protection and security.
Labral tears don't play favorites. They can happen from a sudden trauma (like a fall or sports injury), repetitive movements (common in dancers, golfers, and hockey players), or even structural abnormalities you might have been born with.
Symptoms of a labral tear often include a frustrating mix of sensations. Many patients describe a distinct clicking or catching feeling when moving their hip – almost like something is getting stuck momentarily inside the joint. This might be accompanied by a locking sensation that temporarily limits your movement.
Beyond these mechanical symptoms, you'll likely experience pain that gets worse when sitting for long periods (especially in low chairs), walking distances, or making pivoting movements. Many patients also report a general feeling of hip instability, like the joint might give way, and a deep, sometimes sharp pain in the groin area.
When we suspect a labral tear at Evolve Physical Therapy, we often recommend a magnetic resonance arthrography (MRA) for confirmation. This specialized imaging technique has shown a remarkable 90% sensitivity and 91% accuracy for detecting these tears, making it our preferred diagnostic tool for this condition.
I recently worked with Kelly, a 34-year-old dancer who came to us frustrated by a painful click whenever she moved into certain positions. "It feels like something is snapping inside my hip," she explained during her initial evaluation. After a comprehensive assessment and confirmation of a labral tear via MRI, we developed a program focused on improving her hip stability and movement patterns. By addressing the biomechanical issues that were stressing her labrum and strengthening the muscles that support the hip joint, Kelly was able to return to dancing with minimal discomfort within a few months.
While some labral tears eventually require surgical intervention, many patients find significant relief through targeted physical therapy that addresses movement patterns, muscle imbalances, and joint mechanics.
3. Femoroacetabular Impingement
If you've ever felt a pinching pain deep in your hip when squatting down or sitting for too long, you might be experiencing femoroacetabular impingement (FAI). This condition occurs when there's abnormal contact between your hip socket and thigh bone during movement - essentially, parts of your hip that shouldn't be touching are rubbing against each other.
There are three main types of FAI that we commonly see at Evolve Physical Therapy:
Cam impingement: This happens when your femoral head (the "ball" of your hip joint) isn't perfectly round, creating a bump that can catch on the hip socket during movement.
Pincer impingement: Here, the problem is extra bone extending over the rim of your acetabulum (hip socket), creating an overcoverage that pinches soft tissues during hip motion.
Combined impingement: Many patients have both cam and pincer issues happening simultaneously, which can be particularly challenging.
The most telling sign of front hip pain from FAI is discomfort when your hip is deeply flexed. You might notice pain when tying your shoes, sitting in low chairs, or performing deep squats. Many patients describe a feeling of stiffness or even a catching sensation.
"Many individuals with structural alignment differences can experience femoroacetabular impingement during deep squats," explains physical therapist Dean Somerset. "This doesn't mean you should never squat, but you may need to modify your depth and technique."
At Evolve, we've worked with countless patients who thought their squatting days were over due to FAI. One of our recent success stories involved a CrossFit enthusiast who couldn't perform essential movements without sharp hip pain. Through careful movement analysis and targeted strengthening of his hip stabilizers, we helped him return to modified workouts while managing his symptoms effectively.
The good news? Many people with FAI can manage their symptoms quite well with proper physical therapy, activity modifications, and strengthening exercises - all without needing surgery. It's about finding the right balance between maintaining your activity level and respecting your body's structural limitations.
4. Hip Osteoarthritis
Hip osteoarthritis is what we might call the "wear and tear" condition of the hip joint. It's the most common form of arthritis affecting the hip, and we see it particularly often in our patients over 50 years old.
What's happening inside your hip? The smooth, protective cartilage that normally allows your hip joint to glide effortlessly begins to break down over time. This gradual deterioration eventually leads to bone rubbing against bone – which is every bit as uncomfortable as it sounds.
Symptoms you might experience with hip osteoarthritis include:
Morning stiffness that typically resolves within 30 minutes of getting up
Pain that tends to worsen the more active you are and feels better with rest
Noticeably reduced range of motion, especially when trying to turn your leg inward
Everyday challenges like simply putting on your socks or getting in and out of the car
In a healthy hip, the cartilage space measures approximately 4 mm, with minimal difference from side to side. As osteoarthritis progresses, this space narrows significantly – a change we can clearly see on X-ray images.
Here at Evolve Physical Therapy, we've helped countless patients manage their front hip pain from osteoarthritis without rushing to surgery. Our approach combines targeted strengthening exercises, hands-on manual therapy techniques, and practical modifications to daily activities.
"Many patients come in thinking surgery is inevitable," says our senior therapist. "But they're often surprised by how much improvement they experience through consistent physical therapy. One gentleman postponed his hip replacement by three years through our program – giving him time to attend his daughter's destination wedding pain-free."

While osteoarthritis can't be reversed, the right physical therapy approach can significantly slow its progression and dramatically improve your comfort and function. The key is starting treatment early rather than waiting until the pain becomes severe.
5. Iliopsoas & Iliopectineal Bursitis
That nagging pain at the front of your hip might be coming from one of the body's most remarkable cushioning systems gone awry. Bursitis occurs when the fluid-filled sacs (bursae) that act as natural shock absorbers become inflamed and irritated. The iliopsoas bursa, tucked away at the front of your hip, happens to be the largest bursa in your entire body – and when it's unhappy, you'll definitely know it.
Front hip pain from bursitis often announces itself as a deep ache that can radiate into your groin area. Many patients describe a peculiar snapping or clicking sensation when moving their hip – almost like something is catching inside the joint. This "snapping hip syndrome" is a telltale sign that something's not quite right with your bursa.
"Iliopsoas syndrome is irritation of the tendon or structures at the front of the hip joint," according to the NHS. "It's often caused by biomechanical overload of the iliopsoas combined with gluteal muscle weakness."
When you press directly on the affected area, you'll likely feel tenderness or sharp discomfort. This pain tends to worsen in certain situations – like when you've been sitting through a long meeting or movie, or when performing specific movements that engage your hip flexors.
At Evolve Physical Therapy, we regularly see patients whose bursitis developed from repetitive activities or poor movement patterns. One of our recent patients, a 42-year-old cyclist, came to us frustrated by persistent front hip pain that flared up after long rides. Through targeted manual therapy to reduce inflammation, correcting his bike positioning, and strengthening his gluteal muscles to take pressure off the iliopsoas, we helped him return to pain-free riding within six weeks.
The good news? With proper treatment, iliopsoas bursitis typically responds well to conservative management. Most patients find significant relief through a combination of rest, anti-inflammatory measures, and corrective exercises that address the underlying movement patterns that triggered the problem in the first place.
6. Stress Fracture & Osteoporosis
If you've ever experienced deep, persistent pain in your hip that worsens when you're on your feet and doesn't seem to go away with rest, you might be dealing with a stress fracture. These tiny cracks in the bone develop gradually from repetitive force – think of them as the bone's version of fatigue.
In the hip area, stress fractures most commonly affect the femoral neck (the part of your thigh bone that connects to the hip socket). What makes these particularly concerning is their location – they can potentially displace, turning a manageable injury into a serious medical emergency.
How do you know if you might have a stress fracture? The signs are distinctive:
A deep, aching pain that gets worse when you're standing or walking
Discomfort that continues even at night or when you're resting
Tenderness at a specific point when you press on it
Pain that briefly improves with rest but quickly returns once you're active again
For older adults with osteoporosis, these fractures represent an even greater concern. The statistics are sobering – about 1 in 2 women and 1 in 4 men over age 50 will experience a fracture due to osteoporosis, with hip fractures being among the most dangerous for overall health and independence.
At Evolve Physical Therapy, we've seen how critical early detection can be. I remember working with a 35-year-old endurance runner who came to us puzzled by persistent pain in his upper thigh that bothered him both during runs and while trying to sleep. After we advocated for an MRI, it revealed what we suspected – a femoral neck stress fracture.
With prompt surgical intervention (percutaneous screw fixation) and a carefully structured rehabilitation program, he was able to gradually return to his passion for running within six months. Without proper diagnosis, the outcome could have been much worse.
The relationship between night pain and stress fractures is particularly important – if your front hip pain wakes you up or prevents sleep, don't dismiss it as just another ache. This could be your body signaling that something more serious is happening beneath the surface.
7. Nerve Compression Syndromes
Have you ever felt a strange tingling or burning sensation running down the front of your thigh? This might not be a muscle or joint problem at all, but rather a nerve issue. Nerve compression syndromes can mimic other causes of front hip pain, making them particularly tricky to diagnose.
Meralgia paresthetica is one of the most common nerve compression conditions affecting the hip region. This occurs when the lateral femoral cutaneous nerve gets compressed or irritated, typically where it passes under the inguinal ligament near the front of your hip.
"Many patients describe it as feeling like their phone is vibrating in their pocket, even when it isn't there," shares Lou Ezrick, founder of Evolve Physical Therapy. "Others say it feels like their thigh is sunburned or that they're wearing pants that are too tight, even when they're in shorts."
Symptoms you might experience include:
Burning, tingling, or prickling sensations in the outer thigh
Numbness in a specific patch-like area on the front and side of the thigh
Pain that follows a predictable pattern (known as a dermatome)
Symptoms that worsen after standing or walking for long periods
Interestingly, the L2 spinal nerve supplies sensation to the skin covering the anterior hip region. This means irritation of this nerve can cause front hip pain even without any accompanying back pain, making the condition even more puzzling for many patients.
Common triggers for nerve compression include tight clothing (especially belts or tight jeans), pregnancy, weight gain, scar tissue from previous surgeries, and certain sitting positions. At Evolve, we've even seen cases triggered by wallets kept in front pockets!
One of our patients, a delivery driver who spent hours behind the wheel daily, came to us confused about his symptoms. "It doesn't hurt when I press on it, and it doesn't hurt when I exercise—it just burns all the time!" After a thorough assessment, we identified nerve compression as the culprit and developed a treatment plan involving nerve gliding exercises, posture modifications, and temporarily switching to suspenders instead of a belt. Within three weeks, his symptoms had dramatically improved.
If you're experiencing these unusual sensations, don't ignore them. Nerve pain responds differently to treatment than muscle or joint pain, and proper diagnosis is essential for effective relief.
8. Sports Hernia & Core Muscle Injury
Despite its misleading name, a sports hernia isn't actually a true hernia at all. This condition—also known as athletic pubalgia or core muscle injury—involves strains or tears in the soft tissues around your lower abdomen or groin area. What we're really talking about is a collection of injuries affecting the muscular and tendinous attachments surrounding the pubic symphysis.
When patients come to us at Evolve Physical Therapy with this condition, they typically describe a frustrating pattern of symptoms:
Front hip pain that seems to come and go, but always returns with activity. Many describe a deep, nagging discomfort that's worst during specific movements like twisting, cutting, or doing sit-ups. There's often tenderness directly over the pubic symphysis that you can feel when pressing on the area.
"The challenge with sports hernias is that they can mimic several other conditions," explains our clinical director. "Many patients have already tried resting for weeks, only to have the pain return as soon as they get back to their sport."
Athletes who perform cutting, pivoting, and kicking movements face the highest risk—that's why we see so many soccer players, hockey players, and runners with this condition. The good news? Research shows encouraging outcomes, with about 90% of patients returning to full activity after proper treatment for occult sports hernia.
One of our recent success stories involved a collegiate soccer midfielder who had been struggling with groin pain for nearly a full season. After comprehensive evaluation revealed a core muscle injury rather than the hip flexor strain he'd been told he had elsewhere, we developed a targeted rehabilitation program focusing on proper load management and progressive core strengthening. Within eight weeks, he was back on the field without pain.
The key to successful recovery lies in addressing not just the injured tissue but also the movement patterns and muscle imbalances that contributed to the problem in the first place—something we specialize in at Evolve Physical Therapy.
9. Osteitis Pubis
Osteitis pubis is an inflammatory condition that affects the pubic symphysis—the joint where your pubic bones meet at the front of your pelvis. This painful condition typically develops gradually and can be surprisingly stubborn to treat.
We see this condition frequently in our Brooklyn clinic, particularly among runners, soccer players, and athletes who perform repetitive kicking or cutting movements. The constant stress on the pelvic region creates microtrauma at the pubic symphysis, leading to inflammation and sometimes even bone marrow edema.
Front hip pain from osteitis pubis has some telltale characteristics. Most patients describe a deep aching or sharp discomfort directly over the pubic bone that often radiates outward into the groin or lower abdomen. This pain typically worsens when you stand on one leg or make lateral movements—like side-stepping or changing direction quickly while running.
"What surprises many of my patients is how long recovery can take," says Lou Ezrick, founder of Evolve Physical Therapy. "This isn't a condition that resolves in a few weeks with simple rest."
Research confirms this challenging recovery timeline. In a comprehensive review of 59 patients diagnosed with osteitis pubis, women took an average of seven months to fully recover, while men needed nearly 10 months. This extended rehabilitation period can be frustrating for active individuals eager to return to their sports.
The good news is that with proper diagnosis and a structured rehabilitation approach, most people can fully recover. At Evolve, we've developed specific protocols that focus on core stabilization, pelvic alignment, and gradual return to activity that have helped athletes safely return to their sports.
If you're experiencing persistent pain in your pubic region that worsens with activity, it's worth getting evaluated. Early intervention typically leads to better outcomes and might help you avoid that prolonged 7-10 month recovery window that catches many patients by surprise.
10. Referred & Visceral Causes
Not all front hip pain originates from muscles, tendons, or joints. Sometimes, the discomfort you feel in your hip is actually coming from somewhere else entirely—a phenomenon known as referred pain.
Your body can play tricks on you. I've seen patients convinced they had a hip injury when the real culprit was hiding elsewhere. This happens because nerve pathways connect different regions of your body, allowing pain signals to travel in unexpected ways.
For women, gynecological conditions like endometriosis can manifest as persistent hip and groin pain. During a flare-up, tissue similar to the uterine lining that grows outside the uterus becomes inflamed, often referring pain to the pelvic region and front hip area.
Femoral hernias are another sneaky cause of front hip discomfort. These occur when tissue pushes through a weak spot in the groin or inner thigh. Interestingly, they're ten times more common in women than men, often creating a tender bulge near the crease of the groin that worsens with activity.
The urinary system can also be responsible. Kidney stones or infections might surprise you by causing pain that radiates to the hip region rather than staying in the back where the kidneys are located. This connection often confuses patients who come to Evolve Physical Therapy puzzled by hip pain that doesn't respond to typical treatments.
Your digestive tract is yet another potential culprit. Gastrointestinal conditions affecting the lower intestines can refer discomfort to the hip area, especially when inflammation is present. This connection makes sense when you consider how closely packed these structures are within your abdomen.
Vascular issues affecting blood vessels near the hip can sometimes mimic musculoskeletal pain. Restricted blood flow or inflammation of blood vessels might present as a deep, aching sensation in the anterior hip region.
These non-musculoskeletal causes highlight why we take a whole-body approach at Evolve Physical Therapy. What seems like straightforward front hip pain might require detective work beyond the hip joint itself. If standard treatments aren't helping, or if your pain is accompanied by other symptoms like fever, unexplained weight loss, or changes in bowel or bladder habits, it's crucial to get a comprehensive evaluation from a healthcare professional.
Finding the true source of your pain is the first step toward effective treatment—whether that source is in your hip or somewhere else entirely.
Diagnosing and Differentiating Your Pain
Accurate diagnosis of front hip pain requires a systematic approach that considers the many potential causes. At Evolve Physical Therapy, we use a comprehensive evaluation process to identify the specific source of your discomfort.
Clinical Evaluation Steps
Our evaluation begins with a detailed history:
When did your pain start?
What activities make it better or worse?
Is the pain constant or intermittent?
Do you experience clicking, locking, or other sensations?
Have you had any recent changes in activity level or training?
Next, we perform a thorough physical examination:
Inspection: Looking for asymmetries, swelling, or visible deformities
Gait analysis: Observing how you walk for compensatory patterns
Range of motion testing: Measuring movement in all directions
Strength assessment: Testing the muscles around the hip
Special tests: Performing specific maneuvers to identify particular conditions
"Anterior hip pain can originate from multiple deep structures that produce similar syndromes, making diagnosis challenging," notes a recent medical review. This is why a methodical, layer-by-layer approach is essential.
Imaging & In-office Tests
When necessary, we work with physicians to obtain appropriate imaging:
X-rays: Useful for identifying arthritis, fractures, or bony abnormalities
MRI: Provides detailed images of soft tissues, labral tears, and early stress reactions
Ultrasound: Can visualize tendons, bursae, and guide injections
MR arthrography: The gold standard for labral tear diagnosis with 90% sensitivity and 91% accuracy
In some cases, diagnostic injections may be used:
An intra-articular anesthetic injection that relieves pain confirms an intra-articular source
Iliopsoas bursa injections can help diagnose bursitis
Muscle vs Tendon vs Joint vs Nerve: Key Clues
Different tissues present with distinct pain patterns that help guide diagnosis:
Tissue Type Pain Characteristics Aggravating Factors Night Pain Response to Rest Muscle Dull, achy, diffuse Contraction, stretching Rare Quick improvement Tendon Sharp, localized Loading activities Uncommon Gradual improvement Joint Deep, achy Weight-bearing, end-range movements Common Variable improvement Nerve Burning, shooting, tingling Compression, tension Can be severe Variable
Additional clues that help differentiate the source:
Muscle issues: Pain with active contraction, relief with rest
Tendon problems: Pain with specific movements, morning stiffness
Joint disorders: Pain throughout range of motion, stiffness after inactivity
Nerve involvement: Symptoms follow a specific distribution, may include sensory changes
At Evolve Physical Therapy, we pride ourselves on accurate diagnosis, as this forms the foundation for effective treatment.
Home Remedies and Self-Care Strategies for Front Hip Pain
When front hip pain strikes, you don't always need to rush to a doctor right away. Many people find relief with simple home care strategies that can ease discomfort and support healing. Let's explore some practical approaches that have helped many of our patients at Evolve Physical Therapy.
RICE & Safe Medication Use
The RICE method remains one of the most effective first-line treatments for acute front hip pain. Think of it as your hip's first aid kit:
Rest doesn't mean becoming a couch potato—it simply means avoiding activities that make your pain worse. Listen to your body. If running triggers your pain, try swimming instead. Your hip needs some activity to maintain mobility, just not the kind that increases your discomfort.
Ice is your friend in the first 48-72 hours. Wrap an ice pack in a thin towel and apply it to your hip for 15-20 minutes, giving your skin at least an hour between applications. The cold helps numb the area and reduce inflammation that might be contributing to your pain.
Compression with an elastic bandage can provide gentle support and help control swelling. Just make sure it's snug but not tight enough to restrict blood flow or cause additional pain.
Elevation might seem tricky for a hip, but when resting, try lying down with a pillow under your hip to position it slightly above heart level. This can help minimize swelling.
For pain management, over-the-counter medications can provide temporary relief. Acetaminophen (Tylenol) helps with pain but doesn't address inflammation. NSAIDs like ibuprofen (Advil) or naproxen (Aleve) tackle both pain and inflammation, but come with important cautions:
Medication safety is crucial. Don't exceed recommended dosages on the package, and avoid taking NSAIDs for more than 10 consecutive days without consulting a healthcare provider. People with certain medical conditions should be especially careful with these medications. According to NHS guidance on paracetamol, it's generally safe for most adults but always follow package instructions.
Stretching & Strengthening Basics
Gentle movement can be incredibly healing for front hip pain when done correctly. Here are some beginner-friendly exercises our patients have found helpful:
The hip flexor stretch is perfect for those tight muscles at the front of your hip. Kneel on one knee with your other foot planted in front of you. Keeping your back straight, gently push your hips forward until you feel a comfortable stretch in the front of your hip. Hold for 30 seconds, breathing normally, and repeat three times on each side. This stretch can be particularly helpful if you spend a lot of time sitting during the day.
Glute activation is equally important, as weak gluteal muscles can contribute to front hip pain. The simple bridge exercise is a great place to start. Lie on your back with your knees bent and feet flat on the floor. Tighten your abdominal and buttock muscles, then lift your hips toward the ceiling until your body forms a straight line from shoulders to knees. Hold for 5 seconds before lowering, and repeat 10 times.
For those dealing with hip flexor issues, isometric exercises can strengthen without aggravating pain. While seated with good posture, simply lift one foot slightly off the floor, hold for 5 seconds without moving, then relax. Do 10 repetitions on each side.
"Finding the right balance between hip flexors and glutes is like maintaining harmony in a relationship," explains Lou Ezrick, founder of Evolve Physical Therapy. "When one side gets too dominant, problems arise. We focus on restoring that balance to reduce anterior hip stress."
For more specific guidance on exercises that can help with front hip pain, check out our detailed guide on Anterior Hip Pain and How to Mitigate It.

When to Seek Urgent Care
While patience is important with most cases of front hip pain, certain situations require prompt medical attention. Trust your instincts and head to urgent care if you experience:
Inability to bear weight on your affected leg is a red flag that shouldn't be ignored. If you can't stand or walk on your leg, something serious might be happening.
Severe, debilitating pain that comes on suddenly, especially after a fall or injury, warrants immediate evaluation. This could indicate a fracture or other serious injury.
Visual changes like significant swelling, bruising, or deformity around the hip area suggest potential trauma that needs professional assessment.
Signs of infection including fever, redness, or warmth around the joint require urgent care, as joint infections can cause rapid damage if not treated promptly.
Popping or snapping sounds accompanied by immediate pain might indicate a tear or dislocation that needs proper medical management.
It's always better to err on the side of caution when it comes to hip injuries. Most front hip pain improves with conservative care, but knowing when to seek help is just as important as knowing how to care for yourself at home. At Evolve Physical Therapy, we're always here to help you determine the best course of action for your specific situation.
Medical, Physical Therapy, and Surgical Solutions
When home remedies aren't enough to resolve front hip pain, professional intervention may be necessary. At Evolve Physical Therapy + Sports Rehabilitation, we offer comprehensive treatment approaches custom to your specific condition.
Role of Physical Therapy
Physical therapy is often the first-line treatment for front hip pain and can be remarkably effective. Our approach at Evolve is both comprehensive and personalized.
We use manual therapy techniques to address tissue restrictions directly. This hands-on approach includes soft tissue mobilization to release tight muscles, joint mobilization to improve mobility, myofascial release for the anterior hip, and trigger point therapy to address those painful muscle knots that just won't go away on their own.
Movement retraining is another crucial component of our care. Many people develop compensatory patterns that actually perpetuate their pain. We'll analyze your walking mechanics, assess your functional movements, and help you correct the subtle habits that might be contributing to your discomfort.
We complement these approaches with progressive strengthening programs. Building strength in weak muscles (particularly the gluteals), improving core stability, and gradually increasing load tolerance are all essential for long-term relief.
One of our patients, a 42-year-old recreational runner, shared: "I was skeptical that physical therapy could help my hip pain after two years of suffering. Within six sessions at Evolve, I noticed significant improvement, and after twelve weeks, I was back to running pain-free."
The evidence supports our approach too. Systematic reviews have found that supervised exercise therapy effectively reduces pain and improves function across various hip conditions, including osteoarthritis, femoroacetabular impingement, and labral tears. For more information about our specialized hip treatments, visit our Physical Therapy for Hip Pain page.
Pharmacologic & Injection Options
Sometimes additional pain management strategies are needed alongside physical therapy:
Oral medications can help manage pain and inflammation. These might include prescription-strength NSAIDs, muscle relaxants for acute spasms, or in cases of inflammatory arthritis, disease-modifying antirheumatic drugs (DMARDs).
Injection therapies offer another avenue for relief. Corticosteroid injections can reduce inflammation in the joint or bursa, while hyaluronic acid injections provide lubrication for osteoarthritic joints. Regenerative options like platelet-rich plasma (PRP) use components of your own blood to promote healing, and prolotherapy stimulates tissue repair through carefully placed irritant injections.
At Evolve, we work closely with physicians to coordinate care when injections are part of your treatment plan. We time our interventions carefully to maximize the benefits of these medical treatments while you're working through your rehabilitation program.
It's worth noting that while corticosteroid injections can provide significant short-term relief, they should be used judiciously. Research from the American Academy of Orthopaedic Surgeons has shown that repeated steroid injections may increase the risk of complications like osteonecrosis in some patients.
Surgical Pathways
Surgery is generally reserved for cases that don't respond to conservative management. When it's necessary, several options exist depending on your specific condition.
Hip arthroscopy has revolutionized the treatment of many hip conditions. This minimally invasive procedure uses small incisions and a camera to repair labral tears, address femoroacetabular impingement, and treat some cartilage injuries. Success rates of 85-90% are common for appropriate candidates, though recovery typically takes 3-6 months of dedicated rehabilitation.
For stress fractures, femoral neck fracture fixation with percutaneous screws can prevent displacement and the serious complication of avascular necrosis. Early intervention typically yields better outcomes, which is why prompt diagnosis is so important.
In cases of advanced osteoarthritis or significant joint damage, total hip replacement remains an excellent option. Modern techniques allow for faster recovery and excellent outcomes. Many of our patients are surprised by how quickly they can return to their favorite activities after a well-executed hip replacement and appropriate rehabilitation.
One patient who underwent hip arthroscopy for a labral tear shared: "After trying physical therapy elsewhere without success, I was referred to Evolve for pre-surgical preparation and post-surgical rehabilitation. Their expertise in hip rehabilitation made all the difference in my recovery."
At Evolve Physical Therapy, we specialize in both pre-surgical preparation and post-surgical rehabilitation. Our hip-specific therapy services are designed to help you achieve the best possible outcome, whether you're trying to avoid surgery or recovering from a procedure.
Special Considerations & Prevention Tips
Front hip pain affects people differently based on their age, activity level, and specific circumstances. Understanding these differences helps us create more effective prevention and treatment plans at Evolve Physical Therapy.
Athletes and Active Individuals
If you're an athlete or regularly active person, you face unique challenges when it comes to front hip pain. The repetitive movements and high demands of sports can take a toll on your hip joints.
Regular athletes should focus on smart training practices. This means warming up properly before activity and cooling down afterward, giving your body time to adjust. When increasing your training intensity or volume, follow the 10% rule – don't increase by more than 10% each week to give your tissues time to adapt.
Cross-training is your friend! By varying your activities, you distribute stress across different muscle groups rather than overloading the same ones repeatedly. And don't forget those recovery days – they're when your body actually builds strength and repairs itself.
"Hamstring-dominant hip extension can push the femoral head anteriorly, increasing tension on anterior hip structures," explains Dean Somerset. "Prioritizing glute activation can improve femoral head centration and reduce anterior hip stress."
Many athletes we work with at Evolve benefit from preseason movement assessments that identify potential problems before they cause pain. These screenings can reveal muscle imbalances, movement compensations, or technique issues that might lead to front hip pain down the road.
Adolescents vs Adults
Age matters significantly when we're talking about front hip pain. The developing bodies of adolescents face very different challenges than adult bodies.
For teenagers, growth plate injuries (apophysitis) often mimic tendinitis but require different treatment approaches. Young athletes should be especially vigilant about a condition called slipped capital femoral epiphysis (SCFE), which requires immediate medical attention. This serious condition affects both hips in up to 40% of cases, making early detection crucial.
During growth spurts, teens often develop muscle-tendon imbalances as bones grow faster than muscles can adapt. This can create temporary but significant strain on the front of the hip.
Adults, on the other hand, tend to face more degenerative conditions as they age. Previous injuries from years past can come back to haunt you, creating vulnerability to new problems. If you're an adult getting back into exercise after a break, remember to progress even more gradually than younger athletes would.
For both groups, nutrition plays a vital role in hip health. Adequate calcium, vitamin D, and protein provide the building blocks for strong bones and muscles that can withstand the stresses placed on the hip joint.
Long-Term Complications if Untreated
Ignoring front hip pain is never a good strategy. Without proper treatment, what starts as a minor issue can develop into something much more serious over time.
Structurally, untreated hip problems can lead to permanent changes in your joint. Cartilage might degenerate, small labral tears can become larger ones, and bones may actually remodel themselves in response to abnormal forces – usually not in helpful ways.
The functional impact can be significant too. Your body naturally develops compensation patterns to avoid pain, but these altered movement patterns often create secondary problems in your knees, back, or opposite hip. Many patients tell us they've gradually reduced their activity levels without even realizing it, which affects their overall health and fitness.
There's an emotional and psychological component too. Chronic pain affects your mood and mental health. Many people develop fear-avoidance behaviors, where they become afraid to move in certain ways – which ironically can make the problem worse in the long run.
Prevention is truly the best medicine when it comes to front hip pain. Beyond physical training, consider your workspace ergonomics (standing desks can be helpful), take movement breaks during long periods of sitting, and wear appropriate footwear for your specific activities.
At Evolve Physical Therapy, we take a whole-person approach to hip health. We don't just treat your current symptoms – we help you build habits and movement patterns that will protect your hips for years to come. Whether you're a teenage athlete, a weekend warrior in your 40s, or enjoying an active retirement, we can help you keep moving comfortably and confidently.
Frequently Asked Questions about Front Hip Pain
What exercises can I do without worsening front hip pain?
When you're dealing with front hip pain, finding exercises that don't aggravate your condition can feel like walking a tightrope. The good news is that many activities can keep you moving without making things worse.
Low-impact activities tend to be your best friends. Swimming and water aerobics offer wonderful resistance training without putting pressure on your hip joints. The buoyancy of water supports your body weight while allowing you to maintain fitness. Stationary biking can also be gentle on your hips, especially if you raise the seat height slightly and adjust the handlebars higher to reduce hip flexion angle.
Many of our patients at Evolve find elliptical training with moderate resistance to be comfortable, as it mimics a natural walking pattern without the impact. Walking itself can be beneficial too, particularly on level surfaces and with supportive shoes that cushion each step.
For strengthening exercises, focus on working within your comfort zone:
Isometric exercises that don't require joint movement can build strength without aggravating pain. Partial range-of-motion exercises let you work within pain-free zones while gradually increasing your mobility. Core stabilization exercises that don't force deep hip flexion help support your entire kinetic chain, while gentle gluteal strengthening with bridges and clamshells can improve hip stability.
As Dean Somerset, a respected physical therapist, recommends: "When experiencing anterior hip pain, back off deep squats in favor of higher box squats, split squats, or deadlifts. Incorporate glute isolation work and adjust core exercises to reduce psoas tension."
How long should I try home care before seeing a provider?
Knowing when to seek professional help for front hip pain isn't always straightforward, but I can offer some helpful guidelines based on our experience with patients at Evolve Physical Therapy.
For mild pain that improves with rest, trying home care for 1-2 weeks is generally reasonable. This might include the RICE protocol, gentle stretching, and over-the-counter pain relievers. If you're experiencing moderate pain that affects daily activities like walking, climbing stairs, or sleeping, it's best to seek evaluation within a week rather than continuing to push through discomfort.
For severe pain or any pain following a fall or injury, don't wait – immediate evaluation is necessary to rule out serious conditions like fractures.
Pay attention to warning signs that suggest you should seek care sooner: pain that wakes you from sleep, symptoms that get progressively worse despite rest, clicking or locking sensations in your hip, difficulty bearing weight, or signs of infection like fever and redness around the joint.
At Evolve Physical Therapy, we understand that timely care makes a difference. That's why we prioritize getting patients with front hip pain in quickly, usually within 24-48 hours of their call. Early intervention often leads to faster recovery and prevents minor issues from becoming chronic problems.
Can front hip pain come from my spine or SI joint?
Absolutely! The human body is wonderfully interconnected, which sometimes means pain appears in surprising places. Front hip pain frequently originates from areas you might not suspect – like your spine or sacroiliac (SI) joint.
This phenomenon, called referred pain, happens because the hip, spine, and SI joint share nerve pathways. When your brain receives pain signals, it sometimes has trouble pinpointing the exact source. Think of it like getting a call from an unknown number – you know someone's calling, but you're not sure who.
Spine-referred hip pain often comes with some telltale signs. You might experience back pain alongside your hip discomfort, though not always. Some patients notice sensory changes like numbness or tingling that follow specific nerve pathways (called dermatomes). Certain spine movements might trigger or worsen your hip pain.
As Dr. Alison Grimaldi explains, "Back-related hip pain occurs when the brain misinterprets sensory signals shared between spinal segments." Problems with the L2-L3 spinal discs or nerve roots commonly refer pain to the front hip area.
SI joint issues can also masquerade as front hip pain. Though SI joint pain typically affects the back of the hip, it can radiate forward. You might notice it worsens with prolonged sitting or standing, or flares up during transitions like getting up from a chair. Some patients even experience pelvic floor symptoms alongside their hip pain.
At Evolve Physical Therapy, our evaluation process is designed to play detective with your pain. We carefully distinguish between local hip problems and referred pain from the spine or SI joint. This comprehensive approach ensures we're treating the true source of your symptoms, not just where you feel them.
Conclusion
Living with front hip pain can be challenging, but with the right approach, most people can find relief and return to their favorite activities. Throughout this guide, we've explored the many conditions that can cause discomfort in the anterior hip region—from common issues like hip flexor strains and labral tears to more complex problems like osteoarthritis and referred pain.
If there's one thing we've learned from helping hundreds of patients at Evolve Physical Therapy, it's that early action makes all the difference. The longer you wait to address front hip pain, the more likely it is to develop into something more serious. Many of our most successful recovery stories come from patients who sought help at the first sign of trouble.
Getting an accurate diagnosis is absolutely essential. With so many potential causes sharing similar symptoms, pinpointing the exact source of your pain requires professional evaluation. This isn't just about putting a name to your condition—it's about creating a foundation for effective treatment that targets the root cause, not just the symptoms.
The good news? Most people with front hip pain respond beautifully to non-surgical approaches. A thoughtful combination of activity modification, targeted physical therapy, and appropriate pain management often provides significant relief. Surgery, while sometimes necessary, is typically reserved for cases that don't respond to conservative care.
At Evolve Physical Therapy + Sports Rehabilitation in Brooklyn, we believe in looking at the whole person, not just the painful hip. Your movement patterns, strength imbalances, daily activities, and even emotional well-being all play important roles in both the development and resolution of front hip pain. This holistic perspective allows us to provide truly comprehensive care that addresses all factors contributing to your discomfort.
Prevention strategies should be custom to your specific needs. The approach that works for a teenage soccer player won't necessarily be right for a 65-year-old retiree or a 35-year-old office worker. We take pride in creating individualized plans that consider your unique circumstances, goals, and lifestyle.
Our team of experienced physical therapists at Evolve is dedicated to guiding you through every step of your recovery journey. From your initial evaluation to your triumphant return to hiking, dancing, playing with your kids, or whatever activities bring you joy, we're here to support you with evidence-based, compassionate care.
Don't let front hip pain keep you on the sidelines of your own life. With proper care and guidance, you can overcome this challenge and get back to doing what you love. Contact us today to schedule an evaluation and take your first step toward a pain-free future.
Remember—pain might be what brings you through our doors, but our ultimate goal is to help you thrive, not just survive. Your journey to better hip health starts here.

Scoliosis Solutions: A Guide to Treatment Options
Understanding Your Scoliosis Treatment Options
Scoliosis treatment options vary based on curve severity, age, and symptoms. Here's a quick overview of the main approaches:
Treatment Approach When It's Used Key Benefits Observation Mild curves (<25°) Non-invasive monitoring Physical Therapy All curve sizes Improves function, reduces pain Bracing Growing children (25-45°) Prevents progression in 75% of cases Surgery Severe curves (>50°) Corrects deformity, prevents worsening
Scoliosis affects roughly 2% of people worldwide - that's over 6 million Americans living with this spinal condition. While the sideways curvature of the spine might sound alarming, the good news is that most cases are mild and many treatment options exist today.
What makes scoliosis treatment different from other back problems is that the approach changes dramatically based on your age, growth status, and curve severity. For growing children with moderate curves, bracing for 16+ hours daily can effectively prevent worsening. Meanwhile, adults with scoliosis typically focus on pain management and function rather than curve correction.
Early detection remains crucial. When caught early, non-surgical approaches like specialized physical therapy techniques can help manage symptoms and sometimes slow progression, potentially avoiding more invasive interventions.
My name is Lou Ezrick, and as a physical therapist with nearly two decades of experience specializing in complex musculoskeletal conditions, I've helped hundreds of patients steer their scoliosis treatment journey using evidence-based manual therapy and specialized exercise programs at Evolve Physical Therapy.

Understanding Scoliosis: Types, Causes & Symptoms
Scoliosis is more than just "bad posture" – it's a three-dimensional deformity where the spine curves sideways and also rotates, creating a complex structural change. To understand why certain treatments work, we first need to understand what we're treating.
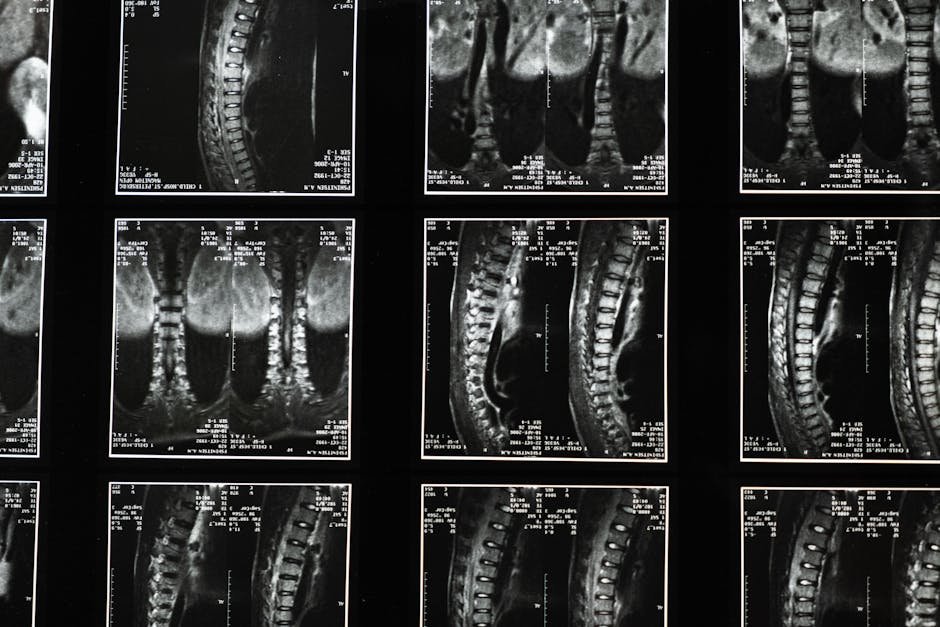
Main Types of Scoliosis
Scoliosis comes in several forms, each with different implications for treatment:
Idiopathic Scoliosis: The most common type (80% of cases), with no identifiable cause. It's further categorized by age of onset:
Infantile (0-3 years)
Juvenile (4-10 years)
Adolescent (11+) – the most prevalent form
Congenital Scoliosis: Present at birth due to vertebral malformations during fetal development.
Neuromuscular Scoliosis: Results from neurological or muscular conditions like cerebral palsy, muscular dystrophy, or spina bifida.
Degenerative Scoliosis: Develops in adulthood due to wear-and-tear of spinal discs and joints, often alongside arthritis.
As Dr. Mark Morningstar, a scoliosis specialist, explains: "Each type of scoliosis requires a different treatment approach. What works for adolescent idiopathic scoliosis may not be appropriate for degenerative scoliosis in seniors."
Common Causes in Children vs Adults
The causes of scoliosis differ significantly between age groups:
In Children:
Genetic factors (family history increases risk by 20%)
Hormonal imbalances (especially during growth spurts)
Neuromuscular conditions
Connective tissue disorders
In Adults:
Progression of untreated childhood scoliosis
Degenerative changes from aging
Arthritis and disc degeneration
Osteoporosis (especially in postmenopausal women)
Leg length discrepancies
Research suggests that idiopathic scoliosis may have genetic components, with studies showing it can run in families. However, environmental factors also play a role, making it a complex condition with multiple contributing factors. For more detailed information about the various causes of scoliosis, you can visit the National Scoliosis Foundation.
Key Signs & Screening Tips
Early detection is crucial for effective scoliosis treatment. Here are the warning signs to watch for:
Uneven shoulders or shoulder blade prominence
One hip higher than the other
Asymmetrical waistline
Clothes that hang unevenly
Visible curve when bending forward (the "Adams forward bend test")
Rib hump (prominence on one side when bending forward)
Back pain (more common in adults than children)
The Adams forward bend test is a simple screening method where the patient bends forward at the waist with arms hanging down and knees straight. A trained observer looks for asymmetry in the rib cage or lower back.
For more objective measurement, healthcare providers use a scoliometer, a specialized tool that measures trunk rotation. A reading of 7 degrees or more typically warrants referral for an X-ray to confirm the diagnosis.
Many schools conduct scoliosis screenings, but these programs have decreased in recent years. Parents should be vigilant about watching for signs, especially during growth spurts when curves can progress rapidly.
Diagnosis: From School Screenings to High-Tech Imaging
Proper diagnosis is the foundation of effective scoliosis treatment. Today's diagnostic tools range from simple physical exams to sophisticated 3D imaging technologies that give doctors a complete picture of what's happening with your spine.
Think of scoliosis diagnosis as a detective story. It usually begins with someone noticing something's a bit off – maybe a parent spots uneven shoulders while their child is swimming, or a school nurse flags something during a routine screening. From there, the investigation deepens.
The diagnostic journey typically begins with a hands-on physical examination. Your doctor will check for tell-tale signs like uneven shoulders or hips, looking at your back from different angles. The famous Adams forward bend test – where you bend forward at the waist with arms hanging down – often reveals the subtle rotation that makes scoliosis different from simple poor posture. Your doctor will also check your reflexes, muscle strength, and sensation to make sure there's nothing neurological contributing to the curve.
"A comprehensive exam looks beyond just the curve," explains Dr. Clayton J. Stitzel, a scoliosis specialist. "We're assessing overall posture, movement patterns, and neurological function to understand the full picture."
Tests Your Doctor May Order
After the physical exam, your doctor will likely want to get a clearer look inside with imaging studies. These tests confirm the diagnosis and provide measurements that guide treatment decisions:
X-rays remain the gold standard for diagnosis and monitoring. A standing full-spine X-ray lets your doctor measure the Cobb angle – the technical term for how many degrees your spine curves. This number, along with the curve pattern and location, largely determines your treatment path. X-rays also reveal your Risser sign, a measure of skeletal maturity that helps predict whether your curve might progress.
For children who need repeated scans, the newer EOS Imaging system is a game-changer. It captures 3D images using just one-tenth the radiation of conventional X-rays – important for young patients who may need monitoring for years.
When something unusual appears in the initial evaluation, your doctor might order an MRI. This radiation-free imaging is particularly helpful when there are neurological symptoms or atypical curves, as it can reveal hidden issues like syringomyelia (a fluid-filled cyst in the spinal cord), tethered cord syndrome, or even tumors.
For the youngest patients, ultrasound sometimes serves as an initial screening tool, offering a radiation-free glimpse at the spine, though with less detail than other methods.
Beyond imaging, your doctor might recommend:
Pulmonary function tests if your curve is severe enough to potentially affect breathing
Bone density scans, especially for adults with degenerative scoliosis
Genetic testing in cases with strong family history
"The diagnostic process has evolved tremendously," says Dr. Aatif Siddiqui. "With tools like EOS imaging, we can now monitor curves with minimal radiation exposure, which is crucial for growing children who need regular follow-up."
This combination of careful physical examination and targeted imaging creates a roadmap for your scoliosis treatment journey, helping your healthcare team make informed decisions about the best approach for your specific situation.
When & Why Scoliosis Treatment Is Needed
Not every curve requires intervention. The decision to treat depends on multiple factors, with curve progression risk being the primary concern.
Factors Guiding Treatment Decisions
When my young patients and their parents first hear a scoliosis diagnosis, their immediate question is usually "Do we need to do something about this?" It's a valid concern, and the answer isn't always straightforward.
Age and growth status play a crucial role in treatment decisions. Growing children, particularly during puberty, have a much higher risk of curve progression. I often explain to parents that the most dangerous time for curves to worsen is during those rapid growth spurts. Once a teen reaches skeletal maturity (typically 14-16 years for girls and 16-18 years for boys), the risk of progression drops significantly.
The curve magnitude measured by the Cobb angle guides our approach to scoliosis treatment. Mild curves under 25 degrees generally just need careful monitoring with regular X-rays. Moderate curves between 25-45 degrees often benefit from bracing, especially in growing children. When curves exceed 45-50 degrees, we typically need to have serious conversations about surgical options, particularly if the patient is still growing.
"My doctor explained that my son's 30-degree curve, combined with the fact that he still had two years of growth left, meant bracing was our best option to prevent surgery later," shared Maria, mother of a 13-year-old patient. "Understanding the 'why' behind the treatment made the challenging brace-wearing process easier for our whole family."
The curve pattern and location significantly impact treatment decisions too. Thoracic curves (in the upper back) tend to progress more than lumbar curves. Double curves behave differently than single curves. And interestingly, right thoracic curves in adolescent girls have a particularly high progression risk.
We also closely monitor the progression rate. A curve that increases by more than 5 degrees in six months signals the need for more aggressive intervention, while curves that remain stable for a year or longer suggest lower risk.
Symptoms matter tremendously in the treatment equation. While children rarely experience pain from scoliosis, adults often do. Severe thoracic curves can affect breathing. Some patients develop neurological symptoms like numbness or weakness. And we should never discount the psychological impact and cosmetic concerns, which can significantly affect quality of life and self-image, especially for teenagers.
Research shows that proper bracing can prevent progression in about 75% of adolescent idiopathic scoliosis patients with curves between 25° and 45°. This evidence-based approach helps many avoid surgery altogether.
For my adult patients, our treatment decisions focus more on managing pain and maintaining function rather than preventing curve progression. Adult curves typically progress more slowly—about 1 degree per year for curves over 50 degrees—but can still cause significant discomfort and functional limitations over time.
The journey through scoliosis treatment is highly individualized. What works for one patient may not be appropriate for another, even with similar curve measurements. That's why a thorough evaluation and personalized treatment plan are essential for achieving the best possible outcome.
Non-Surgical Scoliosis Treatment Options
For most people with scoliosis, non-surgical approaches are the foundation of care. These conservative methods aim to prevent curves from worsening, ease symptoms, and help you live your best life – all without the need for surgery.

Observation & Regular Monitoring
If you or your child has a mild curve under 25°, your doctor might recommend watchful waiting. But don't be fooled – this isn't a "do nothing" approach!
"Observation doesn't mean ignoring the condition," explains our physical therapy team at Evolve. "It means carefully tracking any changes so we can catch progression early when it's most treatable."
This approach typically involves X-rays every 4-6 months during growth spurts, clinical check-ups to spot changes in posture, and staying alert during those critical growth periods when curves tend to worsen.
The good news? Once you reach skeletal maturity (around 14-16 for girls and 16-18 for boys), your risk of progression drops dramatically, and you won't need such frequent monitoring.
Bracing 101: Who, What, How Effective for Scoliosis Treatment
For growing kids with moderate curves, bracing is often the go-to scoliosis treatment. Think of a brace as a guide for your growing spine – it can't straighten what's already curved, but it can prevent things from getting worse while you're still growing.
Bracing works best for:
Growing children who haven't reached skeletal maturity
Curves between 25° and 45°
Sometimes smaller curves (20-25°) if there are risk factors for rapid progression
The world of scoliosis braces has evolved tremendously over the years. Most common are the rigid TLSOs (thoracolumbosacral orthoses) like the Boston Brace – custom-molded plastic shells worn under clothing. For some patients, nighttime-only options like the Charleston Bending Brace might be recommended, while others might benefit from more flexible systems like the SpineCor.
Here's the honest truth about bracing: it works, but only if you wear it consistently. Research shows wearing a brace for more than 16 hours daily gives you the best chance of success – about 75% of patients who follow their wear schedule avoid surgery. Modern braces even come with temperature sensors to track actual wear time, taking the guesswork out of the equation.
"The first month with the brace was tough for my daughter," one parent shared with us. "But once she adjusted, it became part of her routine. Knowing it was preventing surgery made those challenging days worthwhile."
Physical Therapy & Exercise: Schroth Method and Beyond for Scoliosis Treatment
Physical therapy has become a cornerstone of modern scoliosis treatment, with specialized approaches showing real results for both children and adults.
The Schroth Method stands out as one of the most promising PT approaches. Developed in Germany, this three-dimensional technique teaches patients to:
Understand their unique curve pattern
Use rotational breathing to reshape the rib cage
Elongate and de-rotate the spine
Stabilize in improved positions using specialized exercises
"What makes Schroth different is that it's not one-size-fits-all," explains our team at Evolve Physical Therapy. "Each exercise program is customized to your specific curve pattern, and we use mirrors to help you visualize and feel the corrections."
Beyond Schroth, effective physical therapy for scoliosis includes core strengthening, postural retraining, and functional movement patterns. Many of our patients also benefit from complementary approaches like modified Pilates or yoga when custom to their specific needs.
Swimming deserves special mention as a fantastic full-body, low-impact exercise for people with scoliosis. The buoyancy of water supports your spine while allowing you to strengthen muscles symmetrically.
The benefits we see in our patients who commit to physical therapy include better posture, reduced pain, improved breathing, greater body awareness, and perhaps most importantly – a sense of control over their condition. You can learn more about our Schroth Method Physical Therapy Service for Scoliosis on our blog.
Lifestyle Tweaks & Home Care
The daily choices you make can significantly impact how scoliosis affects your life. Small adjustments can make a big difference in comfort and function.
When it comes to physical activity, the good news is that exercise is not only allowed but encouraged! Swimming is particularly beneficial for overall conditioning without compressing the spine. Some activities that involve extreme twisting or bending might need modification, and sports like gymnastics require individual assessment to ensure safety.
Your everyday environment matters too. Proper ergonomics – from how you sit at your desk to how you carry your backpack – can dramatically reduce strain on your spine. We recommend backpacks limited to 10-15% of body weight, ergonomic workstations with appropriate lumbar support, and balanced weight distribution when carrying items.
Don't overlook nutrition's role in scoliosis treatment. Calcium and vitamin D support bone health, while maintaining a healthy weight reduces strain on your spine. Some patients also find that anti-inflammatory foods help manage pain.
"I never realized how much my workstation was contributing to my pain," shared a patient from our Brooklyn clinic. "The simple adjustments my physical therapist recommended for my home office setup made a world of difference in my comfort throughout the day."
Do Alternative Therapies Work?
Many patients explore complementary approaches alongside conventional scoliosis treatment. Let's look at what the evidence actually shows:
Chiropractic care may provide symptom relief for some patients, but research doesn't support it for actual curve correction. If you choose this route, work with a chiropractor experienced in scoliosis who uses gentle techniques.
Acupuncture won't change your curve, but some studies suggest it can help manage pain, especially for adults with scoliosis-related discomfort.
Myofascial release techniques can address soft tissue restrictions and pain – a worthwhile addition to your care plan, though not a standalone solution.
As for supplements, the evidence for scoliosis-specific benefits is limited. However, supporting overall bone health with vitamin D, calcium, and magnesium makes good sense, especially during growth spurts or for older adults.
"We take an integrative approach," explains our team at Evolve. "While we focus on evidence-based physical therapy, we recognize that some complementary approaches may offer real benefits as part of a comprehensive plan. The key is having realistic expectations about what each therapy can and cannot do."
Want to learn more about how physical therapy can help with scoliosis pain? Check out our article on How Can Physical Therapy Help With Pain and Discomfort Caused by Scoliosis?
Surgical Options for Severe Curves
When conservative approaches reach their limits, surgery becomes a necessary consideration, especially for those with severe or rapidly progressing curves.

I've seen many patients struggle with the decision to pursue surgical intervention. It's never taken lightly, but sometimes it's truly the best path forward. Surgery typically enters the conversation when:
Your curve measures beyond 45-50 degrees (especially in adolescents)
Your spine continues to curve despite consistent bracing
You're experiencing significant pain or neurological symptoms as an adult
Your breathing or heart function becomes compromised by the curve
"When I discuss surgery with my patients," shares Dr. Michael Neuwirth, a renowned scoliosis surgeon, "I emphasize that our goal isn't just cosmetic—we're preventing future complications and improving quality of life."
The most common surgical approach is Posterior Spinal Fusion, which straightens the spine using a combination of rods, hooks, and screws. The procedure fuses vertebrae together using bone graft material, typically focusing only on the curved segments. Modern techniques can achieve impressive 60-100% curve correction, depending on how flexible your spine remains.
For younger children still growing, special systems have revolutionized scoliosis treatment. Magnetically Controlled Growing Rods can be expanded without additional surgeries—a huge advancement from traditional growing rods that required operations every 6 months. The VEPTR (Vertical Expandable Prosthetic Titanium Rib) system specifically addresses thoracic insufficiency syndrome, allowing chest and lung development while controlling the curve.
A newer, exciting option for select patients is Vertebral Body Tethering. Think of it as braces for your spine—a flexible cord is attached to the vertebrae on the curve's outer edge, allowing continued growth and motion while gradually straightening the spine. This technique works best for specific curve patterns in children who are still growing.
For adults concerned about recovery time, minimally invasive options like XLIF (eXtreme Lateral Interbody Fusion) offer side-approach techniques with smaller incisions. These approaches typically mean shorter hospital stays and faster recovery periods.
During any spinal surgery, sophisticated neurological monitoring tracks spinal cord and nerve function in real-time, significantly reducing the risk of neurological complications.
Weighing Risks & Benefits
The decision to undergo surgery involves careful consideration of both potential gains and concerns.
On the positive side, surgery offers significant curve correction, often between 60-100% improvement. It effectively prevents further progression of the curve and can dramatically improve appearance and self-image—something particularly important for adolescents. For those experiencing pain, surgery often provides substantial relief of symptoms. Perhaps most importantly, it can prevent serious long-term complications like cardiopulmonary issues.
"After my fusion surgery at 14, my confidence soared," shares Melissa, a former patient. "Not only did my back pain disappear, but I gained two inches in height and could finally stand straight without feeling self-conscious."
Of course, surgery comes with potential risks that shouldn't be downplayed. These include infection (occurring in about 2-3% of cases), potential blood loss requiring transfusion, and rare but serious neurological injury (less than 1% of cases). Some patients experience hardware complications like loosening or breakage of implants. Over time, there's also the possibility of adjacent segment degeneration and reduced spinal flexibility in the fused areas.
Recovery & Long-Term Outlook
The recovery journey after scoliosis treatment surgery follows a fairly predictable timeline, though individual experiences vary:
Most patients spend 3-5 days in the hospital, with initial focus on pain management and learning to move safely. You'll likely return to school in 4-6 weeks, resume non-contact sports by 3-6 months, and get back to all activities within 6-12 months. Complete healing and solid fusion typically takes 1-2 years.
"We encourage our post-surgical patients to work with physical therapists who understand the unique needs of fusion patients," notes our team at Evolve Physical Therapy. "Proper rehabilitation helps maximize function and teaches strategies to protect the unfused portions of the spine."
Long-term outcomes for modern spinal fusion are generally excellent. Most patients maintain their correction for decades and report significantly improved quality of life. While adjacent level degeneration can occur over time, today's instrumentation provides remarkably stable correction with very low rates of pseudarthrosis (failure of fusion).
Regular follow-up remains essential, with periodic X-rays to confirm fusion status and monitor unfused segments. Many of my patients are pleasantly surprised by how quickly they adapt to any movement limitations and how dramatically their lives improve after recovering from surgery.
Adult vs Pediatric Management Strategies
Scoliosis treatment takes distinctly different paths depending on whether we're talking about growing children or adults. This isn't just about age – it's about fundamentally different goals and physical realities.
When working with children, we're racing against growth spurts to prevent curve progression, sometimes even aiming for correction. For adults, the conversation shifts dramatically toward managing pain, maintaining function, and preserving quality of life.
Adult scoliosis typically falls into one of two categories. Some adults have been living with curves since childhood (adult idiopathic scoliosis), while others develop what we call "de novo" or degenerative scoliosis later in life, often as part of the aging process.
"The approach to adult scoliosis is fundamentally different," explains our physical therapy team at Evolve. "While pediatric treatment focuses on the curve itself, adult treatment prioritizes symptom management and functional improvement. It's less about 'fixing' the curve and more about living well with it."
Pain Management Strategies for Adults
Pain is often the primary concern for adults with scoliosis, and it typically stems from several sources working together. Muscle fatigue from years of compensating for spinal imbalance, facet joint arthritis where vertebrae connect, disc degeneration between vertebrae, nerve compression, and spinal stenosis (narrowing of spaces in the spine) all contribute to the discomfort many adults experience.
Thankfully, we have multiple effective approaches to address this pain:
For medication-based relief, many adults benefit from NSAIDs to reduce inflammation, muscle relaxants to ease painful spasms, and occasionally more targeted pain relievers for breakthrough pain. These aren't long-term solutions, but they can provide important relief during flare-ups.
When pain becomes more stubborn, injection therapies offer more targeted relief. Epidural steroid injections can calm irritated nerves, while facet joint injections address pain from arthritic joints in the spine. For specific nerve pain, nerve blocks can interrupt pain signals and provide temporary but meaningful relief.
Physical therapy remains the cornerstone of long-term management. At Evolve, we focus on building core strength to support the spine, re-educating posture to reduce strain, applying hands-on manual therapy to release tight tissues, and sometimes using aquatic therapy where the buoyancy of water reduces gravitational stress on the spine.
One of our adult patients, Martha, shared her experience: "After years of thinking I just had to live with the pain, the team at Evolve designed a program that addressed both my curve and the resulting muscle imbalances. The combination of hands-on therapy and targeted exercises has given me tools to manage my symptoms effectively. I'm not pain-free, but I'm back to gardening and playing with my grandkids."
Day-to-day life adjustments matter tremendously too. Simple changes like ergonomic modifications at work, thoughtful activity modifications that avoid painful positions, and occasionally using supportive braces during high-demand activities can dramatically improve comfort.
Long-Term Complications of Untreated Curves
When adult scoliosis goes unmanaged, several complications can develop over time. Understanding these risks helps emphasize why ongoing care matters.
Progression is a real concern, particularly with larger curves. Adult curves exceeding 50 degrees tend to worsen about 1 degree annually – a slow but steady change that adds up over decades. This isn't about cosmetics; it's about the domino effect of increasing imbalance.
Pain typically intensifies as muscles work harder to maintain balance, joints experience uneven wear, and nerves may become compressed in narrowing spaces. What starts as occasional discomfort can evolve into chronic, limiting pain.
For those with severe curves (exceeding 60-70 degrees), cardiopulmonary issues may develop as the chest cavity becomes compressed, restricting lung expansion and potentially affecting heart function. Breathing difficulties often emerge first during exercise, then gradually at rest.
Neurological symptoms represent another serious concern. Numbness, weakness, or even changes in bowel and bladder function can develop if nerve compression becomes significant. These symptoms shouldn't be ignored, as they can signal the need for more aggressive intervention.
The psychological impact of adult scoliosis shouldn't be underestimated either. Body image concerns, depression related to chronic pain, and social isolation when activities become difficult can significantly affect mental health and overall well-being.
Day-to-day functional limitations often become the most immediately relevant concern. Difficulty with routine activities, reduced mobility, and a shrinking world of comfortable movements can dramatically impact quality of life.
The good news? Early intervention and consistent management can help prevent or minimize these complications. That's why we emphasize comprehensive, lifelong care for our adult scoliosis patients at Evolve. While we can't turn back time, we can absolutely help you live better with scoliosis at any age.
Prevention, Prognosis & Emotional Support
The genetic nature of idiopathic scoliosis means we can't prevent it entirely, but early detection makes a world of difference in managing outcomes. School screening programs have proven invaluable for catching curves before they progress significantly, though many districts have scaled back these initiatives in recent years.
"While we can't prevent the initial development of most scoliosis cases, we can often prevent progression through early detection and appropriate intervention," notes our physical therapy team at Evolve.
For families concerned about prevention, focus on what you can control. Regular physical check-ups during growth years, maintaining strong core muscles, and ensuring adequate vitamin D and calcium intake all support overall spine health. For children with neuromuscular conditions, early and consistent management of the underlying condition may help minimize associated spinal curvature.
Adults facing degenerative scoliosis can take proactive steps too. Core-strengthening exercises build crucial support for your spine, while maintaining healthy weight reduces unnecessary spinal loading. Learning proper body mechanics for lifting and daily activities protects your back from additional stress, and bone health optimization through appropriate nutrition and exercise helps prevent osteoporosis-related curve progression.
Can You Prevent Scoliosis?
The honest answer is that for idiopathic scoliosis—the most common type—prevention isn't currently possible. The genetic components are strong, with studies showing that having a parent or sibling with scoliosis increases your risk by about 20%.
However, this doesn't mean we're powerless. Environmental factors interact with genetic predisposition, and maintaining muscle balance through regular physical activity may help minimize the impact. Some evidence suggests that addressing vitamin D deficiency supports bone development during crucial growth periods, potentially influencing how curves develop.
As one mother shared, "After my daughter was diagnosed, we learned her vitamin D levels were extremely low. While supplementing didn't reverse her curve, her orthopedist believed it might help prevent further weakening of her bones during treatment."
For adults, prevention focuses on slowing progression rather than preventing initial onset. Regular exercise, proper ergonomics, and maintaining bone density through appropriate nutrition and weight-bearing activities all play important roles in spinal health.
Coping Tips for Patients & Families
The emotional journey with scoliosis can sometimes be more challenging than the physical one, especially for adolescents navigating social pressures and body image concerns alongside treatment.
For teens wearing braces, practical strategies make a big difference. Loose-fitting clothes help accommodate braces discreetly, while personalizing your brace with designs or stickers can transform it from a medical device to a personal statement. Many of our younger patients at Evolve find that connecting with peers who understand the experience provides immeasurable support.
Parents play a crucial role in the emotional landscape. Open communication about frustrations and fears creates a safe space for processing feelings. Finding the balance between supportive care and overemphasis can be tricky—acknowledge the condition without letting it become the family's central focus.
"Finding an online support group made all the difference for my daughter," one parent shared. "Seeing other teens thriving with braces gave her confidence that she could do it too."
For all affected by scoliosis, body image counseling provides tools for developing healthy self-perception despite physical differences. Social media support groups offer community and understanding from others walking the same path. Many patients benefit from developing self-advocacy skills for medical appointments, learning to voice their concerns and ask important questions.
At Evolve Physical Therapy, we understand that emotional well-being directly impacts physical recovery. Our approach addresses both the curve in your spine and the very natural feelings that come with it. We've seen how peer networks foster resilience, and how celebrating treatment milestones builds the momentum needed for long-term compliance with care plans.
Most people with scoliosis lead full, active lives without limitations. With proper support—both physical and emotional—scoliosis becomes just one part of your story, not its defining feature.
Frequently Asked Questions about Scoliosis Treatment
When is a brace truly necessary?
This is perhaps the most common question I hear from parents in my practice. The decision to brace isn't one-size-fits-all, but rather follows specific guidelines backed by research.
A brace becomes necessary when we see a combination of factors that signal high progression risk. Your doctor will typically recommend bracing when your child is still growing (shown by a Risser sign of 0-2), has a curve measuring between 25-45 degrees, and especially if there's documented progression of 5+ degrees over a short period. Girls who haven't yet had their first period face particularly high progression risk.
"My daughter was so resistant to the idea of bracing at first," one mom recently told me. "But when we explained that wearing it consistently now could prevent surgery later, she began to understand the bigger picture."
The research is clear on this point: bracing works best when worn at least 16 hours daily and continued until skeletal maturity. While it won't reverse existing curves, consistent bracing prevents progression to surgical levels in about 75% of patients who follow the wearing schedule. That's a significant success rate that makes the temporary discomfort worthwhile for most families.
Can physical therapy alone correct my curve?
I wish I could tell you that physical therapy alone will structurally correct established scoliosis curves, but I need to be honest: in most cases, it cannot completely reverse them. However, that doesn't mean PT isn't incredibly valuable in scoliosis treatment.
What specialized physical therapy absolutely can do is provide significant benefits that improve quality of life. The Schroth method, which we offer at Evolve, has shown modest curve improvements in some studies. More consistently, good PT improves posture and appearance, reduces the perceived deformity, decreases pain, increases function, improves breathing mechanics, and provides self-management strategies you can use for life.
"Physical therapy works best as part of a comprehensive approach," our team at Evolve often explains to new patients. "For growing children, it may complement bracing. For adults, it's often the cornerstone of non-surgical management."
One of our teenage patients put it perfectly: "The exercises don't make my curve disappear, but they make me feel stronger and more in control of my body. My posture is better, and I have far fewer painful days."
Is spinal fusion permanent and safe long term?
This question understandably causes anxiety for patients considering surgery. Yes, spinal fusion is permanent—the fused segments will no longer move independently. However, modern surgical techniques preserve as many mobile segments as possible, minimizing the impact on your overall spinal flexibility.
The good news about long-term safety is reassuring. Studies following patients for 20+ years show over 90% maintain their correction without significant problems. While adjacent segment degeneration occurs in about 30% of patients over decades (as the mobile segments above and below the fusion work harder), most patients report satisfaction with their results and say they would choose surgery again if faced with the same decision.
Most fusion patients successfully return to normal activities, including non-contact sports. Hardware rarely requires removal unless complications develop.
"The fusion decision isn't just about today—it's about preventing progressive deformity over a lifetime," a surgeon colleague often tells patients. "For those with severe, progressive curves, the benefits of preventing further deformity and potential cardiopulmonary complications typically outweigh the drawbacks of reduced mobility in the fused segments."
At Evolve Physical Therapy, we work with many post-fusion patients to maximize function in the non-fused segments and develop core strength that supports long-term spine health. Our comprehensive approach helps patients achieve the best possible outcomes, whether they're pursuing conservative care or recovering from surgical intervention.
Conclusion
Your journey with scoliosis doesn't have to be a lonely road full of uncertainty. As we've explored throughout this guide, scoliosis treatment has transformed dramatically in recent years, offering new hope and better outcomes for people of all ages living with spinal curves.
Think of scoliosis management as a personalized path rather than a one-size-fits-all approach. What works beautifully for a growing 12-year-old with a moderate curve might be entirely different from what helps a 65-year-old with degenerative scoliosis. This personalization is exactly why working with specialists who understand the nuances of spine care makes such a difference.
Remember these essential insights as you steer your scoliosis journey:
Early detection truly can be life-changing. When we catch curves early, especially in growing children, we have more options and often better outcomes. Those regular school screenings and pediatrician check-ups matter more than you might realize!
Your treatment plan should feel like it was created just for you – because it should be! Your age, curve pattern, progression risk, and personal goals all play vital roles in determining the right approach, whether that's specialized physical therapy, bracing, or in some cases, surgical intervention.
For many people, especially growing children with moderate curves, consistent bracing can be remarkably effective at preventing progression. Yes, wearing a brace for 16+ hours daily isn't easy, but the long-term benefits make those temporary challenges worthwhile.
If surgery becomes necessary, today's advanced techniques offer excellent long-term results with faster recoveries than ever before. Most patients return to their favorite activities and enjoy significantly improved quality of life.
Adults with scoliosis need a different focus – typically centered on managing pain, improving daily function, and maintaining quality of life rather than dramatically changing the curve itself.
The emotional side of scoliosis matters just as much as the physical aspects. Support groups, counseling, and connecting with others who understand your experience can make all the difference in your coping journey.
Here at Evolve Physical Therapy + Sports Rehabilitation in Brooklyn, we're passionate about helping people with scoliosis live their best lives. Our specialized team offers evidence-based scoliosis treatment using the Schroth Method and other advanced physical therapy techniques that address not just your spine, but your whole person.
Our hands-on approach means we get to know you, your specific challenges, and your goals. Whether you're a teenager adjusting to life with a brace, an adult managing pain from a long-standing curve, or someone recovering from scoliosis surgery, we're here to support every step of your journey.
Living with scoliosis might be part of your story, but it doesn't have to define your life. With the right care team and treatment approach, you can move, play, work, and thrive.
For more information about our Schroth Scoliosis Physical Therapy services that have helped hundreds of Brooklyn residents manage their scoliosis effectively, visit our specialized scoliosis treatment page or reach out to schedule your personalized evaluation.

Unlock Relief: TMJ Self-Massage Techniques
Finding Relief: TMJ Self Massage Techniques
TMJ self massage techniques can provide immediate relief for jaw pain by targeting key muscles. Here's how to get started:
Masseter massage: Place fingers on cheeks near jaw joint, apply gentle pressure in small circles for 30-60 seconds
Temporalis massage: Rub temples in circular motions with fingertips for 30-60 seconds
Suboccipital release: Press fingers at base of skull and hold for 30 seconds
Jaw stretches: Gently open mouth while applying light resistance with fingers
The temporomandibular joint (TMJ) affects over 10 million Americans, with symptoms ranging from clicking and popping to severe jaw pain and headaches. When stress builds up, many of us unknowingly clench our teeth throughout the day, creating tension in the powerful jaw muscles that can lead to TMJ dysfunction.
Self-massage techniques target these overworked muscles, releasing trigger points and improving blood flow to reduce pain and restore normal function. These techniques are backed by research showing that manual therapy significantly improves mouth opening and reduces TMJ pain.
I'm Lou Ezrick, physical therapist at Evolve Physical Therapy, where I've helped thousands of patients find relief from TMJ pain through specialized manual therapy and TMJ self massage techniques that address not just the jaw but the entire connected system of muscles.

What Is TMJ Dysfunction?
Ever had that moment when your jaw clicks loudly during a quiet meeting, or wakes up feeling like it's been through a boxing match? That's your temporomandibular joint (TMJ) sending you signals that something's not quite right.
TMJ dysfunction (also called TMD) affects the complex joint that connects your jawbone to your skull—that essential hinge that lets you talk, chew, and express yourself. When this joint or its surrounding muscles become irritated, inflamed, or damaged, the result can be anything from mild discomfort to debilitating pain.
"It's been a jaw-clenching, teeth-grinding kind of week. When isn't it that kind of week? And now, you have excruciating jaw pain. Ibuprofen? Might as well put a bandage on your jaw for all the help it's doing," shares one of our patients who later found relief through TMJ self massage techniques.
What causes this frustrating condition? The culprits are varied:
Your nightly teeth grinding (bruxism) could be wearing down your TMJ. Perhaps arthritis has settled into the joint. Maybe you took a hit to the jaw playing sports years ago. For many, the daily stress that turns into jaw clenching is the primary offender. Some folks even have misaligned teeth or jaws that contribute to the problem, while others simply inherited the tendency from family.
This isn't a rare issue—TMJ disorders affect over 10 million Americans, with research showing 20-40% of adults will experience symptoms at some point. That makes it one of the most common musculoskeletal conditions affecting the face and jaw.
Common Symptoms & Red Flags
How do you know if you're dealing with TMJ dysfunction? Your body typically sends clear signals:
Jaw pain is the most obvious sign, especially when you're chewing that morning bagel or trying to enjoy a crunchy apple. Many people describe a clicking or popping sound when opening their mouth—sometimes loud enough for others to hear! In more severe cases, your jaw might even temporarily lock open or closed, which can be both painful and panic-inducing.
Facial tenderness often extends beyond just the jaw, creating a dull ache across your cheek and temple areas. This tension frequently leads to headaches that mimic tension headaches but actually stem from your overworked jaw muscles.
Surprisingly, many people experience ear symptoms including pain, ringing, or a feeling of fullness—all without any actual ear infection present. Some even report dizziness or unexplained tooth sensitivity that dentists can't trace to dental problems.
Hannah Etlin-Stein, a registered massage therapist specializing in TMJ treatment, notes: "Many clients are unaware that their headaches, ear pain, and even some forms of dizziness can be directly related to TMJ dysfunction."
If you experience a sudden inability to open or close your mouth, severe pain that interferes with eating, jaw pain with fever, or symptoms that worsen despite self-care, it's time to seek professional help immediately.
Why Muscles Matter
To understand TMJ dysfunction—and why TMJ self massage can be so effective—you need to know the key players in this painful drama:
The masseter muscle is your jaw's powerhouse. Relative to its size, it's often considered the strongest muscle in your body, capable of exerting hundreds of pounds of pressure when you clench. Located on the side of your face, this muscle frequently becomes overworked and is a primary source of TMJ pain.
Your temporalis muscle spans from your temple down to your jaw in a fan shape. It helps with chewing and closing your mouth. When tense, it often triggers those temple headaches you might blame on stress or screen time.
Deeper inside lie the pterygoid muscles—smaller but mighty controllers of your side-to-side jaw movements. The lateral pterygoid in particular helps open your mouth and can refer pain deep into the TMJ area when irritated.
But the jaw doesn't work in isolation. Your neck tension directly influences jaw function through muscles like the sternocleidomastoid (SCM), upper trapezius, and suboccipitals. This creates a chain reaction where tension in one area feeds tension in another.
As one TMJ specialist explains, "Jaws do not exist in a vacuum. It's essential to address other areas in the body that may be contributing to jaw tension and pain."
Understanding this interconnected system helps explain why comprehensive approaches to TMJ relief—including TMJ self massage techniques that address not just the jaw but also the neck and shoulders—often provide the most significant benefits.
For more scientific background, the research on temporomandibular disorders continues to evolve, helping professionals develop better approaches to this complex condition.
How TMJ Self Massage Relieves Pain
Ever wonder why a good jaw massage feels so incredibly relieving? There's real science behind that "ahhh" moment when tension melts away. TMJ self massage works through several natural healing mechanisms that your body responds to immediately.
When you apply gentle pressure to those tight jaw muscles, you're physically breaking up adhesions—those pesky "knots" that form when muscle fibers get stuck together. This mechanical pressure is like smoothing out wrinkles in fabric, helping your jaw muscles return to their natural, relaxed state.
"The first time I tried massaging my jaw muscles, I felt this immediate sense of relief, like something was finally releasing after being tight for months," shares Maria, one of our patients at Evolve Physical Therapy.
Your massage also boosts blood circulation to these overworked areas. Think of it as opening the highways to your muscles—fresh oxygen and nutrients rush in while waste products that contribute to pain get swept away. This improved blood flow is why your jaw often feels warmer and more relaxed after a good massage session.
Those particularly tender spots you might find? They're likely trigger points—hyper-irritable knots that can refer pain to other areas. When you press on these spots during TMJ self massage, you're helping to deactivate them, which can stop pain that radiates to your ears, temples, or neck.
Perhaps most fascinating is how massage affects your nervous system. The gentle pressure activates your body's rest-and-digest response (the parasympathetic nervous system), counteracting the fight-or-flight stress response that often leads to jaw clenching in the first place. It's like hitting the reset button on your stress levels.
Research backs this up too. A 2021 study found that conservative manual techniques, including massage, significantly improved both pain levels and mouth opening ability in people with TMJ disorders. The evidence is clear—your hands can be powerful tools for relief.
Science Behind Self-Massage vs. Professional Therapy
While nothing replaces the skilled hands of a physical therapist, TMJ self massage offers unique benefits that complement professional care beautifully.
Both approaches trigger the release of endorphins—your body's natural painkillers that create that pleasant, relaxed feeling. The difference? With self-massage, you can tap into this natural pharmacy whenever you need it, not just during appointments.
There's also something special about touching your own muscles. As you massage, you develop what therapists call "proprioceptive awareness"—essentially, you become more tuned in to your own body. This heightened awareness helps you catch tension before it snowballs into pain.
"I used to have no idea I was clenching until my jaw was already in agony," explains Tom, another patient. "Now I can feel the tension building and use TMJ self massage to release it before the pain starts."
Here's how self-massage stacks up against professional therapy:
Aspect Self-Massage Professional Therapy Cost Free $75-200 per session Frequency Can be done daily Typically 1-2x weekly Precision Moderate (improves with practice) High (expert knowledge) Techniques External primarily, limited intraoral Comprehensive external and intraoral Feedback Self-assessment Professional assessment Integration with other treatments Self-directed Coordinated care plan
At Evolve Physical Therapy, we believe the best approach combines both—our expert hands-on therapy plus empowering you with effective self-massage techniques for between-session relief.
Benefits Beyond Pain Relief
The magic of TMJ self massage extends far beyond just making pain disappear. Regular practice creates a cascade of positive effects throughout your body.
Your jaw's range of motion often improves dramatically. Patients who couldn't fully open their mouths to enjoy a sandwich or who winced when yawning find these everyday movements becoming comfortable again.
Many people also notice they're clenching and grinding less—both during waking hours and while sleeping. This decreased muscle hyperactivity gives overworked jaw muscles a chance to truly recover.
Sleep quality frequently improves too. When your jaw isn't throbbing with pain, you're less likely to wake up during the night or struggle to fall asleep in the first place. Better sleep means better healing and less pain overall—a wonderful upward spiral.
Those nagging tension headaches? They often diminish or disappear completely when jaw tension is addressed, since many headaches actually originate from tight jaw and neck muscles.
Perhaps best of all, TMJ self massage offers a drug-free approach to pain management. No side effects, no prescriptions—just your own hands providing natural relief.
"I was popping ibuprofen like candy before learning these techniques," shares Jamie, who found relief through our TMJ program. "Now I reach for my jaw massage routine instead of the pill bottle, and I feel better for it."
The act of massage itself can become a mindful, meditative practice. Those few minutes of focused self-care can lower your overall stress levels—addressing one of the root causes of TMJ issues in the first place.
Want to learn more about how manual therapy approaches can help your TMJ pain? Check out our detailed information about TMJ Pain on our website.
Map Your Muscles: Key Trigger Points
Understanding the location of key muscles and their trigger points is essential for effective TMJ self massage. Trigger points are hyper-irritable spots within a taut band of muscle that can refer pain to other areas when pressed.
Think of your jaw area as a neighborhood where several important muscles live side by side. Your masseter is like the neighborhood strongman, sitting at the angle of your jaw where you can feel it bulge when you clench your teeth. When this muscle harbors trigger points, you might feel pain radiating to your upper and lower teeth, jaw joint, or even your ear.
Up above lives the temporalis, a fan-shaped muscle stretching from your temple down to your jaw. When this muscle gets cranky, it often sends pain signals that feel like temple headaches or pain around your eyebrow. Many patients are surprised to learn their "tension headaches" actually originate here!
Hidden away inside your mouth are the medial and lateral pterygoids - the shy neighbors that require a bit more effort to reach. These muscles can be accessed through gentle intraoral techniques and when irritated, often cause deep ear pain or discomfort inside the mouth itself.
At the base of your skull, the tiny but mighty suboccipitals play a crucial role in the TMJ story. These small muscles can refer pain upward into your head and contribute to jaw issues through a chain reaction of tension. As one of our patients finded, "I never realized the tension at the base of my skull was connected to my jaw pain until I learned to massage both areas."
The sternocleidomastoid (SCM) is that rope-like muscle running from behind your ear to your collarbone. This muscle is particularly interesting because trigger points here can cause unexpected symptoms like dizziness and ear fullness that are often mistakenly attributed to other conditions.
Finally, your upper trapezius muscles across your shoulders and upper back often hold tension that can affect your jaw position through postural changes. These muscles are like the foundation of a house - when they're unstable, everything above them (including your jaw) can get thrown off balance.
Jaw Power Trio
The three main muscles of mastication form what we at Evolve Physical Therapy call the "Jaw Power Trio":
Your masseter is truly remarkable - it has three overlapping layers, making it incredibly strong for its size. When performing TMJ self massage, it's important to work through all these layers. The superficial layer is easiest to access from the outside, while the middle layer requires moderate pressure. The deep layer might need intraoral techniques for full release.
"After learning how to properly target each layer of my masseter muscle," shares Maria, one of our Brooklyn patients, "I experienced relief that months of pain medication couldn't provide."
The temporalis fan spreads across your temple in three functional areas. The anterior fibers primarily close your jaw, the middle fibers assist with closing and pulling back, and the posterior fibers help with jaw retrusion and stabilization. Learning to massage each section can provide targeted relief.
Your pterygoid side-glide muscles control the side-to-side movement of your jaw. The medial pterygoid works with the masseter to close the jaw, while the lateral pterygoid controls jaw opening and side-to-side movement. These muscles are often overlooked but play a crucial role in TMJ dysfunction.
Neck & Shoulder Influencers
Your jaw doesn't exist in isolation - it's intimately connected to your neck and shoulders in ways that might surprise you.
The sternocleidomastoid (SCM) affects head position and can indirectly influence jaw alignment. Many people with TMJ pain also have tender spots in this prominent neck muscle. During your TMJ self massage routine, don't forget to include gentle work on this area.
Those pesky trapezius knots that develop between your shoulders and neck can actually refer pain up into your head and jaw region. I often tell my patients that addressing these knots is like turning down the volume on their TMJ pain.
The posture link is perhaps the most important connection to understand. For every inch your head moves forward from optimal alignment, the effective weight on your neck muscles increases by about 10 pounds! This forward head posture places strain on both neck and jaw muscles, creating a vicious cycle of tension.
"I spent years focusing just on my jaw," admits Tom, who found relief at our Brooklyn clinic. "It wasn't until I learned about the neck-jaw connection and started addressing my posture that I found lasting relief."
At Evolve Physical Therapy, we address these connections through a comprehensive approach that includes both TMJ self massage techniques and posture correction strategies. For more detailed information about these connections, visit our page on Temporomandibular Joint Massage.
Step-by-Step TMJ Self Massage Routine
Ready to try tmj self massage at home? I've helped hundreds of patients find relief with these techniques, and with a little practice, you can too. Let's walk through a simple routine that targets those tight jaw muscles.
Preparation: First things first—wash those hands thoroughly and trim any long fingernails. Find a quiet spot where you can relax without interruptions. Before diving in, apply a warm compress to your jaw for about 5 minutes—this helps soften those tight muscles and prepares them for massage. Take a minute or two for some deep belly breathing to calm your nervous system.
"I tell all my patients to start with heat and breathing," says our senior therapist at Evolve Physical Therapy. "It makes such a difference in how the muscles respond to massage."
When it comes to pressure, think moderate—about 5-7 on a scale of 10. You want to feel it working, but it shouldn't be painful. Hold each pressure point for 30-60 seconds, waiting until you feel the tension start to melt before moving on. We're helping your muscles here, not punishing them!
For best results, aim to do this routine 2-3 times weekly. During flare-ups, you might benefit from daily sessions, but as things improve, you can scale back to a maintenance schedule of once or twice a week.
tmj self massage: External Techniques

Let's start with the masseter—the powerhouse muscle that does most of your chewing. Place your fingertips on your cheeks just in front of your ears. Gently clench your teeth to feel where this muscle bulges, then release. Now make small, firm circles with your fingertips, gradually working your way down toward the angle of your jaw. Spend 30-60 seconds on each side.
Next, let's move to your temples for the temporalis muscle. This fan-shaped muscle often holds tension that can trigger headaches. Use your fingertips to make gentle circles across your temples, covering the entire area from your temple to your hairline. Again, 30-60 seconds per side is ideal.
"The temporalis massage was life-changing for me," shares Maria, a patient from our Park Slope location. "I'd been getting headaches for years and never connected them to my jaw until I tried this technique."
For the jaw joint itself, place your fingertips directly over your TMJ (that's right in front of your ear canal). While applying gentle pressure, open and close your mouth slightly and make small circles directly over the joint for 30-60 seconds on each side.
Don't forget those suboccipital muscles at the base of your skull! These little muscles can refer pain up into your head and down to your jaw. Place your fingertips at the base of your skull where it meets your neck, and apply gentle pressure while making small circles, focusing on those small indentations on either side of your spine.
tmj self massage: Intraoral Techniques
Now for the inside-the-mouth techniques. These are incredibly effective but require extra care:
Safety is paramount here—use a clean nitrile or vinyl glove (avoid latex if you have allergies), keep those fingernails short, and be extra gentle. If anything hurts, stop immediately.
For the intraoral masseter release, put on your glove and open your mouth slightly. Place your thumb inside your cheek while your index and middle fingers rest on the outside. Gently pinch the muscle between your fingers and hold for 30 seconds before releasing. You can repeat this in 2-3 different spots along the muscle.
The pterygoid muscles are trickier to reach but often hold significant tension. For the lateral pterygoid, place your gloved little finger inside your mouth and slide it along your upper teeth toward the back. When you reach the last molar, move your finger outward toward your cheek until you feel a small hollow area. Apply very gentle pressure here for 15-30 seconds while breathing deeply.
"Many of my patients are surprised by how effective the pterygoid release can be," notes our TMJ specialist at Evolve. "It's often the missing piece in their relief puzzle."
For the medial pterygoid, use your gloved index finger inside your mouth, sliding along your lower teeth to the back. At the last molar, move your finger inward toward your tongue and apply gentle pressure for 15-30 seconds.
Track Progress & Frequency
Keeping tabs on your improvement helps you fine-tune your approach. Consider starting a simple pain journal—nothing fancy, just rate your pain on a scale of 0-10 before and after each massage session and note any changes in symptoms like clicking, locking, or headaches.
A ruler can be your best friend for measuring progress. Once weekly, measure the distance between your upper and lower front teeth when opening as wide as comfortable. Record this measurement to track improvements in your range of motion.
When should you massage more often? If your pain consistently rates above 5/10, if you're having trouble opening your mouth fully, or during particularly stressful periods, you might benefit from more frequent sessions.
When can you cut back? When your pain consistently stays below 3/10, when your mouth opens more easily, or when that annoying clicking has decreased, you can start tapering to maintenance level.
"Being consistent made all the difference for me," shares Josh, who visited us at Evolve after months of jaw pain. "I noticed the temporalis massage gave me immediate relief, while working on my pterygoids seemed to have longer-lasting effects. I adjusted my routine based on these observations and saw faster improvement."
Tmj self massage is a skill that improves with practice. Be patient with yourself as you learn these techniques, and don't hesitate to reach out to our team at Evolve Physical Therapy if you need guidance or aren't seeing the improvement you'd hope for.
Safety Guidelines & When to Call the Pros
Let's talk safety first, because even something as helpful as TMJ self massage needs to be done with care. Think of these guidelines as your protective guardrails—they'll keep you on the safe path to relief.
Your jaw is a sensitive area with important structures nearby, so certain situations call for hands-off caution. Skip the self-massage if you're dealing with an acute facial infection, recent jaw surgery, or if you have a history of jaw dislocations. Those with severe unexplained pain or significant swelling should also press pause on DIY techniques.
"I learned this the hard way," shares Maria, one of our Brooklyn patients. "I tried aggressive massage during a flare-up with swelling and actually made things worse. My physical therapist at Evolve later explained why gentle was the way to go."
When performing your massage, be mindful of these important precautions:
Never press deeply on your neck where you can feel your pulse (that's your carotid artery)
Avoid squeezing both sides of your neck muscle (sternocleidomastoid) at once
Use gentle pressure behind your ear where the styloid process sits
Lighten your touch if you're taking blood thinners or anti-inflammatories
If using gloves for intraoral work, check for latex allergies first
TMJ self massage should bring relief, not create new problems. If your pain increases during or after massage, that's your body waving a red flag—stop and reassess.
Sometimes self-care just isn't enough. Consider it time to call in the professionals if your symptoms persist beyond two weeks of consistent self-massage, or if you experience numbness or tingling in your face. Difficulty swallowing, increasing jaw locking, or new clicking sounds are also signs to seek expert help.
Red-Flag Symptoms Requiring Professional Help
Some symptoms simply shouldn't wait. If you experience any of these warning signs, it's time to put down this article and pick up the phone:
Neurological symptoms like facial numbness or tingling can indicate nerve involvement that needs professional assessment. Similarly, any sudden weakness in your facial muscles or unexpected changes in vision or hearing warrant immediate attention.
Structural issues send equally important messages. If your teeth suddenly don't fit together properly, or you can't fully open or close your mouth, your jaw joint may be experiencing mechanical problems beyond what self-massage can address.
Pain patterns matter too. As Lou Ezrick, PT at Evolve Physical Therapy explains, "Pain that wakes you from sleep, radiates down your neck into your arm, or feels sharp and shooting rather than dull and achy suggests something more complex than simple muscle tension."
Your history plays a role as well. Recent trauma to your jaw or face, complications from previous jaw surgery, or conditions like rheumatoid arthritis require specialized care approaches.
"I ignored the warning signs for months," admits David, another Brooklyn patient. "When the pain started shooting down my neck, I finally came to Evolve. Turns out I needed a comprehensive treatment plan that addressed more than just the muscle tension."
Choosing a Specialist
When self-care reaches its limits, finding the right professional becomes your next important step. But who should you see?
Physical therapists (PTs) offer a comprehensive approach to TMJ dysfunction. They're movement specialists who can assess not just your jaw but how it connects to your neck, shoulders, and overall posture. A good PT will combine hands-on treatment with personalized exercises and may incorporate helpful modalities like ultrasound or electrical stimulation.
Registered massage therapists (RMTs) focus primarily on soft tissue treatment. Some have specialized training specifically for TMJ work and can provide both external and intraoral massage techniques with skilled precision.
When searching for the right provider, look for credentials that matter: specialized training in TMJ or orofacial pain, certification in intraoral techniques, and substantial experience treating TMJ cases.
Don't be shy about asking questions before booking an appointment:
"How much experience do you have treating TMJ disorders?"
"Do you perform intraoral work as part of your treatment?"
"How will you help me continue care at home?"
"What's your overall approach to treating TMJ issues?"
"How many sessions might I need before seeing improvement?"
At Evolve Physical Therapy + Sports Rehabilitation in Brooklyn, our team has specialized training in TMJ treatment. We believe in empowering patients with effective self-care strategies while providing expert hands-on care. Our approach combines in-clinic treatment with personalized home programs for lasting relief.
Seeking professional help isn't giving up on self-care—it's taking the next smart step toward comprehensive healing. The best outcomes often come from combining expert care with the TMJ self massage techniques you've learned.
Beyond Massage: Exercises & Daily Habits for Lasting Relief
While tmj self massage provides powerful relief, it works best when combined with targeted exercises and lifestyle changes. Think of massage as your immediate relief tool and these additional practices as your long-term solution builders.
The humble chin tuck might look silly (hello, temporary double chin!), but it's one of the most effective exercises for TMJ relief. Sit with good posture, draw your chin straight back, hold for 3-5 seconds, and repeat 10 times, three times daily. This simple movement helps realign your jaw and neck, reducing strain on your TMJ.
Controlled jaw opening exercises create strength and stability. Place your fist gently under your chin for light resistance, then slowly open your mouth against this gentle pressure. Hold for 3 seconds before slowly closing. Ten repetitions twice daily can significantly improve jaw control and reduce pain.
Your tongue position matters more than you might think. Try maintaining "tongue-to-roof posture" by resting your tongue tip on the roof of your mouth, just behind your front teeth. Keep teeth slightly apart with lips closed. This neutral position reduces unconscious clenching throughout the day.
"I never realized how much tension I was holding in my neck until I started doing daily stretches," shares Maria, an Evolve Physical Therapy patient. "The combination of neck stretches and tmj self massage reduced my headaches by about 80% in just two weeks." Simple neck stretches—gently tilting your ear toward your shoulder for 15-30 seconds on each side—can release tension that directly impacts your jaw.
Heat and ice therapy complement your massage routine beautifully. Apply moist heat for 10-15 minutes before massage to relax tight muscles. Use ice afterward if inflammation is present. For chronic conditions, alternating between heat and ice often works best.
Breathing & Relaxation Hacks
Your breath might be the most underrated tool in your TMJ relief toolkit. "Most people with jaw tension are shallow chest breathers," explains our lead physical therapist at Evolve. "Learning diaphragmatic breathing can transform your jaw tension within days."
Place one hand on your chest and one on your abdomen. Breathe slowly through your nose, feeling your abdomen expand rather than your chest. Exhale slowly through your mouth. Just five minutes of this practice, three times daily, can dramatically reduce stress-related jaw clenching.
Progressive muscle relaxation pairs beautifully with tmj self massage. Before bed, systematically tense and then relax each muscle group in your body, including gently clenching and releasing your jaw. This practice helps your nervous system recognize and release tension patterns.
Technology can help too. Apps like Calm, Headspace, or Insight Timer offer guided meditations specifically for body awareness and tension release. Set phone reminders to check in with your jaw tension throughout the day—you might be surprised how often you're clenching without realizing it.
Create a jaw-friendly bedtime routine. Avoid screens an hour before sleep (the blue light can increase tension), apply a warm compress to your jaw, perform gentle tmj self massage, and practice diaphragmatic breathing as you drift off. This ritual signals to your body that it's safe to release the day's tension.
Lifestyle Tweaks & Tools
Small daily habits can make or break your TMJ recovery. During flare-ups, be kind to your jaw by choosing softer foods cut into smaller pieces. That juicy steak might need to wait until your symptoms improve. Limit caffeine, which can increase muscle tension and unconscious clenching.
Your workstation might be secretly aggravating your TMJ. Position computer screens at eye level to prevent forward head posture. Use a headset for phone calls instead of cradling the phone between your shoulder and ear (we've all done it!). Take regular stretch breaks—your jaw will thank you.
"The way you sleep matters tremendously," notes our TMJ specialist at Evolve Physical Therapy. Avoid stomach sleeping, which twists your neck and strains your jaw. Instead, use a supportive pillow that keeps your spine aligned. Some patients find relief with contoured pillows specifically designed for TMJ support.
Consider supportive tools for comprehensive care. Night guards or splints prescribed by dentists can prevent teeth grinding damage. Posture reminder apps or devices can help you maintain jaw-friendly alignment throughout the day. Some patients even benefit from specialized massage tools designed for facial muscles.
James, who visited our Brooklyn clinic after months of jaw pain, shares: "The combination of night guard from my dentist and the tmj self massage techniques I learned at Evolve completely changed my life. After years of morning headaches and jaw pain, I finally wake up feeling rested."
Consistency matters more than perfection. Incorporate these exercises and habits gradually, and be patient with your progress. For personalized guidance on combining these techniques with professional care, visit our TMJ Therapy Brooklyn page to learn how our specialists can help create a comprehensive treatment plan.
Frequently Asked Questions about TMJ Self-Massage
How often should I perform TMJ self-massage?
Finding the right frequency for your TMJ self massage routine is like finding the perfect workout schedule—it needs to be sustainable and effective for your unique needs. For most people, 2-3 sessions per week provides excellent maintenance and keeps jaw tension at bay.
During those frustrating flare-ups when your jaw feels especially tight or painful, daily gentle massage can be incredibly soothing. Just remember, your tissues need time to respond and heal between sessions.
"I always tell my patients that consistency trumps intensity every time," shares one of our TMJ specialists at Evolve. "Those who perform gentle massage regularly see much better results than those who do aggressive work once in a while and then forget about it for weeks."
Pay attention to how your body responds. If you notice increased soreness after massage, that's your cue to ease up on pressure or frequency. Your jaw will thank you for the gentler approach.
Can self-massage replace my mouth guard?
Think of TMJ self massage and your mouth guard as partners in your jaw health journey—they're better together than apart. While they might seem to address the same problem, they actually work in complementary ways.
Self-massage targets those tense muscles and painful trigger points that have already developed, helping to release existing tension. Your mouth guard, on the other hand, works preventatively by creating a barrier that protects your teeth and helps relax your jaw muscles during sleep—especially if you're a nighttime clencher or grinder.
"Many of my Brooklyn patients see the best results when combining both approaches," explains our physical therapist. "The massage addresses the current tension while the mouth guard prevents new tension from developing overnight. It's a powerful combination."
If you're already using a prescribed mouth guard, definitely keep it in your routine while adding self-massage techniques. Just remember to clean your guard thoroughly if you've been doing any intraoral massage work before popping it back in!
Is intra-oral massage safe to try at home?
Intra-oral massage can feel a bit intimidating at first—after all, you're working inside your mouth where tissues are more sensitive. When done correctly, it's generally safe and can provide remarkable relief for those deeper jaw muscles that are hard to reach from the outside.
However, this technique deserves extra care and attention:
Always start with clean hands and fresh gloves (vinyl or nitrile are best if you have latex sensitivities). Begin with extremely gentle pressure—think of it as exploring rather than digging in. The tissues inside your mouth haven't experienced this kind of touch before, so introduce them slowly to this new sensation.
"The inside of your mouth is like delicate territory," says one of our TMJ specialists at Evolve Physical Therapy. "You want to be a gentle explorer, not a bulldozer. If anything causes pain rather than the 'good hurt' of releasing tension, that's your signal to back off immediately."
For those with open sores, recent dental work, or infections, it's best to stick with external techniques until those issues resolve. And if you're uncertain about proper technique, consider scheduling a session with us at Evolve Physical Therapy in Brooklyn. We're happy to demonstrate proper intra-oral massage techniques and ensure you feel confident continuing safely at home.
The goal of TMJ self massage is relief, not creating new problems—so always err on the side of gentleness when working inside your mouth.
Conclusion
Living with jaw pain can feel overwhelming, but you now have a powerful toolkit at your fingertips. TMJ self massage techniques offer not just temporary relief, but a path toward long-term jaw health and comfort when practiced consistently.
Through my years working with TMJ patients at Evolve Physical Therapy, I've seen how these simple techniques can transform lives. One Brooklyn patient recently told me, "I went from taking pain medication daily to managing my TMJ almost entirely through the self-massage techniques you taught me. I feel empowered rather than helpless."
The key to success with TMJ self massage lies in a holistic approach. Rather than treating your jaw in isolation, it's part of an interconnected system. When you address tension in your neck, improve your posture, and manage your stress levels, you're supporting your jaw health from multiple angles.
For lasting relief, remember these essential principles:
Be patient and consistent with your routine. Healing happens gradually, and regular brief sessions (2-3 times weekly) typically yield better results than occasional intense ones. Your muscles respond best to gentle, persistent care rather than aggressive manipulation.
Listen to your body's signals. Start with gentle pressure and only increase as your muscles respond positively. Pain is never the goal—if a technique hurts, back off and try a lighter touch or a different approach.
Combine approaches for maximum benefit. The most successful TMJ management plans integrate self-massage with targeted exercises, stress management techniques, and mindful daily habits. This comprehensive strategy addresses both symptoms and root causes.
Know when to seek professional guidance. While self-care is empowering, persistent or worsening symptoms deserve expert attention. At Evolve Physical Therapy in Brooklyn, our specialized TMJ treatment programs can identify underlying issues that self-massage alone might not address.
As one of our patients beautifully expressed, "The self-massage techniques changed my relationship with my body. Instead of feeling betrayed by my jaw pain, I now feel capable of helping myself heal."
For Brooklyn residents experiencing stubborn TMJ issues, our team at Evolve Physical Therapy + Sports Rehabilitation offers specialized treatment from therapists with advanced training in orofacial pain. We create personalized plans that combine hands-on therapy with education, ensuring you have the tools to manage your condition effectively at home.
Healing is rarely linear. You may have good days and challenging ones, but with consistent practice of TMJ self massage techniques and the supporting strategies we've discussed, you're taking meaningful steps toward lasting relief.
Your journey toward a pain-free jaw begins with these simple techniques practiced with care and intention. And remember—you don't have to walk this path alone. Professional support is available whenever you need it.
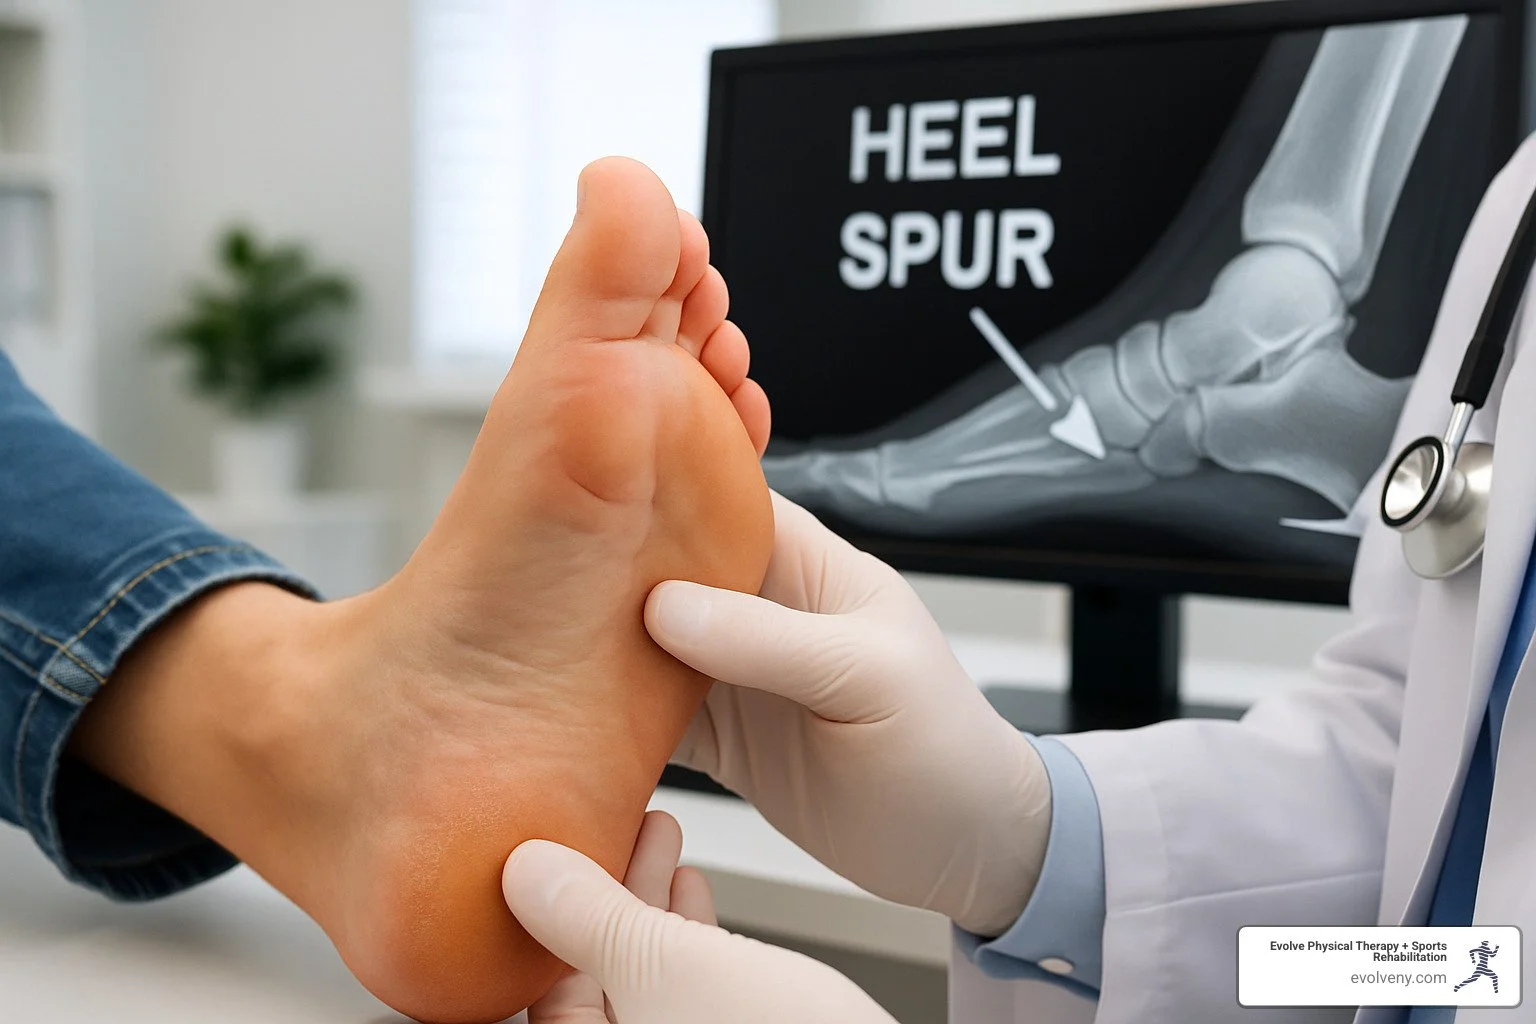
The Most Effective Solution for Heel Spur Treatment
Finding Relief: The Truth About Heel Spur Treatment
Heel spur treatment options range from simple home remedies to advanced medical procedures. Most cases improve with conservative approaches:
Rest and activity modification - Reduce high-impact activities
Ice therapy - 15 minutes, 3-4 times daily
Supportive footwear with cushioned heels and arch support
Stretching exercises for plantar fascia and calf muscles
Over-the-counter pain relievers like ibuprofen
Orthotics or heel cups to reduce pressure
When pain persists beyond 6 weeks, consider:
Physical therapy
Night splints
Corticosteroid injections
Shockwave therapy
Surgery is typically only needed if conservative treatments fail after 6-12 months.
Living with heel pain can make every step a challenge. Whether you're experiencing that characteristic sharp pain with your first steps in the morning or a persistent ache throughout the day, you're not alone. Heel spurs affect approximately 15% of the population, but the good news is that over 90% of cases improve with proper treatment.
What exactly is a heel spur? It's a calcium deposit causing a bony protrusion on the underside of the heel bone. While the spur itself is rarely the source of pain, the associated inflammation of the plantar fascia—the tissue connecting your heel to your toes—is typically what causes discomfort.
Many people are surprised to learn that heel spurs themselves are often painless. In fact, studies show that only about 5% of people with heel spurs actually experience pain from the spur itself. The real culprit is usually plantar fasciitis, an inflammation of the connective tissue that runs along the bottom of your foot.
I'm Lou Ezrick, a physical therapist with nearly two decades of experience specializing in heel spur treatment at Evolve Physical Therapy, where I've helped thousands of patients overcome foot pain through targeted manual therapy and progressive rehabilitation techniques.

Understanding Heel Spurs: Anatomy, Causes & Risk Factors
To effectively treat a heel spur, you need to understand what's actually happening in your foot. Your calcaneus (heel bone) is the largest bone in your foot and serves as an important attachment point for several structures, including the plantar fascia—that thick band of tissue running along the bottom of your foot connecting your heel to your toes.
Heel spurs don't appear overnight. They develop gradually over months as calcium deposits build up on the underside of the heel bone, sometimes forming a hook-like protrusion extending forward up to half an inch. Think of them as your body's response to ongoing stress in the area.
There are two main theories about how these bony outgrowths form:
Traction Theory: Repeated pulling of the plantar fascia or other soft tissues attached to the heel bone triggers calcium deposits to form.
Compression Theory: Your body weight and impact forces compress the heel bone against the ground, stimulating bone growth as a protective response.
Several factors can increase your chances of developing heel spurs. If you're carrying extra weight, you're putting additional stress on your feet with every step. Sports activities involving running and jumping create repetitive impact that can trigger spur formation. Your natural foot structure matters too—both high arches and flat feet can create abnormal biomechanics that stress the plantar fascia.
As we age, the natural fat pad on our heel thins out, providing less cushioning against impact. And those tight calf muscles many of us have? They increase tension on the plantar fascia, potentially contributing to spur development.
One of our patients, Maria, a 45-year-old nurse who stands for 12-hour shifts, told me: "I had no idea that my worn-out nursing shoes and tight calves were contributing to my heel pain. Understanding the causes helped me make simple changes that made a huge difference."
Plantar vs Dorsal (Achilles) Spurs
Not all heel spurs are created equal. The location makes a big difference in both symptoms and how we approach heel spur treatment.
Plantar spurs form on the bottom of the heel where the plantar fascia attaches. These are the most common type and typically cause that characteristic pain when standing or walking, especially with those first steps in the morning when you're wondering if you'll ever walk normally again.
Dorsal (Achilles) spurs develop at the back of the heel where the Achilles tendon attaches. If you have this type, you'll likely feel pain at the back of your heel, which may worsen when wearing shoes with rigid backs or during activities that stretch your Achilles.
This distinction matters because effective treatment varies based on location. Dorsal spurs often respond better to different shoe modifications (like open-back shoes) compared to plantar spurs, which benefit from arch support and heel cushioning.
Your walking pattern (gait mechanics) also differs between the two types. With plantar spurs, you might unconsciously develop a compensatory walking pattern to avoid putting pressure on your painful heel. With dorsal spurs, you may walk more flat-footed to reduce tension on your Achilles tendon.
Heel Spur vs. Plantar Fasciitis Relationship
Here's where things get interesting—and where many people misunderstand their heel pain. Many assume the spur itself is causing their pain, but research tells a different story.
A 2012 study found that 89% of patients with plantar fasciitis also had heel spurs, showing they're closely related. However, many people with heel spurs visible on X-rays have absolutely no symptoms at all. So what's really happening?
When your plantar fascia is repeatedly strained, it creates inflammation at its attachment to the heel bone. Over time, this inflammation can trigger calcium deposits that form the spur. But—and this is key—the pain typically comes from the inflammation and micro-tears in the fascia, not from the spur itself.
Dr. James Smith, a leading orthopedic researcher, explains it beautifully: "Think of a heel spur as a sign that there's been ongoing stress in the area, rather than as the primary pain generator. It's like a tree growing around a fence—the tree isn't causing the fence to be there; it's growing in response to the fence's presence."
This understanding fundamentally changes how we approach heel spur treatment. Rather than focusing on removing the spur (which often isn't necessary), effective treatment focuses on addressing the soft-tissue inflammation and biomechanical issues.
At Evolve Physical Therapy, we've found that addressing these underlying soft tissue problems resolves most patients' pain, even when the spur remains unchanged on follow-up X-rays.
Getting the Right Diagnosis
Getting an accurate diagnosis is the first step toward effective heel spur treatment. At Evolve Physical Therapy, we don't just treat symptoms—we find the root cause of your pain through a thorough diagnostic process.
When you come in with heel pain, we start with a detailed conversation about your symptoms. That sharp, stabbing pain with your first steps in the morning is often a telltale sign of plantar fasciitis associated with heel spurs. We'll ask when your pain started, what activities make it better or worse, and how it's affecting your daily life.
During the physical examination, we'll gently press on specific areas of your foot. Most people with heel spurs feel tenderness at the medial tubercle of the calcaneus—that's the inner portion of your heel where plantar spurs typically form. Don't worry if these terms sound technical; we'll explain everything in simple language during your visit.
"Many patients come in thinking they know exactly what's wrong," says Lou Ezrick, senior physical therapist at Evolve. "But often, what seems obvious isn't the full picture. That's why we take the time to assess everything from your ankle flexibility to your walking pattern."
We'll check your ankle dorsiflexion (your ability to pull your foot toward your shin), as limited range in this movement often contributes to heel pain. By watching you walk, we can spot compensatory patterns that might be adding stress to your heels.
While a thorough physical exam usually tells us what we need to know, imaging can sometimes help confirm our diagnosis:
Imaging Type Benefits Limitations Best For X-ray Quick, inexpensive, clearly shows bone spurs Doesn't show soft tissue well Confirming heel spur presence Ultrasound Shows soft tissue inflammation, no radiation Operator-dependent, less detailed Evaluating plantar fascia thickness and inflammation MRI Detailed view of all structures Expensive, time-consuming Complex cases, ruling out other conditions
One important thing to remember: finding a heel spur on an X-ray doesn't automatically mean it's causing your pain. Many people have heel spurs without any symptoms at all.
Mark, a 48-year-old teacher who came to us with severe heel pain, shared: "I was convinced my X-ray would show a massive heel spur that needed surgery. Instead, my therapist explained that while I did have a small spur, my pain was coming from inflammation in the surrounding tissues. That completely changed my outlook on treatment."
When to See a Specialist
While many people try to tough out heel pain, certain symptoms should prompt you to seek professional help right away:
Most heel pain will improve with proper home care, but don't wait too long if you're suffering. Pain that severely limits daily activities or doesn't improve after 2-3 weeks of rest and ice deserves professional attention. Other warning signs include heel pain with fever, redness, or warmth (which could indicate infection), numbness or burning sensations (suggesting nerve involvement), or pain that started after a sudden injury.
Be especially careful if you notice an inability to bend your foot downward or stand on your toes, as these could indicate a more serious condition. And if your heel pain worsens at night or when resting, it's time to give us a call.
At Evolve Physical Therapy, we've seen how early intervention leads to faster recovery. Many patients tell us they wish they hadn't waited so long to seek help. The sooner we can address your heel pain, the less likely it is to become a chronic problem that affects your quality of life.
You don't need to suffer through heel pain. Proper diagnosis is the first step toward getting back to the activities you love—pain free.
Step-by-Step Heel Spur Treatment Plan
When it comes to heel spur treatment, I have good news to share with you: about 90% of patients improve with conservative care alone. At Evolve Physical Therapy, we follow a thoughtful, tiered approach that starts with gentle, non-invasive options before considering more intensive interventions.
Our evidence-based timeline typically looks like this:
During the first 6 weeks (Tier 1), we focus primarily on managing your pain, reducing inflammation, and introducing gentle stretching exercises
For up to 6 months (Tier 2), we may progress to more intensive physical therapy, custom orthotics, and possibly injections if needed
Beyond 6 months (Tier 3), we might consider advanced interventions for those stubborn cases that haven't responded to earlier approaches
I remember Sarah, a dedicated 38-year-old teacher who came to us barely able to walk after her morning bell rang. She confided, "I was terrified I'd need surgery and wouldn't be able to stand in my classroom." Following our step-by-step plan, Sarah's pain completely resolved within 8 weeks. "The key," she told me, "was being consistent with the daily routine my therapist prescribed."
Daily Heel Spur Treatment Routine
For effective heel spur treatment at home, I recommend establishing a consistent daily routine. This approach helps manage pain while addressing the underlying causes.
Morning Stretches are crucial before your feet even touch the floor. Keep a towel by your bed and before standing, loop it around your forefoot and gently pull your foot toward you. Hold for 30 seconds and repeat three times. This simple habit can dramatically reduce that excruciating first-step pain many patients describe.
Another essential morning stretch targets your plantar fascia directly. While seated, cross one foot over your opposite knee, grasp your toes, and gently pull them toward your shin until you feel a stretch in your arch. Hold for 30 seconds, repeating three times on each foot.
Ice Therapy works wonders for inflammation. Try freezing a water bottle and rolling your foot over it for 15 minutes, 3-4 times daily. The combination of cold therapy with the massaging motion is particularly effective. Alternatively, a cloth-covered ice pack applied directly to your heel for 15 minutes can provide similar relief.
Anti-inflammatory Management may include over-the-counter NSAIDs like ibuprofen to help reduce pain and inflammation. Just remember to follow dosage guidelines and check with your doctor, especially if you have medical conditions or take other medications.
Supportive Footwear is non-negotiable during recovery. I always tell my patients: "Even if you're just walking to the bathroom at night, put on supportive slippers." Choose shoes with good arch support and cushioned heels, and replace athletic shoes every 300-500 miles of use.
Orthotic Support such as silicone heel cups can provide immediate cushioning while over-the-counter arch supports help distribute pressure more evenly across your foot. For persistent cases, custom orthotics may be recommended to address your specific foot mechanics.

Your Evening Routine should include calf stretches to address tightness that often contributes to plantar fascia strain. Stand facing a wall with one foot behind you, keep your back heel firmly on the ground, and lean forward until you feel a stretch in your calf. Hold for 30 seconds and repeat three times with each leg.
Before bed, try gentle self-massage by using your thumbs to apply circular pressure to the arch of your foot for 2-3 minutes. This helps release tension that's built up throughout the day.
Tom, a 55-year-old construction worker who stands on concrete all day, shared with me: "The morning and evening stretches made the biggest difference. After two weeks of consistently doing them, I noticed I could take those first steps in the morning without feeling like I was walking on broken glass."
Physical Therapy & Manual Techniques
When home care isn't providing enough relief, professional physical therapy offers specialized heel spur treatment techniques that can significantly accelerate healing.
Joint Mobilization involves gentle, targeted movements of specific foot joints to restore normal biomechanics and reduce stress on the plantar fascia. At Evolve, we pay particular attention to the calcaneus (heel bone), talus, and navicular bones, which often need specific mobilization to improve foot function and reduce pressure on painful areas.
Myofascial Release is one of our most effective hands-on techniques. By applying sustained pressure to tight fascial tissues, we can release tension throughout the foot and connected structures. Maria, a marathon runner who came to us with chronic heel pain, told me: "The myofascial release techniques my therapist used provided immediate relief. It was like someone finally released a tight knot I didn't even know was there."
Therapeutic Taping provides support and pain relief by offloading stress from the plantar fascia. This is particularly valuable for active individuals who need to maintain their activities during recovery. The visual feedback from the tape also helps remind patients to maintain proper foot positioning throughout the day.
Intrinsic Foot Strengthening addresses a commonly overlooked aspect of heel pain—weak foot muscles that contribute to abnormal mechanics. Simple exercises like towel scrunches, marble pickups, and "short foot" exercises build strength in these often-neglected muscles, providing better support for your arch and reducing strain on the plantar fascia.
At Evolve Physical Therapy, we combine these techniques with a progressive exercise program custom to each patient's specific needs and goals. Our comprehensive approach to physical therapy for heel pain addresses not just the symptoms but the underlying causes to prevent recurrence.
When Heel Spur Treatment Should Escalate
While most heel spur cases respond well to initial treatments, some require more intensive interventions. Here's how to know when it's time to escalate your heel spur treatment:
Night Splints become an excellent option if your morning pain persists after 3-4 weeks of consistent stretching. These devices work while you sleep by holding your foot in a slightly dorsiflexed position, maintaining a gentle stretch on the plantar fascia and preventing it from tightening overnight.
Robert, a 42-year-old accountant who sat most of the day and then experienced excruciating morning pain, found remarkable relief with this approach. "The night splint was a game-changer for me," he shared during a follow-up visit. "After just a week of using it, my morning pain decreased by about 70%. It took some getting used to, but the results were worth it."
Walking Boots may be recommended for severe cases to completely rest the plantar fascia and allow inflammation to subside. Typically worn for 1-3 weeks, these boots are particularly helpful for patients who have difficulty limiting their activities or whose occupations require extensive standing or walking.
Corticosteroid Injections can provide significant short-term relief when pain is severe and limiting function despite other treatments. These injections work by reducing inflammation at the source. However, they're not without risks.
Research has identified potential concerns with repeated steroid injections, including plantar fascia rupture and fat pad atrophy. That's why at Evolve Physical Therapy, we typically recommend limiting these injections to no more than 2-3 in a six-month period and always combine them with appropriate rehabilitation.
As Dr. Emily Johnson, a respected foot and ankle specialist, explains: "Steroid injections should be viewed as a tool to break the pain cycle and allow patients to progress with their rehabilitation, not as a standalone solution."
If you're wondering whether it's time to escalate your treatment, I recommend consulting with a healthcare professional to determine the most appropriate next steps based on your specific situation and how you've responded to previous interventions.
Advanced & Minimally Invasive Options
For the approximately 10% of patients who don't respond to conservative heel spur treatment, several advanced options exist that can provide relief before considering traditional surgery. These approaches offer hope when standard treatments haven't worked.
Extracorporeal Shock Wave Therapy (ESWT) uses high-energy sound waves to stimulate healing in the plantar fascia. Think of it as a controlled way of "shocking" your tissue into healing mode. Research shows it can be particularly effective for chronic cases that haven't responded to other treatments.
James, a 50-year-old patient with an 8-month history of heel pain, shared his experience with us: "After three ESWT sessions, I experienced a gradual improvement that continued over several weeks. Six months later, I'm almost completely pain-free. The procedure itself wasn't comfortable, but it was worth every minute."
Another option gaining popularity is Platelet-Rich Plasma (PRP) Injections. This regenerative treatment uses concentrated platelets from your own blood to stimulate healing. We draw a small amount of your blood, process it to concentrate the healing platelets, and then inject it precisely where it's needed. The platelets release growth factors that can help repair damaged tissue in the plantar fascia, offering a natural approach to healing.
If you're looking for something that combines two therapeutic elements, Cryoultrasound Therapy might be worth considering. This innovative treatment pairs ultrasound energy with cold therapy to reduce inflammation and promote tissue healing. It's particularly effective for cases with significant inflammation, and many patients appreciate the cooling sensation that provides immediate comfort during the procedure.
For those needing more direct intervention, an Ultrasound-Guided Fasciotomy offers a minimally invasive solution. During this procedure, a doctor makes a small incision in the plantar fascia under ultrasound guidance to release tension. The beauty of this approach is its precision – the ultrasound allows the doctor to see exactly where to make the tiny cut. This procedure typically has a shorter recovery time than traditional surgery, getting you back on your feet faster.
Similarly, Endoscopic Plantar Release uses an endoscope (a thin tube with a camera) to allow surgeons to release part of the plantar fascia through very small incisions. The result is less scarring and faster recovery than open surgery. Many patients are walking normally within weeks rather than months.

When considering these advanced options, it's important to weigh potential benefits against risks and costs. Some treatments may not be covered by insurance, and each carries its own set of possible complications. Recovery times vary, and results aren't guaranteed for everyone.
At Evolve Physical Therapy, we don't perform these procedures ourselves, but we work closely with a trusted network of specialists to help patients make informed decisions about these treatments. We can help coordinate your care and provide pre- and post-procedure rehabilitation to maximize your outcomes.
Melissa, one of our physical therapists, often reminds patients: "Advanced treatments aren't magic bullets – they work best when combined with proper rehabilitation and addressing the underlying biomechanical issues that contributed to your heel spur in the first place."
If you're considering these options, we're happy to discuss which might be most appropriate for your specific situation and connect you with the right specialists to continue your journey toward pain-free walking.
Prevention & Lifestyle Modifications
Preventing heel spurs is far easier than dealing with them after they've developed. With some simple adjustments to your daily routine, you can significantly reduce your risk of experiencing that dreaded heel pain.
Proper Footwear makes perhaps the biggest difference in heel spur prevention. When shopping for shoes, look beyond style alone (though you don't have to sacrifice fashion completely). Focus on finding footwear with good arch support, cushioned heels, and firm heel counters—that's the back part of the shoe that wraps around your heel. Your shoes should bend at the ball of your foot, not in the middle, and athletic shoes should be replaced every 300-500 miles.
Lisa, one of our patients who successfully recovered from heel spurs, shared her experience: "I used to buy shoes based solely on style. Now I understand that proper support is non-negotiable. I can still find fashionable options, but I check for good arch support first."
Weight Management plays a crucial role in foot health that many people overlook. Each extra pound of body weight adds 3-5 pounds of force on your feet with every step you take. That adds up quickly—just think about how many steps you take in a day! Maintaining a healthy weight significantly reduces stress on your plantar fascia and heel bone.
When it comes to Exercise Choices, being smart about how you move can save your feet from pain. Always warm up properly before any physical activity—cold muscles and fascia are more prone to injury. Follow the 10% rule when increasing your workout intensity: don't bump up your distance or intensity by more than 10% per week. Your body needs time to adapt.
Mix high-impact activities like running or jumping with lower-impact options such as swimming or cycling. When possible, choose softer surfaces like grass or trails over unforgiving concrete. Your feet will thank you! For specific exercises that can strengthen your feet and ankles, check out our guide to exercises for heel spurs.
Don't forget about Workplace Modifications if you spend long hours on your feet. Anti-fatigue mats can make a world of difference if you stand for extended periods. Take regular breaks to stretch your feet and calves—even a quick 30-second stretch every hour helps. If you use a standing desk, invest in a cushioned mat to reduce pressure on your heels. A simple trick: keep a frozen water bottle under your desk to roll your foot over during breaks for a refreshing stretch and some cold therapy.
A Regular Stretching Routine is your best defense against recurrence. Even when you're pain-free, maintaining daily stretches for your calves and plantar fascia can prevent problems from returning. Just 5 minutes in the morning and evening can make a significant difference in keeping heel pain at bay.
Michael, a 45-year-old teacher who spends all day on his feet in the classroom, shared his prevention strategy: "I keep a tennis ball in my classroom and roll my foot over it during breaks. I also switched to supportive shoes with cushioned insoles and do calf stretches against the wall between classes. I haven't had a heel pain flare-up in over a year."
At Evolve Physical Therapy, we emphasize these preventive measures because we've seen how effective they can be. Our patients who adopt these lifestyle modifications consistently experience fewer recurrences of heel spur treatment needs. Prevention truly is the best medicine when it comes to keeping your feet happy and pain-free.
Frequently Asked Questions about Heel Spurs
Do heel spurs ever go away on their own?
The calcium deposits that form heel spurs don't typically disappear without intervention. Once that bony projection forms on your heel bone, it's generally there to stay unless surgically removed. But here's the silver lining – the spur itself is rarely what's causing your pain!
What absolutely can improve on its own (with proper care) is the inflammation around the spur. This explains why many of my patients experience significant relief even though follow-up X-rays show the spur remains unchanged.
I remember working with Ben, a passionate weekend warrior who was devastated when his X-ray showed a prominent heel spur. "Does this mean I need surgery?" he asked anxiously. Six weeks later, after consistent stretching and proper footwear, he was back to hiking pain-free – spur still visible on X-ray but no longer causing issues.
As Dr. Robert Anderson, a respected foot specialist, puts it: "I've seen countless patients who have significant heel spurs on X-ray but are completely pain-free after treating the soft tissue inflammation. The spur is still there, but it's no longer causing problems."
How long does conservative heel spur treatment take?
When patients ask about timelines for heel spur treatment, I always emphasize that healing isn't linear. Your personal recovery journey depends on several factors:
Duration of symptoms before starting treatment
Severity of inflammation in your plantar fascia
How consistently you follow your treatment plan
Individual factors like weight, activity level, and foot mechanics
Most people can expect initial pain relief within 2-3 weeks of consistent treatment. Significant improvement typically comes around the 6-8 week mark, with complete resolution taking 3-6 months for many patients.
The good news? About 90% of people improve within 10 months of starting conservative care. Patience truly is a virtue when dealing with heel pain.
Sarah, who I treated last year for debilitating heel pain, offers this encouragement: "Don't get discouraged if improvement seems slow at first. I didn't notice much change in the first two weeks, but by week four, the difference was dramatic. Six months later, I was back to running without pain."
Is surgery the only way to remove a heel spur?
While surgery is indeed the only way to physically remove a heel spur, here's what's fascinating – removing the spur is rarely necessary to resolve your pain! Effective heel spur treatment typically focuses on addressing the inflammation and movement issues causing discomfort, not on removing the spur itself.
At Evolve Physical Therapy, we consider surgical intervention only when:
Conservative approaches have failed after a thorough 6-12 month trial
Pain significantly limits your daily activities and quality of life
Specific imaging confirms that the spur itself (not just associated tissues) is the primary pain generator
Even when surgery becomes necessary, it often focuses on releasing part of the plantar fascia rather than removing the spur, addressing the root cause of pain for most people.
I recently spoke with Dr. Lisa Martinez, an orthopedic surgeon specializing in foot conditions, who shared: "In my practice, less than 5% of patients with heel spurs ultimately require surgical intervention. When conservative care is properly implemented and given adequate time, most patients achieve excellent outcomes without surgery."
This aligns perfectly with what we see at Evolve Physical Therapy, where our hands-on approach helps the vast majority of patients find relief without surgical intervention.
Conclusion
Finding relief from heel pain isn't just about quick fixes—it's about understanding your condition and taking consistent, thoughtful steps toward healing. The journey to recovery might take time, but there's real hope in knowing that heel spur treatment works for the vast majority of people without requiring surgery.
Throughout this guide, we've explored the complex relationship between heel spurs and pain. In most cases, it's not the bony spur itself causing discomfort, but the inflammation of surrounding tissues—particularly the plantar fascia. This understanding fundamentally shapes how we approach treatment.
The foundation of effective heel spur treatment starts with simple but powerful steps: giving your foot appropriate rest, applying ice to reduce inflammation, stretching tight tissues, wearing shoes that properly support your feet, and using over-the-counter pain relievers when needed. These basics might seem simple, but they're remarkably effective when done consistently.
Your daily routine matters enormously. Those morning and evening stretches aren't just suggestions—they're medicine for your feet. As many of our patients find, the discipline of maintaining these habits often makes the difference between lingering pain and complete recovery.
Professional guidance can be transformative, especially when pain persists. At Evolve Physical Therapy, we've seen countless patients who tried to manage on their own for months before seeking help, only to wish they'd come in sooner. Our physical therapists bring specialized knowledge and hands-on techniques that can identify and address issues you might not even realize are contributing to your pain.
For those few cases that don't respond to initial approaches, take heart knowing that advanced options like shockwave therapy, PRP injections, and minimally invasive procedures have excellent success rates before surgery ever becomes necessary.
Once you've recovered, prevention becomes your best strategy. Maintaining strong, flexible feet, choosing supportive footwear, and being mindful about exercise surfaces and intensity can help ensure the pain doesn't return. Many of our patients tell us that the awareness they've gained through recovery has improved not just their foot health, but their overall physical wellbeing.
At Evolve Physical Therapy + Sports Rehabilitation in Brooklyn, we understand that heel pain isn't just a physical challenge—it affects your mood, your activities, and your quality of life. Our team brings not only expertise but genuine care to each patient's recovery journey. We take the time to understand your specific situation and develop personalized treatment plans that address your unique needs.
One of our patients, Elena, recently shared: "After struggling with heel pain for almost a year and trying 'everything' on my own, I finally came to Evolve. The difference was night and day—not just the hands-on treatment, but learning exactly what was happening in my foot and what I needed to do about it. Six weeks later, I'm walking pain-free for the first time in longer than I can remember."
Don't let heel pain become your new normal. Our specialized heel spur physical therapy services can help you return to the activities you love, pain-free. Reach out today—your feet deserve expert care, and you deserve to walk, run, and live without pain holding you back.

From Novice to Expert: Myofascial Release Therapy Training Programs
Open uping the Power of Fascial Therapy: Your Guide to Training
Myofascial release therapy training programs typically range from 2-5 day seminars ($500-$700 per day) to comprehensive 100-200 hour certification courses. Most programs require a background in healthcare (massage therapy, physical therapy, or occupational therapy) and provide hands-on practice with a 15:1 student-to-instructor ratio.
Training Type Duration Cost Prerequisites Weekend Seminars 2-5 days $500-$700/day Often none Certificate Programs 100-200 hours $1,800-$5,000 Healthcare background Online Courses Self-paced $264-$1,000 Varies by provider Blended Learning 3-12 months $1,500-$3,000 Healthcare license Continuing Education 1-2 days $200-$500 Professional license
Are you looking to improve your therapeutic skills with one of the most effective hands-on techniques available today? Myofascial release therapy training equips healthcare professionals with specialized skills to address fascial restrictions that cause pain and limited mobility. With employment for massage therapists projected to grow 17.7% through 2033 and median salaries reaching $55,310 (with top earners making $95,700), investing in this specialized training can significantly boost your career prospects.
The fascia—a continuous web of connective tissue that surrounds every muscle, bone, nerve, and organ—plays a crucial role in bodily function and movement. When restrictions develop in this tissue, they can cause pain, limited range of motion, and decreased function. Through proper training, practitioners learn to identify and release these restrictions, helping clients achieve lasting relief.
I'm Lou Ezrick, a physical therapist with extensive myofascial release therapy training who has helped thousands of patients overcome chronic pain and movement limitations through specialized manual therapy techniques at Evolve Physical Therapy + Sports Rehabilitation.

Why this guide matters
The demand for skilled myofascial release therapists is skyrocketing. With a projected job growth of 17.7% through 2033—much faster than average for all occupations—there's never been a better time to develop expertise in this field. Beyond career opportunities, properly trained practitioners achieve significantly better patient outcomes, helping people who have often tried everything else without success.
At Evolve Physical Therapy + Sports Rehabilitation in Brooklyn, we've seen how specialized myofascial release therapy training transforms both practitioner capabilities and patient lives. This guide will help you steer the various training pathways available so you can make an informed decision about your professional development.
What Is Myofascial Release & Who Benefits?
Myofascial release is a specialized manual therapy technique that addresses restrictions in the fascial system—the three-dimensional web of connective tissue that surrounds and interpenetrates every muscle, bone, nerve, artery, vein, and organ in your body.

Think of your fascia as a continuous, interconnected bodysuit that runs from head to toe. When healthy, it's flexible and glides smoothly. But injuries, stress, inflammation, and poor posture can cause this tissue to become sticky and restricted—like a sweater that's been shrunk in the dryer. This is where myofascial release therapy training comes in.
Unlike traditional massage that primarily targets muscles, myofascial release works more holistically. Practitioners apply gentle, sustained pressure into fascial restrictions, waiting patiently for the tissue to soften and release. As one graduate from a comprehensive program shared with me, "We're taught to use our hands like listening tools. You sink into the tissue at the appropriate depth and wait—sometimes 90-120 seconds or longer—until you feel the fascia begin to release. It's a dance between the therapist's hands and the client's tissue."
This approach effectively addresses trigger points (those tender knots in muscles), helps athletes recover from sports injuries, provides relief for people with fibromyalgia, supports neurological rehabilitation, and accepts the mind-body connection that's essential for complete healing.
John F. Barnes, PT, a pioneer who has trained over 100,000 healthcare professionals in his approach, puts it beautifully: "Myofascial Release® is the ultimate mind/body therapy that is safe, gentle and consistently effective."
Everyday clients who gain the most
While virtually anyone can benefit from myofascial release, certain groups tend to see particularly dramatic results:
Athletes from weekend warriors to professionals find myofascial work invaluable. Not only does it address acute injuries, but it also improves recovery time and helps prevent future problems by releasing restrictions that limit range of motion. I've seen countless runners and basketball players at Evolve who've broken through performance plateaus after just a few sessions.
Desk workers are practically fascia disaster zones! Hours hunched over computers create significant restrictions in the neck, shoulders, and upper back. These restrictions often lead to nagging headaches, thoracic outlet syndrome, carpal tunnel-like symptoms, and that persistent neck pain that just won't quit. For these folks, myofascial release can be nothing short of transformative.
Post-surgical patients face unique challenges with scar tissue. Surgery, while often necessary, creates adhesions that can restrict movement and cause pain. Specialized myofascial techniques for scar tissue can dramatically improve outcomes. As one MSTR® (McLoughlin Scar Tissue Release) practitioner notes, "Post-surgical treatment for scar tissue is often lacking in standard healthcare protocols."
Seniors experience natural changes in their fascia as they age—it becomes more dehydrated and restricted, contributing to that morning stiffness and limited mobility. Gentle myofascial techniques can help restore movement and reduce pain without stressing aging joints. I've worked with clients in their 80s who've regained the ability to garden or play with grandchildren after myofascial treatment.
People with hypermobility conditions like Ehlers-Danlos Syndrome require a particularly nuanced approach. These clients benefit from specialized indirect myofascial techniques that don't stress already compromised connective tissue. "Indirect techniques are essential when working with hypermobile clients," as one specialized training program emphasizes.
With proper myofascial release therapy training, practitioners can help these diverse populations find relief from pain and restriction that other approaches might miss. The beauty of this work lies in its gentleness combined with its effectiveness—a truly holistic approach to healing.
Myofascial Release Therapy Training Pathways: 5 Proven Routes
Now that you understand what myofascial release is and who benefits, let's explore the five main training pathways that can help you develop expertise in this transformative therapeutic approach. Whether you're just starting out or looking to add to your existing skill set, there's a training option that fits your schedule, learning style, and career goals.
1. Weekend Seminars & Workshops
If you're looking to dip your toes into myofascial release or add specific techniques to your practice quickly, weekend seminars offer an excellent starting point. These fast-track learning opportunities typically run 2-5 days and introduce foundational skills in an intensive format.
Most weekend workshops maintain a lab ratio of about 15:1 (students to instructor), ensuring you receive adequate guidance while practicing techniques. With tuition typically ranging from $500-$700 per day, these seminars represent an accessible entry point for many practitioners.
"I started with a three-day introductory workshop," shares Maria, a physical therapist at Evolve. "It gave me enough hands-on practice to begin incorporating basic techniques with my patients right away, and helped me decide whether to pursue more comprehensive myofascial release therapy training."
2. Certificate Programs (100-200 Hours)
For those seeking comprehensive training, certificate programs offer in-depth education spanning 100-200 hours. These programs typically cover everything from fascial anatomy to advanced treatment protocols.
Certificate programs often include detailed study of Anatomy Trains (the fascial meridians that connect the entire body), layered assessment techniques to identify primary restrictions, and extensive case studies to develop clinical reasoning. You'll graduate with a thorough understanding of the fascial system and confidence in applying various techniques.
Many practitioners find that the investment in a certificate program pays dividends through improved patient outcomes and expanded service offerings. The structured progression from basic to advanced techniques builds competence systematically.
3. Fully Online Courses
The digital age has made quality myofascial release therapy training more accessible than ever. Self-paced online programs offer flexibility for busy professionals who can't take extended time away from their practice.
These courses typically include detailed video demonstrations, comprehensive anatomy modules, and interactive quizzes to test your knowledge. While nothing replaces hands-on practice, many online programs provide surprisingly effective ways to visualize techniques and understand the underlying principles.
For more detailed information about specific techniques you might learn, check out More info about Myofascial Release Techniques.
4. Blended Learning (Hands-On + Virtual)
Many therapists find that blended learning offers the "best of both worlds" approach to myofascial release therapy training. These programs typically begin with pre-study materials and online modules that prepare you for intensive in-person labs.
The hands-on portion focuses exclusively on technique practice and real-world application, making efficient use of your time away from home. Many blended programs also include ongoing mentorship components, allowing you to submit case studies or video recordings of your technique for expert feedback.
Component In-Person Benefits Online Benefits Technique Practice Real-time feedback Review demonstrations repeatedly Anatomy Learning Palpation experience Self-paced study Mentorship Immediate guidance Ongoing support Community Direct networking Discussion forums
5. Specialty Add-Ons & Continuing Education
Once you've established a foundation in myofascial release, specialty courses allow you to develop expertise in niche areas. Popular specializations include trigger point therapy, scar tissue release, instrument-assisted fascial mobilization, and even canine myofascial therapy for veterinary applications.
These focused workshops typically last 1-2 days and build upon your existing knowledge. They're perfect for practitioners who want to address specific populations or conditions more effectively.
"After my initial training, I took a specialized course in myofascial techniques for headaches," explains David, a therapist at Evolve. "It completely transformed how I approach patients with chronic migraines, and they notice the difference immediately."
For those interested in the scientific research supporting myofascial approaches to pain management, the Bureau of Labor Statistics offers relevant data at Scientific research on myofascial pain.
Whichever pathway you choose, myofascial release therapy training is as much about developing sensitive touch and perception as it is about learning specific techniques. The best programs emphasize developing your ability to feel subtle tissue changes and respond appropriately—a skill that continues to develop throughout your career.
1. Weekend Seminars & Workshops
Dipping your toes into myofascial release therapy training doesn't have to mean a massive time commitment right away. Weekend seminars and workshops offer the perfect entry point for curious practitioners who want to experience this powerful technique firsthand.
These 2-5 day intensive programs pack a wealth of knowledge into a short timeframe, making them perfect for busy professionals. The format typically follows a rhythm that works beautifully—mornings devoted to understanding theory and watching expert demonstrations, while afternoons let you roll up your sleeves for hands-on practice.
"This exciting 'hands-on' introductory course has trained thousands of health professionals," as one popular Myofascial Release I course proudly states. And you won't be lost in a crowd—most workshops maintain a comfortable 15:1 student-to-instructor ratio, ensuring you receive personalized guidance as you practice these nuanced techniques.
The investment for these fast-track learning experiences typically ranges from $500 to $700 per day, with many programs offering early bird discounts (often around $100 off) if you register a couple of weeks ahead. It's a reasonable entry point for something that could transform your practice.
What makes these weekend formats so appealing is their flexibility. You can take one workshop to explore a specific technique, or gradually build your skills through a series of seminars without committing to a lengthy certification program upfront. This modular approach lets you learn at your own pace and focus on the specific techniques most relevant to your practice.
As one enthusiastic attendee shared after attending a weekend workshop: "The structure of lecture first, then lab practice, is highly beneficial. I used a technique I learned on Monday morning with a patient and saw immediate improvement." That's the beauty of these concentrated learning experiences—you can literally take what you learned over the weekend and apply it with your clients on Monday morning.
For those juggling busy schedules, needing continuing education credits, or simply wanting to explore before diving deeper, these weekend intensives offer the perfect balance of commitment and reward.
2. Certificate Programs (100-200 Hours)
If you're serious about mastering myofascial release techniques, certificate programs offer the most comprehensive path to expertise. These in-depth programs typically require 100-200 hours of dedicated study and practice, giving you both theoretical knowledge and extensive hands-on experience.
Take the Certificate in Integrated Myofascial Therapy (CiMFT) from MFR UK, for example. This robust 200-hour qualification can be completed in as little as 5 months, perfect for practitioners ready to dive deep. Similarly, the Manual Trigger Point Therapy (MTT) program by Myopain Seminars packs 100 hours of learning covering an impressive 170 muscles through three 3-day courses plus 28 hours of home study.
What makes these certificate programs truly special is their comprehensive approach. Rather than just teaching you isolated techniques, they help you develop "myofascial mapping" skills – the ability to trace fascial connections throughout the body to find the true source of a client's pain or dysfunction.
"For the work to be effective, we need to use both great hand skills within a meaningful framework of myofascial anatomy," as one instructor puts it. This holistic understanding empowers you to create personalized treatment plans rather than following one-size-fits-all protocols.
These programs typically include in-depth study of fascial anatomy and physiology, detailed assessment methods, and progressive skill development across multiple body regions. You'll also learn to integrate complementary approaches like cranial work and movement therapy, work through case studies to develop clinical reasoning, and receive supervised practice with valuable feedback. Most programs conclude with a final assessment to verify your competency.
Yes, the investment is higher—ranging from $1,800 to $5,000 depending on the program—but so is the return. Myofascial release therapy training at this level translates into greater expertise, confidence with complex cases, and significantly improved marketability in your practice.
At Evolve Physical Therapy + Sports Rehabilitation, we've seen how therapists with comprehensive certificate training bring a deeper level of assessment and treatment skills to their patients, especially those with complex, chronic conditions that haven't responded to conventional approaches.
3. Fully Online Courses
The digital age has opened exciting new doors for myofascial release therapy training, making this valuable skill accessible to more practitioners than ever before. Online courses have become a game-changer for many therapists who want to expand their expertise without disrupting their busy schedules.
These virtual learning experiences are perfect if you're practicing in a remote area, juggling a packed client schedule, or simply prefer to learn at your own pace. I've spoken with many therapists who initially doubted whether hands-on skills could be effectively taught online, only to be pleasantly surprised by how much they gained from quality digital programs.
"I was skeptical at first," shares Maya, a massage therapist from rural Montana, "but the detailed videos and ability to rewatch demonstrations actually helped me refine my technique in ways a one-time workshop couldn't."
The quality and depth of online programs vary considerably. Some offer a taste of basic techniques for under $300, while others provide comprehensive certification pathways with ongoing mentorship. One standout program delivers 150 minutes of high-definition video instruction plus a 43-page manual for $264, awarding 20 continuing education hours. With an impressive 4.65-star rating from 863 reviewers, it demonstrates that meaningful skill development can happen in the virtual space.
What makes the best online myofascial release therapy training programs stand out? Look for courses featuring crystal-clear video demonstrations shot from multiple angles, detailed anatomical explanations, and opportunities to check your understanding through quizzes or self-assessments. Many also include discussion forums where you can ask questions and connect with fellow learners, plus direct access to instructors for personalized guidance.
While online learning works wonderfully for understanding concepts and observing techniques, developing the sensitive touch required for effective myofascial work requires practice. Most successful online students pair their digital learning with hands-on practice sessions with colleagues, friends or family members willing to receive treatment. This practical application helps bridge the gap between watching and doing.
For a deeper dive into specific techniques you might learn through online training, check out Evolve Physical Therapy's guide to myofascial release techniques. This resource breaks down various approaches and can help you determine which online course might best align with your therapeutic goals.
Online learning can be either a starting point or a supplement to in-person training—many practitioners find that combining both approaches gives them the best of both worlds: convenience and hands-on guidance.
4. Blended Learning (Hands-On + Virtual)
If you're looking for the perfect balance between flexibility and hands-on practice, blended learning programs might be your ideal myofascial release therapy training path. These innovative programs have surged in popularity, especially after the pandemic showed us just how effective combining online and in-person learning can be.
Think of blended learning as getting the best of both worlds. You'll start with pre-study materials online, where you can learn anatomy, theory, and watch technique demonstrations at your own pace. Then, you'll attend focused in-person lab sessions where instructors can guide your hands directly, providing that irreplaceable tactile feedback that's essential for mastering fascial work. After your workshops, you'll continue accessing online resources and participate in virtual mentorship sessions to refine your skills.
"Having the videos to review before and after the hands-on sessions made a huge difference," shared one recent graduate. "I could focus on feeling the techniques during the workshop rather than trying to memorize everything."
What makes these programs particularly valuable is their thoughtful structure. One standout program offers "online access 45 days before and 90 days after" the in-person components. This extended learning period helps cement your skills, while the community you build through both online discussions and face-to-face practice creates a supportive network of colleagues.
The financial investment for blended programs typically falls between $1,500-$3,000, with programs lasting anywhere from 3-12 months. While this might seem substantial, consider the savings in travel costs since you'll need fewer in-person sessions than traditional programs.
The beauty of this approach is how efficiently it uses your precious in-person time. By learning foundational concepts in advance, those hands-on hours can focus on nuanced palpation skills and technique refinement rather than basic explanations. Plus, having ongoing access to materials means you can continue referring back to demonstrations long after your formal training ends—something many practitioners find invaluable as they integrate new techniques into their practice.
5. Specialty Add-Ons & Continuing Education
Ready to take your myofascial skills to the next level? Once you've built a solid foundation in myofascial release therapy training, specialty programs offer exciting ways to expand your expertise and serve specific client needs. These focused workshops typically span just 1-2 days and cost between $200-$500, making them perfect for ongoing professional development without breaking the bank.
Think of these specialty courses as the perfect way to distinguish yourself in a crowded marketplace. As one therapist told me, "Adding specialized scar release techniques to my practice brought in clients who'd tried everything else without success. It completely transformed my business."
Trigger Point Therapy training dives deep into those tender, knotted areas in muscles that can cause puzzling referred pain patterns. Programs like the Manual Trigger Point Therapy certification cover an impressive 170 muscles through detailed protocols. Many therapists find this knowledge particularly valuable for clients with mysterious pain patterns that don't respond to traditional treatments.
Working with clients who've had surgeries? Scar Tissue Release training might be your perfect next step. Programs like MSTR® (McLoughlin Scar Tissue Release) teach gentle yet effective techniques for addressing surgical and traumatic scars. Consider this: millions of surgeries happen yearly, yet comprehensive post-surgical scar treatment remains surprisingly rare. Mastering these techniques can truly set you apart.
If you're concerned about hand strain (a real issue for career longevity!), Instrument-Assisted Fascial Release courses teach you to use specialized tools to detect and treat fascial restrictions. These tools allow for more precise pressure while saving your hands—a win-win for both you and your clients.
Do you work with unique populations? Specialized courses adapt myofascial release therapy training for pregnant women, children, seniors, or those with conditions like fibromyalgia or Ehlers-Danlos Syndrome. Each population requires subtle modifications to standard techniques, and these courses provide the nuanced understanding you need to work safely and effectively.
For animal lovers, there's even Canine Therapy training that applies myofascial principles to help our four-legged friends. One graduate shared, "Applying these techniques to my client's service dog made such a difference in the dog's mobility that the owner asked me to work on her too!"
Curious about the science behind these approaches? The Bureau of Labor Statistics provides relevant data on therapeutic outcomes that highlights the effectiveness of specialized manual therapy techniques.
Whether you choose to specialize in one area or sample several, these focused trainings build upon your core myofascial release therapy training to help you address specific conditions with greater confidence and precision. Your clients will notice the difference—and so will your practice's bottom line.
Curriculum, Timeline, Prerequisites & Costs
Wondering what you'll actually learn during myofascial release therapy training? While each program has its own flavor, most quality training covers essential territory that will transform your understanding of the body and your hands-on skills.
At the heart of any good program is deep education about fascial anatomy and physiology. You'll find the fascinating three-dimensional web that connects everything in our bodies, how restrictions develop in this tissue, and why these restrictions can cause pain far from their source. One instructor described this part of training as "falling in love with the intelligence of the fascial system."
Developing sensitive "listening hands" through palpation practice might be the most valuable skill you'll gain. This isn't something that happens overnight – it requires guided practice and patience. As one graduate shared, "The first time I truly felt a fascial restriction release under my hands was like finding a new sense. You can't understand it until you experience it."
Assessment becomes second nature as you learn to evaluate posture, movement patterns, and tissue quality to identify the true source of problems rather than chasing symptoms. This detective work is what separates great practitioners from good ones.
The treatment techniques themselves build progressively from basic to advanced. You'll start with fundamental approaches and gradually add sophistication as your confidence grows. Many programs also weave in complementary approaches like cranial-sacral therapy or movement education to create a more integrated treatment approach.
Clinical reasoning skills develop throughout your training as you learn to create effective treatment plans based on each person's unique presentation. The best programs include plenty of case studies and problem-solving scenarios to sharpen these critical thinking skills.
Some comprehensive programs even cover the business side – how to document your work, communicate effectively with clients and other healthcare providers, and market your specialized skills.
The timeline for completing training varies widely:
Weekend workshops pack intensive learning into 2-5 days
Certificate programs typically span 3-12 months
Online courses allow self-paced study, usually completed within 1-6 months
Specialty continuing education usually requires just 1-2 days per topic
Essential hands-on skills in myofascial release therapy training
The true magic of myofascial release therapy training happens when you develop specific manual techniques that allow you to effect real change in the body. While different training lineages have their own signature approaches, several fundamental skills form the foundation of effective practice.
Cross-handed stretches serve as a cornerstone technique, where your hands move in opposite directions to create gentle elongation in the fascia. This simple-looking technique requires surprising subtlety – it's not about forcing tissue but rather inviting it to release. As one instructor puts it, "We're not stretching the tissue; we're creating space for it to return to its natural state."
The sacral float technique addresses restrictions in the sacrum and surrounding tissues – an area that, due to extensive fascial connections, can influence dysfunction throughout the entire body. Learning to properly assess and treat this region can have profound effects on posture, gait, and even breathing patterns.
More advanced work often includes dural tube mobility techniques that address restrictions in the fascial tube surrounding the spinal cord. Because this structure connects directly to the brain and extends all the way to the sacrum, restrictions here can manifest as symptoms seemingly unrelated to the spine.
Diaphragmatic release techniques improve breathing and core function by addressing restrictions in the respiratory diaphragm and related fascial structures. Many clients experience immediate changes in breathing depth and ease after these gentle interventions.
Many programs incorporate cranial techniques for addressing restrictions in the head, jaw, and cranial base. These subtle approaches can be particularly helpful for headaches, TMJ issues, and even certain types of vertigo.
For superficial tissue restrictions, you'll learn skin rolling and superficial fascial techniques that address adhesions and tightness in the more accessible layers of fascia.
Perhaps the most fascinating skill is fascial unwinding – a process where you learn to follow the spontaneous movement that emerges when restrictions begin to release. One practitioner described this as "letting the body show you what it needs rather than imposing your agenda on it."
Myofascial release therapy training requirements at a glance
Before jumping into myofascial release therapy training, it's helpful to understand what you'll need in terms of background, time, and financial investment.
Most comprehensive programs require participants to be licensed healthcare professionals – massage therapists, physical therapists, occupational therapists, chiropractors, or physicians. This requirement exists because the work involves detailed anatomical knowledge and the ability to assess contraindications. As one program director explained, "We're teaching powerful techniques that require a foundation of professional training to apply safely."
Some introductory workshops welcome students who are nearing completion of their professional training, while basic online courses might be available to anyone (though applying the techniques professionally would still require appropriate licensing).
Educational prerequisites typically include a solid understanding of anatomy and physiology. Some specialized programs have specific course prerequisites – for example, one advanced program requires completion of "Lymphatic Drainage Fundamentals" before enrollment.
The time commitment ranges dramatically from 20 hours for a weekend workshop to 200+ hours for comprehensive certification. Many programs include both in-class and home study components to deepen your learning.
Financial investment varies based on the depth and format of training:
Basic online courses run $264-$1,000
Weekend workshops typically cost $500-$700 per day
Comprehensive certificate programs range from $1,800-$5,000
Specialty continuing education courses average $200-$500
Most in-person programs ask students to bring a portable massage table and wear comfortable clothing suitable for both giving and receiving techniques. Some courses recommend specific textbooks or other resources to improve your learning.
While the investment might seem substantial, many practitioners find that specialized myofascial release therapy training quickly pays for itself through improved client outcomes, increased referrals, and the ability to command higher rates for specialized services. As one graduate put it, "The investment in my training was the best business decision I've ever made – my practice is now full with clients seeking these specific skills."
Certification, CEUs & Career Outlook
Wondering what credentials you'll earn through myofascial release therapy training? It's a common question, and the answer depends on which pathway you choose.
Most quality programs offer continuing education units (CEUs) recognized by professional organizations like the National Certification Board for Therapeutic Massage & Bodywork (NCBTMB). These credits aren't just pieces of paper—they're valuable currency for your license renewal requirements and professional development.
For physical and occupational therapists, many courses provide state-approved CEUs. I recently spoke with a PT who completed a weekend intensive that offered "16.5 CEUs in most states for PTs and PTAs, and 16 hours for OTs and OTAs." These credits help you maintain your license while developing specialized skills that set you apart.
Unlike some healthcare specialties, myofascial release doesn't have a single, universal certification body. Instead, you'll typically receive certificates of completion from your training programs. The more comprehensive pathways offer their own respected designations like the Certificate in Integrated Myofascial Therapy (CiMFT), Certified Myofascial Trigger Point Therapist (CMTPT), or certification in the John F. Barnes' Myofascial Release Approach.
While these aren't state-regulated licenses, they carry weight with employers and clients who recognize the rigorous training behind them. One practitioner told me her Barnes certification "opened doors I didn't even know existed" in terms of career opportunities.
Speaking of careers, your myofascial expertise can take you in many directions:
Building a thriving private practice focused on fascial work
Bringing specialized skills to physical therapy, massage, or chiropractic clinics
Working with chronic pain patients in medical settings
Supporting athletes through sports team positions
Training and mentoring other practitioners as you advance
At Evolve Physical Therapy + Sports Rehabilitation in Brooklyn, practitioners with advanced myofascial release therapy training are particularly valued for their ability to help patients who haven't responded to conventional approaches.
How myofascial release therapy training boosts earning power
Let's talk money—because investing in specialized training should pay off financially too. The numbers tell an encouraging story: massage therapists earn a median annual salary of $55,310, with top performers making up to $95,700. Even better, employment in this field is projected to grow by 17.7% through 2033, significantly outpacing most other occupations.
Practitioners with specialized myofascial release therapy training often command premium rates. Why? Because you're offering solutions for complex pain conditions that many other providers can't address effectively. Clients who've struggled for years with chronic issues are often willing to pay more for someone with your specialized skills.
A therapist I know in Manhattan increased her rates by 35% after completing comprehensive myofascial training, and her appointment book remained completely full. As she put it, "Becoming known as the go-to person for complex cases completely transformed my practice."
Beyond higher session rates, your expertise opens additional revenue streams. You might find yourself teaching workshops to other professionals, developing specialized programs for specific populations like athletes or seniors, consulting with healthcare facilities, or creating educational content online.
Frequently Asked Questions about myofascial release therapy training
Is self-study a viable path to learning myofascial release?
While books and videos can give you theoretical knowledge, developing the hands-on skills requires in-person guidance. As one of my mentors always said, "Myofascial work is about developing 'listening hands' through repeated practice with feedback." That tactile sensitivity—feeling exactly how much pressure to apply and when tissue begins to release—simply can't be learned from a book. Start with guided training, then use self-study resources to deepen your understanding.
How do I choose the right training program for me?
Think about how you learn best, what your schedule allows, and your career goals. If you're completely new to myofascial work, a weekend workshop gives you a taste before committing to more extensive training. If you already have bodywork experience, you might benefit more from a comprehensive certificate program. At Evolve Physical Therapy, we've found programs that balance technical skills with clinical reasoning produce the most effective practitioners.
What tools or equipment do I need for myofascial release?
One of the beautiful things about myofascial release is its simplicity—primarily, you need your hands and a treatment table. Some advanced approaches incorporate tools like cups for myofascial decompression or specialized instruments for targeted work, but these are supplements to, not replacements for, skilled manual techniques. Most training programs will clearly specify any required equipment before you enroll.
How long before I can effectively use myofascial release with clients?
You'll likely be able to implement basic techniques immediately after your initial training. I remember using a simple forearm release technique the very day after learning it, with noticeable results for my patient. However, developing true expertise takes consistent practice—typically 6-12 months of regular application before the work becomes intuitive. The learning curve is worth it when you see the life-changing results for your clients.
Can I integrate myofascial release with other therapeutic approaches?
Absolutely! In fact, myofascial release works beautifully alongside other modalities. At Evolve Physical Therapy + Sports Rehabilitation, we often combine myofascial techniques with therapeutic exercise and neuromuscular re-education for comprehensive care. The fascial system connects everything in the body, making myofascial work a natural complement to virtually any other therapeutic approach you might use.
Conclusion
The journey from novice to expert in myofascial release therapy offers both challenges and profound rewards. Throughout this guide, we've explored multiple pathways to developing these valuable skills—whether through immersive weekend workshops, comprehensive certificate programs, flexible online learning, or specialized continuing education.
What connects all successful practitioners isn't just their training pathway, but their dedication to truly understanding the fascial system and developing that sensitive, listening touch that effective myofascial work demands. As one of our instructors often says: "Myofascial work should be gentle yet profound to invite the nervous system to witness itself."
Your investment in myofascial release therapy training yields returns that extend far beyond financial benefits. Yes, specialists typically earn more—but the real reward comes in those moments when a client who's suffered for years suddenly experiences relief, their eyes widening with the realization that healing is possible.
At Evolve Physical Therapy + Sports Rehabilitation in Brooklyn, we've witnessed countless success stories through advanced myofascial techniques. Our therapists blend their specialized training with a holistic understanding of movement and function, addressing the root causes of pain rather than just chasing symptoms.
The hands-on healing approach of myofascial release creates space for true change. When fascia releases, it's not just physical tissue changing—it's often an emotional and energetic shift as well. Many clients describe feeling "lighter" or "more at home" in their bodies after effective treatment.
Whether you're just beginning to explore fascial therapy or looking to deepen your existing skills, I encourage you to take that next step in your professional development. The growing demand for skilled practitioners means your expertise will be valued, and the satisfaction of helping clients achieve lasting relief is truly immeasurable.
For more information about how we incorporate myofascial release into our comprehensive approach to physical therapy, visit our Myofascial Release Brooklyn page.
Your journey to mastery begins with a single choice—selecting the training pathway that best fits your goals, learning style, and current life circumstances. We hope this guide has provided the clarity you need to move forward with confidence, knowing that each technique you master represents another person you can help heal.

Shoulder Signals: Recognizing Rotator Cuff Injury Symptoms
Understanding the Warning Signs: When Your Shoulder Is Telling You Something's Wrong
Rotator cuff injury symptoms include persistent shoulder pain (especially at night), weakness when lifting or rotating your arm, pain with overhead activities, limited range of motion, and cracking or popping sensations in the shoulder joint.
Common Rotator Cuff Injury Symptoms Acute Injury Degenerative Injury Pain Location Sharp, localized Dull, diffuse Onset Sudden after trauma Gradual worsening Night Pain May develop later Often present early Weakness Immediate Progressive Overhead Movement Painful and difficult Increasingly limited
Your shoulder is an engineering marvel - a complex ball-and-socket joint that gives your arm incredible freedom of movement. But this mobility comes at a cost: vulnerability. At the heart of this system is your rotator cuff, a group of four muscles and their tendons that wrap around your shoulder joint like a sleeve, keeping the ball of your upper arm bone firmly within the shallow socket of your shoulder blade.
When these tissues become damaged or torn, the symptoms can range from mildly annoying to completely debilitating. And you're not alone in this experience - each year, almost 2 million Americans visit their doctors because of rotator cuff problems.
Whether you're a weekend warrior who felt something "pop" during a tennis serve, or someone who's developed gradually worsening shoulder discomfort over months, recognizing the signs of a rotator cuff injury is the crucial first step toward recovery.
I'm Lou Ezrick, and through my nearly two decades of experience as a physical therapist specializing in orthopedic rehabilitation, I've helped thousands of patients overcome rotator cuff injury symptoms through targeted manual therapy and personalized exercise protocols.

Quick Checklist of Rotator Cuff Injury Symptoms
Is your shoulder giving you trouble? Let's cut to the chase and help you figure out if those aches and pains might be rotator cuff injury symptoms.
Think of this as your shoulder pain detective guide. Most people with rotator cuff problems experience a dull, deep ache in their shoulder that often becomes your unwelcome bedtime companion. You might also notice sharp twinges when reaching for something on a high shelf or trying to scratch that spot on your back.
Weakness is another telltale sign – suddenly finding it difficult to lift your coffee mug or feeling your arm tire quickly during routine tasks. Many of my patients describe a frustrating limitation in their shoulder movement, almost like their arm is stuck within an invisible fence.
Those crackling or popping sounds when you move? That's your shoulder talking too. And if you've experienced a sudden loss of strength after a fall or while lifting something heavy, your rotator cuff might be sending up a serious red flag.
Pain that radiates from the front of your shoulder down the side of your arm and difficulty with everyday movements like combing your hair or reaching for your seatbelt are also common complaints I hear in the clinic.
Symptom Severity Possible Condition When to Seek Help Mild discomfort with specific movements Early tendinitis or impingement Within 1-2 weeks if not improving Moderate pain affecting daily activities Partial tear or significant tendinitis Within days Severe pain and weakness after an injury Possible complete tear Immediately
The severity of your symptoms often reflects the extent of your injury. A mild case of tendinitis might just give you occasional discomfort during certain movements, while a complete tear could leave you with severe pain and significant weakness.
Now let's take a deeper dive into each of these symptoms to help you better understand what your shoulder is trying to tell you. Recognizing these warning signs early can make a world of difference in your recovery journey.
1. Persistent Dull Ache That Ruins Your Sleep
That deep, persistent ache in your shoulder that seems to get worse just as your head hits the pillow? It's not your imagination—it's one of the most revealing signs of a rotator cuff injury.
Nighttime shoulder pain is so closely associated with rotator cuff problems that many physical therapists and doctors consider it a red flag. When you're trying to get comfortable in bed and that nagging ache just won't quit, your rotator cuff might be crying out for attention.
"I could handle the discomfort during the day," shares Michael, a patient at Evolve Physical Therapy in Brooklyn, "but nights became torture. I'd toss and turn, trying to find a position that didn't hurt, only to wake up exhausted the next morning."
Why does rotator cuff pain often worsen at night? Several factors are at play:
When you lie down, particularly on the affected side, you're directly compressing the injured supraspinatus tendon—the most commonly damaged part of the rotator cuff. Even lying on your back or unaffected side can't fully relieve the pressure.
Your body also increases blood flow to injured areas during rest, which sounds helpful but actually ramps up inflammation and pain signals. Without the distraction of daytime activities, your brain has more bandwidth to process these pain signals too.
The quality of your sleep matters enormously for overall health and recovery. When rotator cuff injury symptoms repeatedly wake you throughout the night, you're caught in a frustrating cycle: the injury disrupts sleep, and poor sleep slows healing.
If you find yourself avoiding sleeping on one shoulder or regularly waking up with that characteristic dull ache deep inside your shoulder joint, your body is sending you an important message. This isn't just "normal aging" or something to tough out—it's a specific symptom that deserves attention.
At Evolve Physical Therapy, we often hear patients say they dismissed nighttime shoulder pain for months before seeking help. Don't make that mistake—addressing this symptom early can prevent more serious complications and get you back to restful, pain-free sleep much faster.
2. Sharp Twinge With Any Overhead Reach
That moment when you reach up to grab something from a high shelf and—ouch!—a sharp pain shoots through your shoulder? That's not something you should ignore. This specific type of pain during overhead activities is one of the most telling rotator cuff injury symptoms you'll experience.
I see this all the time with clients from various walks of life. The painters who wince when rolling ceiling paint. The tennis enthusiasts who can't serve without pain. The swimmers whose freestyle stroke isn't quite so free anymore. Even parents who struggle to lift their children overhead for a playful moment.

What's fascinating is how predictable this pain can be. Physical therapists and doctors call it a "painful arc"—discomfort that appears when your arm is raised between 60 and 120 degrees away from your body. This isn't random. This specific range is exactly when the space between your shoulder bones narrows the most, potentially pinching those already irritated rotator cuff tendons.
People describe this sensation differently. Some call it a sharp, stabbing pain, others a pinching feeling, and some experience a burning discomfort. Whatever the description, the result is the same—you start avoiding overhead movements.
Think about your daily routine. Have you found yourself:
Rearranging your kitchen so frequently used items aren't on high shelves?
Asking for help to reach things you used to grab easily?
Changing how you wash your hair to avoid lifting your arm too high?
These adaptations might seem minor, but they're your body's way of protecting an injured rotator cuff. At Evolve Physical Therapy in Brooklyn, we often hear clients say they didn't realize how many times they reach overhead until it started to hurt.
The good news? This symptom is often one of the first to improve with proper treatment. The right exercises can help restore pain-free overhead reaching—getting you back to painting ceilings, serving tennis balls, or simply putting away dishes without that dreaded twinge.
3. Arm Weakness or Fatigue When Lifting a Coffee Mug
Have you ever reached for your morning coffee and felt your arm tremble with unexpected effort? That subtle weakness might be more than just morning grogginess—it could be your rotator cuff sending an SOS.
Weakness is one of the most telling signs of a rotator cuff injury, though it often sneaks up on you. Unlike pain, which demands immediate attention, strength loss can develop so gradually you might dismiss it as normal aging or fatigue.
"I thought I was just getting older," shares John, a 64-year-old patient at Evolve Physical Therapy. "But then one morning I couldn't lift my coffee mug without using both hands. It wasn't even that it hurt—my arm just wouldn't do what I wanted it to do."
This weakness happens because your rotator cuff muscles aren't just movers—they're stabilizers. When they're damaged, your shoulder loses both power and endurance. Even simple daily activities become surprisingly challenging:
Reaching for a seatbelt might leave your arm feeling strangely heavy. Brushing your teeth could become a two-handed affair. Even holding a book might leave your shoulder muscles burning with fatigue.
Physical therapists often look for something called the "drop-arm test" when assessing rotator cuff injuries. If you can't slowly lower your arm from an overhead position without it suddenly dropping or experiencing pain, this suggests a significant tear in your rotator cuff.
Left untreated, this weakness can lead to visible muscle atrophy—actual shrinking of the muscles around your shoulder, particularly at the top (supraspinatus) and back (infraspinatus). You might notice a flattening or hollowing where these muscles should create a rounded contour.
What makes weakness particularly concerning as a rotator cuff injury symptom is that it can persist even after pain subsides. Your body is clever at adapting to injury, often recruiting other muscles to compensate. While this might temporarily solve the problem, it creates inefficient movement patterns that can lead to secondary issues down the road.
If everyday objects suddenly feel heavier or your arm seems to "give out" during routine activities, don't wait for it to get worse. These subtle changes in strength deserve professional attention before they impact your independence and quality of life.
4. Stiffness and Limited Range of Motion
Have you ever reached behind your back to tuck in a shirt and felt like your shoulder just wouldn't cooperate? That frustrating stiffness is one of the most common rotator cuff injury symptoms that brings patients through our doors at Evolve.
As your rotator cuff injury progresses, your shoulder gradually becomes stiffer and less cooperative. This isn't just annoying – it can seriously impact your daily life. Simple movements you once took for granted become challenging puzzles: reaching behind to fasten a bra, combing the back of your hair, or grabbing something from the back seat of your car.
"I knew something was really wrong when I couldn't reach up to the top shelf in my kitchen anymore," shares Donna, a 58-year-old patient at our Brooklyn clinic. "It wasn't just that it hurt – my arm literally wouldn't go that far anymore."
There's actually some complex physiology behind this stiffness. When your rotator cuff is injured, your body sets off a chain reaction: pain leads to protective guarding, so you naturally avoid certain movements. This limited use causes joint capsule thickening from inflammation. Your muscles may develop protective spasms to prevent painful motions. And over time, you develop compensatory movement patterns – essentially teaching your body to move differently to avoid discomfort.
What's particularly concerning about shoulder stiffness is the slippery slope it creates. The less you move your shoulder, the stiffer it becomes. The stiffer it becomes, the less you move it. Without intervention, this cycle can eventually lead to adhesive capsulitis – commonly called "frozen shoulder" – where the shoulder capsule becomes so thick and tight that movement becomes severely restricted.
At Evolve Physical Therapy in Brooklyn, we've seen countless patients who waited months before seeking help for their stiffness, thinking it would resolve on its own. Unfortunately, this often makes recovery significantly more challenging and time-consuming. The good news? With proper treatment, even significant stiffness can improve dramatically.
If you're noticing decreased range of motion in your shoulder, don't wait until simple tasks become impossible. Breaking the stiffness cycle early is one of the most effective strategies for a quicker, more complete recovery.
5. Popping, Clicking, or Crepitus Inside the Joint
Ever notice your shoulder making strange noises during your morning stretch? Those clicks, pops, and grinding sensations aren't just conversation starters—they're your body trying to tell you something important.
When you have a rotator cuff problem, your shoulder often becomes quite "talkative." Many of my patients at Evolve describe hearing everything from subtle clicks to dramatic pops when moving their arms. These sounds happen because the smooth gliding surfaces inside your shoulder joint aren't so smooth anymore.
Rotator cuff injury symptoms frequently include these joint noises because damaged tissues create friction where movement should be silent. When a frayed tendon rubs against bone, or when inflammation causes your bursa (that helpful little fluid sac) to become irritated, your shoulder responds with these audible protests.
Sandra, a yoga instructor I worked with at Evolve Physical Therapy, described it perfectly: "It felt like rice krispies crackling in my shoulder whenever I moved my arm in certain positions." What concerned me about Sandra's case was how the progression followed a classic pattern—the sounds came first, with no pain, but within weeks she began experiencing discomfort that eventually limited her ability to demonstrate poses to her students.
This progression is incredibly common. Those joint sounds often serve as early warning signals before pain fully develops. Your body is essentially sending you a mechanical alert that something's not quite right in there.
While an occasional shoulder pop might be nothing to worry about (we all crack a joint now and then), consistent noises that develop recently or gradually increase should raise some flags—especially when they start bringing pain or weakness along for the ride.
Think of these sounds as your shoulder's version of a check engine light. You might be able to keep driving for a while, but ignoring it too long could lead to a breakdown when you least expect it.
6. Sudden Loss of Power After a Fall or Heavy Lift
Not all rotator cuff injuries creep up slowly. Sometimes, they announce themselves with dramatic flair after a single traumatic event.
Picture this: You're helping a friend move a couch, or perhaps you slip on an icy sidewalk and catch yourself with an outstretched arm. Suddenly, there's a distinct pop in your shoulder, followed by immediate, sharp pain that takes your breath away. Your arm feels strangely weak, almost as if it's disconnected from your body.
This scenario describes the classic acute rotator cuff tear – a sudden injury that contrasts sharply with the gradual onset of degenerative tears.
"The day it happened, I knew something was seriously wrong," shares Michael, a 42-year-old contractor who came to Evolve after falling from a ladder. "One minute I was reaching to catch myself, the next I felt this horrible tearing sensation and my arm just wouldn't work right. The bruising showed up within hours."
According to research from the American Academy of Orthopaedic Surgeons, these traumatic tears often produce more dramatic and recognizable rotator cuff injury symptoms than their degenerative counterparts. The telltale signs include:
An audible or felt "pop" at the moment of injury
Immediate, intense pain radiating through the shoulder
Sudden weakness that makes lifting your arm difficult or impossible
Visible bruising or swelling developing around the shoulder area
A disturbing sensation that your arm is "dead-hanging" or disconnected
Athletes who perform explosive overhead movements are particularly vulnerable to these acute tears. Baseball pitchers, volleyball players, and tennis servers can generate enough force to tear through even healthy rotator cuff tissue during a powerful motion.
The silver lining? Because acute tears typically cause such obvious symptoms, they rarely go undiagnosed for long. This prompt recognition often leads to earlier treatment, which can significantly improve long-term outcomes.
If you experience sudden shoulder pain and weakness following a fall or during a heavy lift, don't wait to see if it improves on its own. Seek immediate medical evaluation – the clock starts ticking from the moment of injury, and early intervention may prevent complications and speed your recovery journey.
At Evolve Physical Therapy in Brooklyn, we've helped countless patients steer the rehabilitation process after acute rotator cuff tears, combining hands-on manual therapy with progressive strengthening to restore function and reduce pain.
Acute vs Degenerative Symptom Patterns
When it comes to rotator cuff injury symptoms, understanding whether you're dealing with an acute tear or a degenerative condition makes a big difference in your treatment journey. Think of it like this: one is a sudden storm, while the other is erosion that happens over many years.
Characteristic Acute Tear Degenerative Tear Age Group Any age, often younger Typically over 40 Cause Specific traumatic event Gradual wear and tear Pain Onset Sudden and severe Gradual, worsening over time Night Pain May develop after injury Often an early symptom Progression Symptoms relatively stable Symptoms typically worsen gradually Other Factors Often affects dominant arm May affect both shoulders over time
Let me explain what happens in a degenerative tear. As we age, the blood supply to our rotator cuff tendons naturally decreases. This is especially true in what doctors call the "critical zone" of the supraspinatus tendon—basically its most vulnerable area. With less blood flow, the tendon struggles to repair the tiny injuries that happen during everyday activities.
It's actually quite common! About 30% of folks over 60 have rotator cuff tears, and that number jumps to 62% in people over 80. The interesting thing is that many people with these tears don't feel symptoms right away. You might have a small tear for years before it starts causing trouble.
"I often tell my patients that degenerative tears are like potholes in the road," says Lou Ezrick, PT at Evolve Physical Therapy. "They start small and barely noticeable, but eventually they can't be ignored."
Acute tears are a different story. These can happen to anyone—a weekend warrior, a professional athlete, or someone who took an unfortunate fall. These tears occur when a single event puts too much stress on the tendon, causing it to tear suddenly. The symptoms typically hit you right away: significant pain, weakness, and sometimes that alarming feeling that something just "gave way" in your shoulder.
Understanding which type of tear you're experiencing helps set realistic expectations. Degenerative tears often respond well to conservative treatment but may require more patience during recovery. Acute tears sometimes need more immediate intervention, especially if they're complete tears with significant weakness.
At Evolve Physical Therapy in Brooklyn, we see both types of injuries regularly and create customized treatment plans based on whether your symptoms developed over time or appeared suddenly after an injury. Recognizing the pattern of your rotator cuff injury symptoms is the first step toward getting the right kind of help.
Early Warning Signs You Shouldn't Ignore
Your shoulder often whispers before it screams. Those subtle early signals might not send you rushing to the doctor, but they're actually golden opportunities to address problems before they become serious.
Think of these early rotator cuff injury symptoms as your body's gentle nudges - little warnings that something's not quite right, even when the pain isn't debilitating yet.
Many of our patients at Evolve Physical Therapy share the same regret: "I wish I hadn't ignored those first few twinges." That mild discomfort during your tennis serve or that slight fatigue when painting the ceiling? Those aren't just normal parts of getting older - they're your shoulder telling you something important.
Pay particular attention if you notice mild pain with specific overhead movements that comes and goes quickly. This intermittent discomfort often happens when the rotator cuff tendons are just beginning to get irritated but haven't developed significant inflammation yet.
Similarly, those brief episodes of weakness when reaching for something or lifting a grocery bag might seem like nothing to worry about. Maybe you just chalk it up to being tired. But unexpected weakness, even momentary, can signal early tendon damage.
Do you find yourself with unusual shoulder fatigue after activities that never bothered you before? Your muscles might be working overtime to compensate for early rotator cuff issues.
That clicking or popping without pain might seem harmless - after all, many joints make noise. But new sounds from your shoulder, especially during specific movements, often indicate mechanical changes that precede pain.
Another subtle sign is difficulty reaching certain positions that used to be easy - like hooking your bra or reaching that back pocket. Before pain becomes your main complaint, this reduced mobility can be the first hint of trouble.
Here's a simple self-test you can do at home to check your rotator cuff health:
Stand normally with your arm at your side
Bend your elbow to 90 degrees
Try to rotate your arm outward while your other hand provides gentle resistance
Pay attention to any weakness, discomfort, or shakiness
This test specifically challenges your external rotator muscles, which are commonly involved in early rotator cuff problems.
"I had that clicking in my shoulder for months before the pain started," one of our Brooklyn clients told me recently. "By the time I came in to Evolve, what could have been a simple fix had become a much bigger problem."
Prevention truly is the best medicine when it comes to shoulder health. Maintaining good mechanics during activities, strengthening your rotator cuff proactively, and addressing those early warning signs can save you months of discomfort and rehabilitation down the road.
Want to learn more about keeping your shoulders healthy? Check out our detailed guide on Rotator Cuff Injury Prevention for exercises and tips that can help you avoid problems before they start.
Activities and Movements That Make Symptoms Worse
If you're dealing with a rotator cuff injury, certain movements can feel like pouring salt in a wound. Understanding which activities trigger your pain isn't just about avoiding discomfort—it's valuable information that helps pinpoint the nature of your injury and guides your recovery process.
During my years at Evolve Physical Therapy, I've noticed patterns in what aggravates shoulder pain for most patients. That morning routine of combing your hair? The simple act of reaching into the back seat of your car? These everyday movements can suddenly become your shoulder's worst enemies.
Sleeping positions often top the list of pain triggers. Rolling onto your affected shoulder during the night can wake you from a sound sleep with shooting pain. Many patients tell me they've become "one-side sleepers" out of necessity, sometimes propping pillows behind them to prevent accidentally rolling onto the painful shoulder.
Overhead reaching is another major culprit. Whether you're changing a light bulb, putting away dishes in high cabinets, or grabbing something from a top shelf, these movements can cause sharp, immediate pain. One of my patients, a kindergarten teacher, found it excruciating to pin children's artwork on her classroom's bulletin board—a task that had never caused her a second thought before her injury.
Behind-the-back movements often reveal rotator cuff issues that might otherwise go unnoticed. Fastening a bra, tucking in a shirt, or reaching for a back pocket can all provoke symptoms. These movements specifically challenge the subscapularis muscle of your rotator cuff, which is why they're so telling.
Lifting and carrying heavy objects, especially when your arms are away from your body, puts tremendous strain on an already compromised rotator cuff. The further from your body you hold something, the more leverage it has, and the harder your rotator cuff has to work.
Forceful pulling movements like starting a lawnmower, opening a stuck door, or pulling heavy luggage can cause a painful flare-up. These actions require strong engagement of the rotator cuff to stabilize the shoulder joint during the pulling motion.
Sports activities involving throwing or overhead motions are particularly problematic. Baseball pitchers, tennis players, and swimmers frequently develop rotator cuff injury symptoms due to the repetitive stress these activities place on the shoulder. The recovery phase of swimming strokes (when your arm is out of the water) can be especially painful.
Pushing exercises like push-ups, bench presses, or even pushing a heavy shopping cart can aggravate symptoms, particularly if you have an anterior rotator cuff tear.
Poor posture deserves special mention because it's often overlooked. That forward-head, rounded-shoulder position many of us adopt at our computers creates a mechanical disadvantage for the rotator cuff muscles. Over time, this posture can contribute to impingement and tendon degeneration.
Certain occupations carry higher risks for rotator cuff problems. Painters, carpenters, and electricians who frequently work with their arms overhead report higher rates of shoulder problems. I've worked with numerous construction professionals at our Brooklyn practice who've developed shoulder issues after years in their trades.
Understanding which movements trigger your pain can help you make smarter choices during recovery. If reaching overhead causes pain, consider temporarily reorganizing your kitchen to keep frequently used items at shoulder height or below. If sleeping is painful, a body pillow can help maintain a comfortable position throughout the night.
These activity modifications aren't about limiting your life permanently—they're temporary adaptations that give your shoulder the space it needs to heal. As your rotator cuff injury symptoms improve with proper treatment, you'll gradually return to your normal activities with the guidance of your physical therapist.
How to Tell Rotator Cuff Pain From Other Shoulder Problems
Shoulder pain can be tricky business. That ache in your shoulder could be coming from several different sources, and knowing what you're dealing with is the first step toward proper healing. Let's explore how to distinguish rotator cuff injury symptoms from other common shoulder conditions that might be masquerading as your problem.
I've seen hundreds of patients come into our Brooklyn clinic convinced they have one issue when they're actually dealing with something completely different. The shoulder is complex, and pain can be deceptive. Here's a helpful comparison of common shoulder conditions:
Condition Pain Location Quality of Pain Associated Symptoms Rotator Cuff Injury Deep in shoulder, may radiate to side of arm but rarely below elbow Dull ache at rest, sharp with specific movements Weakness, limited ROM, night pain Cervical Radiculopathy Neck to shoulder, often radiating below elbow to hand Electric, shooting, burning Numbness/tingling in arm/hand, neck movement affects symptoms Shoulder Arthritis Deep in joint, often in back of shoulder Constant aching, stiffness Grinding with movement, progressive loss of motion SLAP Tear Top of shoulder, deep inside joint Pain with loaded positions Catching, popping, pain with resistance Impingement Syndrome Front and top of shoulder Pain with specific arc of movement Often no weakness until advanced
Distinguishing rotator cuff injury symptoms from neck-related pain
"Is it my shoulder or my neck?" This is a question I hear almost daily. Neck problems often send pain signals to the shoulder area, creating genuine confusion about what's actually hurting.
Here's how you can tell the difference: rotator cuff pain typically stays in the shoulder region and might travel down the side of your arm, but it usually stops at or above your elbow. If you're feeling pain, tingling, or numbness that shoots past your elbow into your forearm, wrist, or fingers, you might be dealing with a neck issue like cervical radiculopathy.
Another telltale sign is what happens when you move your neck. Try looking up, down, and side to side. If these movements change your shoulder pain significantly, your neck might be the culprit. With true rotator cuff injuries, neck movements typically don't affect your shoulder symptoms much.
One of my patients, Robert, was convinced he had a rotator cuff tear because of his shoulder pain. But when we noticed his symptoms included numbness in his fingers and worsened when he tilted his head, we correctly identified a pinched nerve in his neck as the actual source.
Rotator cuff injury symptoms vs impingement syndrome
Impingement syndrome and rotator cuff injuries are like cousins – closely related and often showing up together at family gatherings. In fact, prolonged impingement can eventually lead to rotator cuff damage if not addressed.
The key difference is in the weakness pattern. With pure impingement, you'll feel pain (especially in that 60-120 degree "painful arc" when raising your arm), but your strength often remains relatively intact. With a rotator cuff injury, you'll notice specific weakness patterns – trouble holding your arm out to the side or rotating it outward against resistance.
Think of impingement as the rotator cuff tendons getting pinched between bones, while a rotator cuff tear is actual damage to the tendon tissue itself. Many patients experience both simultaneously, which is why a thorough evaluation is so important.
At Evolve Physical Therapy in Brooklyn, we don't just guess at what's causing your pain. We conduct comprehensive assessments that include specific strength testing, range of motion measurements, and special tests designed to isolate different structures in the shoulder. This precision ensures we're treating the actual problem, not just chasing symptoms.
Effective treatment starts with an accurate diagnosis. If you're experiencing shoulder pain and aren't sure what's causing it, having a skilled physical therapist evaluate your specific symptoms can save you significant time, money, and discomfort in the long run.
Diagnosis and Next Steps
So you've recognized some rotator cuff injury symptoms in yourself - what happens now? Let's walk through the journey from suspicion to recovery together.
How healthcare professionals confirm rotator cuff injury symptoms
When you visit a healthcare provider about your shoulder pain, they'll start with a conversation. This isn't just small talk - they're gathering crucial information about when your symptoms started, what movements hurt most, and how your daily life is affected. This history helps paint the clinical picture before any hands-on assessment begins.
Next comes the physical examination, where your provider will gently guide your shoulder through various movements. They might ask you to hold your arm in certain positions against resistance (like the "empty can test" where you hold your arms out like you're emptying soda cans). These special tests help identify which specific tendons might be involved and how severe the injury might be.
"When I perform these tests, I'm looking not just at whether they cause pain, but also if there's weakness or if the patient can't hold the position at all," says Lou Ezrick, Physical Therapist at Evolve Physical Therapy. "These subtle differences tell us a lot about what's happening inside the shoulder."
After the hands-on assessment, imaging studies often come next:
X-rays are usually the first step, not because they show the rotator cuff (they don't - these tendons are soft tissue), but because they help rule out other problems like arthritis or bone spurs that might be contributing to your pain.
Ultrasound has become increasingly popular for rotator cuff assessment because it allows real-time, dynamic imaging. Your provider can actually see how your tendons move as you move your shoulder.
MRI remains the gold standard for detailed evaluation, providing the clearest picture of both full and partial tears. Sometimes, contrast material is injected first (called an MR arthrogram) to highlight subtle partial tears.
The good news? The American Academy of Orthopaedic Surgeons reports that around 80-85% of people with rotator cuff tears get better without surgery. Your shoulder has remarkable healing potential when given the right support.
Typical pathway after noticing rotator cuff injury symptoms
Your recovery journey typically starts with simple but effective first steps:
Give your shoulder some relative rest (avoiding painful movements while maintaining gentle motion), apply ice for 20 minutes several times daily to calm inflammation, and consider over-the-counter anti-inflammatories if they're safe for you. Small adjustments to your daily activities can make a big difference - like using your non-painful arm for reaching overhead or temporarily avoiding heavy lifting.
Physical therapy becomes the cornerstone of recovery for most people with rotator cuff injury symptoms. At Evolve Physical Therapy in Brooklyn, we create personalized rehabilitation programs that evolve as you improve. These typically include hands-on techniques to restore normal joint mobility, carefully progressive strengthening exercises, and guidance on how to move safely during healing.
"We don't just treat the tear - we treat the whole person," explains our team at Evolve. "Understanding how your shoulder problem affects your work, sleep, and favorite activities helps us design a meaningful recovery plan."
If conservative approaches aren't providing sufficient relief, your healthcare team might suggest more advanced interventions. Corticosteroid injections can provide temporary relief from inflammation, while newer options like platelet-rich plasma (PRP) injections aim to improve the body's natural healing processes. For larger tears, especially in younger or more active individuals, surgical consultation may be appropriate.
Recovery timelines vary widely based on several factors including your age, the severity of the tear, your overall health, and how consistently you follow your treatment plan. Many people with partial tears see significant improvement within 6-12 weeks of dedicated physical therapy, while recovery from surgical repair typically takes 4-6 months or longer.
Healing isn't always linear - you might have good days and challenging days. The key is consistent work with your physical therapist to gradually restore your shoulder's strength and mobility, allowing you to return to the activities you love with confidence.
Want to learn more about how physical therapy can help your specific shoulder issue? Visit our Physical Therapy for Rotator Cuff page for more detailed information.
One thing I always emphasize to my patients at Evolve: recovery rarely follows a straight line. You'll likely experience periods of rapid improvement followed by plateaus, and occasional setbacks are completely normal. I remember Sarah, a yoga instructor, who became frustrated when her progress stalled at the three-month mark. We adjusted her program, and two weeks later she had a breakthrough in both mobility and strength.
The journey to healing takes time, consistency, and sometimes a bit of patience—but the destination of pain-free movement is worth the effort.
Conclusion
Living with shoulder pain can be more than just uncomfortable—it can disrupt your sleep, limit your activities, and steal the joy from everyday moments. That's why recognizing rotator cuff injury symptoms early can make all the difference in your recovery journey.
Throughout this guide, we've explored the telltale signs that your shoulder might be in trouble. From that persistent ache that keeps you up at night to the weakness that makes lifting your coffee mug surprisingly difficult, your body sends clear signals when something's wrong.
Remember these important takeaways as you consider your next steps:
Your shoulder pain isn't something you simply have to live with. Those 2 million Americans who seek treatment each year for rotator cuff problems? They're making a smart choice to address their symptoms before they worsen.
Whether your injury happened in an instant during your weekend tennis match or developed slowly over months of repetitive movement, the path to healing begins with recognition and action.
The earlier you address these symptoms, the better your chances for a simpler recovery. What starts as mild tendinitis can progress to a complete tear if ignored—a journey that's entirely preventable with proper care.
Good news: even if you've been diagnosed with a tear, surgery isn't always necessary. Many rotator cuff injuries respond beautifully to skilled physical therapy and targeted exercise programs.
True healing requires a comprehensive approach. At Evolve Physical Therapy, we don't just mask your pain—we work to restore your range of motion, rebuild your strength, and retrain movement patterns that may have contributed to your injury in the first place.
I've seen countless patients walk through our doors at Evolve Physical Therapy + Sports Rehabilitation in Brooklyn, worried their shoulder pain might permanently sideline them from the activities they love. The relief on their faces when they understand that recovery is possible is truly rewarding.
Our approach combines hands-on manual therapy with personalized exercise programs designed specifically for your unique situation. We don't believe in cookie-cutter treatments—your shoulder deserves care as individual as you are.
Don't let shoulder pain write the story of what you can and cannot do. If you're experiencing any of the rotator cuff injury symptoms we've discussed, reaching out for professional guidance could be the first step toward reclaiming your comfort and confidence.
Your shoulder has been speaking to you. Perhaps it started as a whisper—a twinge when reaching overhead or a mild ache after activity. Maybe it's now shouting with night pain or weakness that affects your daily life. Either way, it's time to listen and respond with the care your body deserves.
With the right approach at Shoulder Physical Therapy Brooklyn, most people return to their favorite activities without pain and equipped with strategies to keep their shoulders healthy for years to come. Your journey back to shoulder health starts with that first step—and we're here to walk alongside you every step of the way.
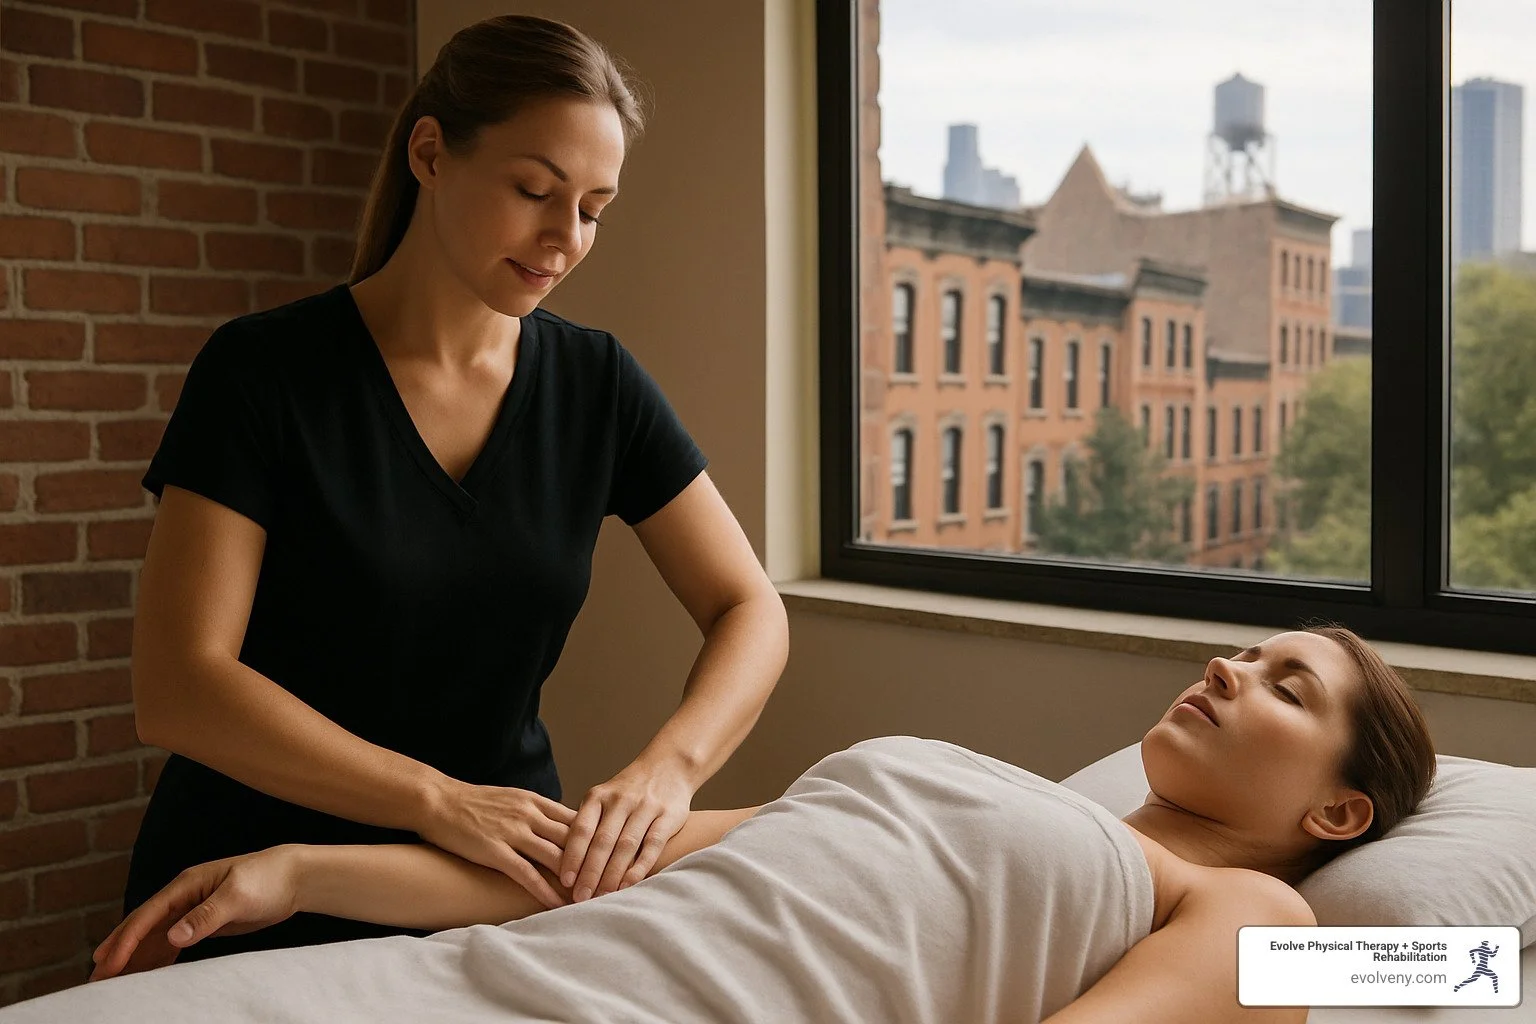
Brooklyn's Best Lymphatic Drainage Massages for Wellness
Understanding Lymphatic Drainage Massage: Brooklyn's Wellness Secret
Lymphatic drainage massage in Brooklyn is a specialized therapeutic technique that helps move excess fluid through the body's lymphatic system, promoting detoxification and healing. Here's what you need to know:
Quick Facts: Lymphatic Drainage Massage in Brooklyn ✓ Average cost: $129-$250 per session ✓ Recommended sessions: 5-10 for optimal results ✓ Key benefits: Reduced swelling, improved immune function, detoxification ✓ Popular locations: Williamsburg, Greenpoint, Bay Ridge, Sheepshead Bay ✓ Types available: Manual lymphatic drainage (MLD) and machine-assisted (Ballancer Pro)
The lymphatic system doesn't have its own pump like the heart. Instead, it relies on body movement and specialized massage techniques to keep fluid flowing properly. When this system gets sluggish, you might experience swelling, fatigue, or frequent infections.
Lymphatic drainage massage in Brooklyn has grown increasingly popular for both therapeutic and beauty benefits. Unlike traditional deep tissue or Swedish massage, lymphatic drainage uses extremely light, rhythmic strokes that follow specific pathways in the body.
Many Brooklyn spas report that clients experience visible reductions in water retention, bloating, and cellulite after completing 5-10 regular sessions. The Ballancer Pro, an FDA-cleared compression therapy system based on manual lymphatic massage principles, is now available at multiple Brooklyn locations with sessions starting at $89.
This gentle technique is especially beneficial for:
Post-surgical recovery
Reducing chronic inflammation
Managing lymphedema
Improving skin tone and appearance
Supporting immune function
Alleviating fluid retention
I'm Lou Ezrick, founder of Evolve Physical Therapy + Sports Rehabilitation with nearly two decades of experience specializing in holistic physical therapy techniques including lymphatic drainage massage in Brooklyn, where I've helped thousands of patients recover from injuries and chronic conditions through personalized manual therapy approaches.

How Does Lymphatic Drainage Massage Work?
Have you ever wondered why your body feels puffy after a long flight or why injuries swell? Your lymphatic system holds the answer. Unlike your circulatory system with the heart pumping blood, your lymphatic vessels depend on your body's movements, muscle contractions, and even your breathing to move lymph fluid around.
When these natural movements aren't enough—maybe you've had surgery, suffered an injury, or spend too many hours at a desk—lymphatic drainage massage in Brooklyn provides the gentle helping hand your body needs.
"The lymphatic system doesn't have a central pump like the heart," explains our senior therapist at Evolve. "It's essentially relying on you to keep it moving. When this system slows down, waste products and extra fluid build up, causing swelling, inflammation, and even weakening your immune defenses."
During your lymphatic drainage session, our therapists use specialized techniques that mimic your body's natural pumping action. We apply light, rhythmic pressure (about as heavy as a nickel) in circular motions along specific pathways, gently stretch the skin, and make sequential movements starting at lymph node areas.
The goal? Opening those lymphatic vessels and encouraging lymph to flow toward your heart, where it can be properly filtered and processed.
The Science Behind the Strokes
There's real science behind why lymphatic drainage feels so different from a deep tissue massage. The feather-light pressure we use isn't because we're being lazy—it's intentional! Too much pressure would actually squish and potentially damage the delicate lymphatic vessels that sit just beneath your skin.
When done correctly, a lymphatic drainage massage:
Opens the initial lymphatics so they can absorb excess fluid
Stimulates the lymphangions (think of them as tiny segments of lymphatic vessels) to contract
Speeds up lymph flow by as much as 20 times
Activates your parasympathetic nervous system (your "rest and digest" mode)
Reduces inflammatory markers in your tissues
Research published in PubMed backs this up, showing that these gentle manual techniques significantly improve lymphatic circulation and fluid reabsorption, especially for lymphedema and post-surgical swelling.
"During your session, we're helping your body expel toxins and purify your lymphatic system," one of our specialists notes. "Your veins absorb 70-80% of interstitial fluid during the process, helping restore proper balance throughout your body."
Manual vs. Machine Approaches
Here in Brooklyn, you'll find two main approaches to lymphatic drainage:
Manual Lymphatic Drainage (MLD) is performed entirely by hand, following the Vodder technique or similar methods. It's highly customizable to your unique needs and allows our therapists to feel and respond to changes in your tissues as they work. This hands-only approach requires specialized training and certification to perform correctly.
Machine-Assisted Drainage (like the popular Ballancer Pro) uses inflatable garments that apply sequential compression to your body. These FDA-cleared devices are based on manual lymphatic principles but offer consistent pressure and can treat larger areas of your body simultaneously. Sessions typically start at $89 for 30 minutes.
"The Ballancer Pro is the world's safest and most advanced compression therapy system," explains our equipment specialist. "It's particularly helpful for people who need regular treatments or who are dealing with significant swelling in their limbs."
At Evolve Physical Therapy + Sports Rehabilitation, we offer both approaches and often combine them for the best results. Our therapists are trained to determine which method will work best for your specific situation, whether you're recovering from surgery, managing a chronic condition, or simply seeking the wellness and beauty benefits of lymphatic drainage massage in Brooklyn.
Health & Beauty Benefits You'll Feel and See
The benefits of lymphatic drainage massage in Brooklyn extend far beyond simple relaxation. This specialized technique offers a unique combination of health and aesthetic improvements that have made it increasingly popular among wellness-conscious Brooklynites.
When you walk out of your first lymphatic drainage session, you'll likely notice an immediate difference. Many clients describe a wonderful sense of lightness in their body, as if a weight has been lifted. That morning puffiness around your face? Significantly reduced. That bloated feeling after a salty meal? Diminished.
Beyond these quick wins, you might also experience improved mental clarity and better digestion. One of our clients at Evolve put it perfectly: "I came in feeling bloated and sluggish after my surgery, and left feeling like myself again. The difference was remarkable."
But the magic of lymphatic drainage massage in Brooklyn really shines with regular sessions. Over time, you'll notice accelerated healing from injuries, stronger immune function (fewer sniffles!), and some impressive aesthetic benefits too. Many clients report smoother skin texture, reduced appearance of cellulite, and better overall tone. Some even notice improved hormone balance and decreased chronic inflammation.
These benefits integrate beautifully with our Soft Tissue Physical Therapy Services, where we combine lymphatic techniques with other manual therapies for truly comprehensive care.
Who Gets the Most Out of It?
While everyone can benefit from improved lymphatic flow (we all have a lymphatic system, after all!), certain groups see particularly impressive results from lymphatic drainage massage in Brooklyn.
If you've recently had surgery, especially cosmetic procedures like liposuction or a tummy tuck, you're an ideal candidate. Lymphatic drainage helps reduce post-surgical swelling, prevents fibrosis, and speeds up healing. Some of our Brooklyn colleagues have performed over 69,000 post-op treatments in the New York area alone!
Those living with chronic conditions like lymphedema, fibromyalgia, or autoimmune disorders often find meaningful relief through regular sessions. The gentle pressure techniques can ease pain and reduce inflammation in ways that more aggressive massage styles simply can't.
Brooklyn's athletes are catching on too. Whether you're training for the NYC Marathon or just enjoy your weekend basketball games, lymphatic drainage helps clear metabolic waste products after intense workouts, potentially improving both performance and recovery time.
Expectant and new mothers find special comfort in these techniques. Pregnancy often brings uncomfortable swelling in the legs and feet, which can be safely addressed through gentle lymphatic work. After baby arrives, these same techniques help the body recover and reduce excess fluid retention.
And let's not forget our beauty enthusiasts! Many Brooklyn clients seek lymphatic drainage purely for its skin-enhancing and detoxifying effects, enjoying reduced facial puffiness and a more contoured appearance.
As Elena, one of our post-surgical clients shared: "When I was here my elbow was about 90 degrees and now I can open it almost fully. I'm working with a therapist who is the most knowledgeable and a great person."
Can It Help With Weight Loss?
This is perhaps the most common question we hear about lymphatic drainage massage in Brooklyn. The honest answer? It's not a weight loss treatment in the traditional sense, but it can certainly support your body composition goals in several meaningful ways.
First, lymphatic drainage significantly decreases bloating and water weight. This creates a more streamlined appearance that many clients mistake for fat loss. While it's not the same thing, the visual difference can be striking!
Second, by enhancing circulation and reducing inflammation, these techniques may support better metabolic function. Your body simply works more efficiently when its waste removal systems are operating at peak performance.
The improved detoxification that comes with lymphatic work supports overall health and can complement other weight management efforts. Plus, many clients are thrilled to find that regular sessions improve the texture and appearance of cellulite-prone areas.
Research published in PubMed suggests that lymphatic techniques may indeed complement other weight management strategies, particularly for folks dealing with lymphatic congestion or post-surgical swelling.
But we always keep it real with our clients at Evolve: There is no alternative to a healthy diet and exercise regimen for weight loss! Lymphatic drainage is a wonderful complement to, not a replacement for, these fundamental lifestyle practices. Think of it as a helpful boost to your existing wellness routine, not a miracle solution.
Lymphatic Drainage Massage in Brooklyn: Neighborhood Guide & Session Experience
Brooklyn has blossomed into a true wellness wonderland, with lymphatic drainage massage in Brooklyn becoming one of the borough's most sought-after therapeutic treatments. From hipster havens to traditional neighborhoods, you'll find skilled practitioners ready to help your lymph flow freely.
When you're looking for lymphatic drainage massage in Brooklyn, each neighborhood offers its own unique flavor. In Williamsburg, expect cutting-edge wellness studios that pair your lymphatic treatment with trendy add-ons like infrared saunas or cryotherapy—this is where you'll find the most Ballancer Pro systems in the borough. Just north in Greenpoint, you'll find a charming blend of old-world European spa traditions alongside modern wellness approaches, with many specialists focusing on beauty and post-surgery care.
Head south to Bay Ridge, and you'll find established practitioners who take a more therapeutic approach, often working with clients managing chronic conditions or recovering from surgery. Over in Sheepshead Bay, medical spas and physical therapy centers integrate lymphatic drainage into comprehensive treatment plans.
At Evolve Physical Therapy + Sports Rehabilitation, we've created a space that balances clinical expertise with comfort—a place where therapeutic lymphatic drainage is performed with both science and soul.
What to Expect During Your First "lymphatic drainage massage in brooklyn" Session
Your first lymphatic drainage massage in Brooklyn is a gentle introduction to this powerful therapy. Unlike that deep tissue massage that left you wincing (but feeling great afterward!), lymphatic work feels surprisingly subtle.
When you arrive, we'll start with a thorough consultation. This isn't just paperwork—it's your chance to share your health history, any surgeries you've had, and what you're hoping to achieve. Be open about medications, conditions, and concerns; this helps us customize your treatment perfectly.
You'll then have privacy to change into comfortable clothing (or sometimes stay in loose clothes—one of the perks of lymphatic work!). Your therapist will begin with a gentle assessment, feeling for areas of congestion or swelling before the main event begins.
The massage itself feels like a revelation—feather-light pressure (about the weight of a nickel) applied in rhythmic, flowing strokes. Most therapists start at your neck or central lymph nodes before moving outward, following your body's natural drainage pathways. The entire experience typically lasts about an hour, though sessions can range from 45-90 minutes depending on your needs.
Many Brooklyn studios improve your experience with soothing touches like essential oils, gentle music, and cozy treatment rooms. As one Brooklyn spa proudly mentions: "Our massages use a combination of Swedish & deep tissue techniques custom to your specific needs, available in indoor, outdoor, or Loft settings."
When your session concludes, your therapist will share aftercare suggestions and recommend a treatment plan. For more details about our therapeutic massage approach, visit our Massage Therapy in Brooklyn page.
How Many "lymphatic drainage massage in brooklyn" Appointments Do You Need?
The million-dollar question: how many sessions will it take? The honest answer is—it depends on why you're seeking treatment in the first place.
If you're recovering from surgery or an injury, your journey might begin intensively with 2-3 sessions weekly for the first couple of weeks, then taper to once or twice weekly for another month. Most post-surgical clients need between 6-12 sessions total to see optimal results.
For those managing chronic conditions like lymphedema or ongoing inflammation, you might start with weekly sessions for about a month, then transition to monthly maintenance visits to keep symptoms at bay.
If you're seeking lymphatic drainage massage in Brooklyn purely for wellness or beauty benefits, a series of 5-10 weekly sessions often creates noticeable improvements in skin texture, puffiness, and that overall "lightness" clients love to describe. After your initial series, monthly sessions can maintain those results.
"What we've seen is that consistency really matters," shares our lead therapist. "Brooklyn clients who commit to regular sessions report the most dramatic improvements in water retention, bloating, and even cellulite appearance."
The good news? Most Brooklyn wellness centers (including Evolve) offer package deals and membership options that make regular treatments more affordable. We'll work with you to create a personalized plan that respects both your wellness goals and your budget—because feeling good shouldn't break the bank.
Techniques, Tools & How They Differ From Other Massages
Lymphatic drainage massage in Brooklyn has its own special rhythm and touch that sets it apart from other massage styles. If you've only experienced deep tissue or Swedish massage before, you're in for a pleasant surprise with this gentle yet powerful technique.
When you experience lymphatic drainage, you'll notice your therapist using incredibly light pressure—about the weight of a nickel on your skin. This isn't because they're being timid! The lymphatic vessels sit just beneath the skin's surface and respond best to these feather-light touches. Your therapist will use gentle circular motions that feel almost like someone softly painting on your skin, along with rhythmic pumping movements that mimic how your lymph nodes naturally pulse.
What makes this approach unique is the precise sequence. Your therapist will always start at central lymph node areas (like your neck or trunk) before moving outward, following the natural flow of your lymphatic system. They'll also incorporate gentle stretching movements that help open the initial lymphatics—those tiny vessels that first collect excess fluid from your tissues.
"If you do it correctly, you can maintain the therapy at home when you need it," one of our Brooklyn lymphatic specialists often tells clients. This is one of the lovely benefits of lymphatic work—some basic techniques are teachable for self-care between sessions.
Comparison of Massage Types:
Feature Lymphatic Drainage Swedish Massage Deep Tissue Massage Pressure Very light (5g/cm²) Moderate Firm to intense Primary Goal Move lymph fluid General relaxation Release muscle tension Strokes Light, rhythmic, specific Long, flowing Deep, focused pressure Depth Superficial (just under skin) Moderate Deep muscle layers Session Length 45-90 minutes 60-90 minutes 60-90 minutes Sensation Subtle, sometimes barely felt Pleasant pressure Can be uncomfortable Recovery Minimal; may experience increased urination Minimal May feel sore for 1-2 days Best For Swelling, detox, immunity Relaxation, tension relief Chronic pain, specific issues
At Evolve Physical Therapy + Sports Rehabilitation, our therapists are skilled in multiple massage techniques. We often blend lymphatic work with other approaches to give you the most comprehensive treatment possible. Sometimes what you need is a bit of both worlds—the gentle flush of lymphatic work combined with targeted release of a tight muscle.
Advanced Tech Seen in Brooklyn Studios
Brooklyn's wellness scene has acceptd some fascinating technology that improves lymphatic drainage results. The Ballancer Pro is leading this tech revolution—it's an FDA-cleared system that looks a bit like a space suit. Once you're zipped in, it applies sequential compression patterns that mimic manual lymphatic techniques. Several Brooklyn locations now offer this service, with sessions starting around $89 for 30 minutes.
"The Ballancer Pro system is particularly effective for those dealing with significant swelling in the limbs," our equipment specialist at Evolve often explains. "It provides consistent pressure and can treat larger body areas simultaneously."
If you're looking for lower-body focus, many studios offer pressotherapy boots—inflatable garments that rhythmically compress your legs to boost circulation and lymph flow. Some forward-thinking Brooklyn spas even combine lymphatic sessions with LED light therapy to boost collagen and reduce inflammation, or cryotherapy to maximize the anti-inflammatory benefits.
For our post-surgical clients, we sometimes incorporate ultrasound treatment starting in the second week of recovery. This gentle sound wave therapy works beautifully with manual lymphatic techniques to break down scar tissue and improve healing.
Manual Skill Sets You Should Look For
When choosing someone for your lymphatic drainage massage in Brooklyn, their training matters tremendously. Look for therapists who are certified in Manual Lymphatic Drainage (MLD) through established methods like Vodder, Földi, or Casley-Smith. These intensive programs ensure your therapist understands the complexities of the lymphatic system.
A Licensed Massage Therapist (LMT) credential provides a solid foundation in anatomy and proper technique. If you're recovering from surgery, seek someone with specific post-surgical specialization—they'll understand the unique challenges of your healing process.
Some of Brooklyn's most skilled practitioners have dual credentials as both LMTs and estheticians, offering a comprehensive approach that addresses both lymphatic health and skin care. Don't hesitate to ask about their continuing education in lymphatic health—the best therapists never stop learning.
At Evolve Physical Therapy + Sports Rehabilitation, our therapists blend extensive manual therapy training with deep rehabilitation knowledge. This ensures your lymphatic drainage treatment isn't just a standalone service but part of a thoughtful, comprehensive approach to your wellness. We believe in treating the whole person, not just the symptom, which is why our hands-on approach has become our signature in Brooklyn's wellness community.
Safety, Contraindications & Post-Surgical Timing
While lymphatic drainage massage in Brooklyn is wonderfully gentle, it's not right for everyone at all times. Think of it like swimming - generally safe, but there are times when you need to stay on dry land. Let's talk about when to dive in and when to wait.
When to Avoid Lymphatic Drainage:
Your health and safety always come first. If you're dealing with certain conditions, this therapy might not be your best option right now.
Some conditions are absolute no-gos - like having an active infection or fever. Your body is already fighting hard, and lymphatic drainage could potentially spread the infection. Similarly, if you have congestive heart failure, recent blood clots, active cancer (unless your oncologist gives the green light), or severe kidney issues, it's best to explore other options.
Other situations require a doctor's approval first - like recent surgery, pregnancy complications, severe high blood pressure, or active inflammatory conditions. As one Brooklyn practitioner wisely puts it, "If you are post-surgery or have any complex underlying health conditions, you must obtain and present a doctor's clearance note at your appointment."
Post-Surgical Timing Guidelines:
Timing is everything when it comes to post-surgical lymphatic drainage. Many specialists, including some of our most experienced therapists at Evolve, recommend beginning gentle treatments within 24-48 hours after surgery. This early intervention can help manage swelling before it becomes more established.
During that first week, we use extremely gentle techniques, often working around rather than directly on the surgical site. Your body is doing incredible healing work, and we're there to support it, not stress it.
By the second week, we might introduce ultrasound treatment alongside manual techniques for even better results. As you continue healing through weeks 3-6, we can gradually increase the intensity of treatment.
One Brooklyn post-op specialist with over 69,000 treatments under their belt emphatically notes, "Best to begin lymphatic drainage 24-48 hours after surgery regardless of surgeon preference." While we always respect surgeon protocols, we've seen remarkable results with early intervention.
For more details on how our manual therapy approaches support healing, take a look at our Manual Physical Therapy Brooklyn page.
Preparation Tips Before Your Appointment
Want to get the most from your lymphatic drainage massage in Brooklyn? A little preparation goes a long way.
Start by drinking plenty of water the day before. Well-hydrated tissues respond better to treatment, and good hydration helps your body process released toxins more efficiently. Try to avoid heavy meals within a couple hours of your session - a full stomach can make lying comfortably difficult and diverts blood flow to digestion rather than circulation.
Wear something loose and comfortable that's easy to take on and off. For machine treatments like the Ballancer Pro, we'll provide special garments, so no need to worry there.
If you're coming in post-surgery or with a medical condition, don't forget that all-important doctor's clearance note. And it's best to skip the morning coffee or evening wine before your appointment - both can dehydrate you and affect how well your lymphatic system responds.
Finally, come prepared to share your health story. The more we know about your medical history, medications, and current concerns, the better we can tailor your treatment for optimal results.
After-Care for Optimal Results
What you do after your session is just as important as the treatment itself. Think of it as extending the benefits long after you've left our clinic.
Hydration is the number one priority. All that gentle pumping and stimulation has mobilized toxins, and water helps flush them out. Keep a water bottle handy and sip throughout the day.
Gentle movement like walking or light stretching helps maintain the improved lymphatic flow we've established. Your body's lymphatic system doesn't have its own pump - it relies on muscle movement to keep things flowing.
For many clients, especially after surgery, compression garments provide crucial support. If they've been recommended, wear them exactly as directed - they're working hard to maintain the results we've achieved together.
Give yourself permission to rest. Your body is processing the effects of the treatment, which takes energy. This isn't the day for intense workouts or hot saunas - both can counteract the benefits we're working toward.
At Evolve Physical Therapy + Sports Rehabilitation, we don't just send you on your way with generic advice. We create personalized aftercare instructions custom to your specific condition and goals. Our approach is always comprehensive - we're partners in your healing journey, not just for the hour you spend on our table, but for the hours and days that follow.
DIY & Lifestyle Hacks to Keep Lymph Moving Between Visits
Between your professional lymphatic drainage massage in Brooklyn sessions, there's plenty you can do at home to maintain the benefits and keep your lymphatic system flowing smoothly. Think of these practices as a way to extend the value of your professional treatments.
At-Home Methods to Support Lymphatic Flow
Your lymphatic system loves movement! Unlike your circulatory system with its built-in pump (your heart), your lymph needs your help to keep moving.
Dry brushing has become a popular morning ritual for many Brooklynites. Using a natural bristle brush, start at your feet and make gentle, sweeping strokes toward your heart. This not only stimulates lymph flow but also exfoliates your skin for a healthy glow. Just 3-5 minutes before your shower can make a noticeable difference.
"I recommend dry brushing to all my clients between visits," shares our senior therapist at Evolve. "It's like giving yourself a mini-treatment every day."
Rebounding might sound fancy, but it's simply bouncing on a mini-trampoline. This gentle up-and-down movement creates a pumping action throughout your body that lymph loves. Even 10 minutes a day can significantly boost your lymphatic circulation—plus, it's surprisingly fun!
Deep breathing costs nothing and can be done anywhere. By practicing diaphragmatic breathing (where your belly expands, not just your chest), you create pressure changes in your abdomen that help move lymph fluid. Try taking 10 deep breaths every hour—your lymphatic system will thank you.
For the brave, contrast showers offer powerful stimulation. Alternate between comfortably warm water (about a minute) and cool water (about 30 seconds), always finishing with cool. This creates a pumping effect on your vessels and leaves you feeling invigorated.
And never underestimate the power of a simple walk around your Brooklyn neighborhood. Even 15-20 minutes of regular walking significantly improves lymphatic circulation while letting you enjoy the local scenery.
Simple Self-Massage for Face & Sinuses
Your face contains many lymph nodes and can benefit tremendously from gentle self-massage, especially if you wake up puffy or congested.
Begin by opening the central drainage points: use flat fingertips to gently stroke downward on the sides of your neck. This creates space for fluid to drain from your face. Next, lightly press the area just above your collarbones with a folded palm—this stimulates the subclavian trunks, major collection points for lymph.
For facial puffiness, use light sweeping motions along your jawline, moving from the center of your chin outward toward your ears. Under-eye puffiness responds well to very gentle pressure under the eyes, sweeping toward the temples. For your forehead, sweep from the center outward.
Many of our Brooklyn clients have fallen in love with jade rollers and gua sha tools for these movements. They feel wonderful on the skin and can improve your technique—just remember to keep the pressure very light.
"Morning face massage has become as essential as my coffee," one client told us. "Five minutes with my jade roller and I look like I got an extra hour of sleep!"
Nutrition & Hydration Guidelines
What you eat and drink dramatically affects your lymphatic health. Think of your diet as either supporting or hindering your body's natural detoxification processes.
Water-rich fruits and vegetables should be your best friends. Cucumbers, watermelon, berries, and leafy greens not only hydrate you but also provide nutrients that support lymphatic function. Brooklyn's farmers markets are perfect for finding fresh, seasonal options.
Incorporate anti-inflammatory foods like turmeric, ginger, and garlic into your meals. These kitchen heroes help reduce inflammation that can slow lymphatic flow. A simple ginger tea can be a powerful lymphatic support.
Healthy fats from avocados, olive oil, and nuts help maintain the lipid balance necessary for proper lymphatic function. Your lymphatic system actually carries fat-soluble vitamins throughout your body, so good fats are essential.
On the flip side, try to limit high-sodium processed foods, artificial additives, excessive sugar, and alcohol. These create more work for your lymphatic system and can lead to increased water retention—exactly what your lymphatic drainage massage in Brooklyn was working to reduce.
For hydration, aim to drink about half your body weight in ounces of water daily. Plain water is best, but herbal teas like red clover, echinacea, and calendula offer additional lymphatic support.
"The most common mistake I see is clients getting a wonderful lymphatic treatment and then immediately having a salty meal and alcoholic drink," notes our nutritionist at Evolve. "That essentially undoes much of the benefit from their session."
At Evolve Physical Therapy + Sports Rehabilitation, we believe in treating the whole person. That's why we often provide these lifestyle recommendations alongside our hands-on therapy. Your body's systems work together, and supporting your lymphatic health between visits helps you get the most from your professional treatments.
Cost, Packages & How to Choose the Right Therapist
When exploring lymphatic drainage massage in Brooklyn, understanding what you'll pay and how to find the right practitioner makes all the difference in your healing journey. Let's break down what to expect cost-wise and how to find someone who truly knows their craft.

The investment in your lymphatic health varies depending on whether you choose hands-on treatment or machine assistance. For traditional manual techniques, expect to pay between $129-$175 for a 45-minute session, $150-$200 for an hour, or $200-$250 for a more comprehensive 75-90 minute treatment.
If you're curious about technology-assisted options, the popular Ballancer Pro system starts at a more accessible $89 for a half-hour session. A full hour runs about $129, while the complete jacket and pants combination treatment (lasting 65 minutes) typically costs around $180.
"Most of our clients find that committing to a series of treatments offers the best value," explains our client care coordinator at Evolve. "We've structured our packages to reward consistency, which also happens to deliver the best results."
Indeed, Brooklyn wellness centers typically offer package deals that make regular sessions more affordable. A 5-pack of Ballancer Pro sessions might cost around $396 (saving you about 10%), while a 10-pack could run $731 (an 18% savings). For manual sessions, most places offer 15-20% discounts when you purchase multiple treatments upfront.
Many studios also offer monthly membership plans – perfect if lymphatic drainage will be part of your ongoing wellness routine. For more details about massage therapy options and pricing, you might want to check out our Deep Tissue Massage Brooklyn page.
Questions to Ask Before Booking
Finding the right match for your lymphatic drainage massage in Brooklyn involves asking smart questions. Before scheduling your first appointment, consider having a quick conversation with the provider about their background and approach.
Start by asking about their specific training in lymphatic drainage techniques. A qualified therapist should be able to name their certification method (like Vodder or Földi) and explain their education. Experience matters too – ask how long they've been practicing and whether they've worked with clients who have similar needs to yours.
"When I first meet a new client, I expect them to ask questions," says our senior therapist at Evolve. "It shows they're invested in their healing and helps me tailor my approach to their specific situation."
Be clear about what approach they use – manual techniques, machines like the Ballancer Pro, or a combination. For your own planning, ask about session details, preparation recommendations, and post-treatment care.
It's also helpful to discuss their recommended treatment plan upfront. How many sessions do they think you'll need? What realistic results might you expect? This helps set proper expectations and budget accordingly.
For those recovering from surgery, ask if they coordinate with physicians and how that communication works. Finally, don't be shy about discussing money – ask about package pricing, membership options, and whether they offer any discounts for booking multiple sessions.
Red Flags to Avoid
Not all lymphatic drainage providers are created equal. Being aware of warning signs can save you time, money, and potential disappointment.
Perhaps the biggest red flag is a therapist who uses too much pressure. Lymphatic drainage massage in Brooklyn should feel incredibly gentle – about the weight of a nickel on your skin. If someone's digging in deep, they likely don't understand the fundamental principles of lymphatic work.
Be wary if a practitioner skips taking your health history. A thorough intake process is essential for identifying contraindications and customizing your treatment safely.
"I once had a client who'd been to three different 'lymphatic specialists' who never asked about her recent surgery," recalls our lead therapist. "That's not just unprofessional – it could be dangerous."
Watch out for miracle promises too. While lymphatic drainage offers wonderful benefits, claims about dramatic weight loss, curing serious medical conditions, or permanent overnight results should raise eyebrows.
Credentials matter – your therapist should clearly explain their training and certification in lymphatic techniques. Similarly, they should offer a clear treatment plan rather than suggesting an open-ended series of sessions with no end in sight.
Finally, pricing should be transparent from the start. Hidden fees or pressure to commit to expensive packages immediately aren't signs of a client-centered practice.
At Evolve Physical Therapy + Sports Rehabilitation, we believe in personalized care that addresses your specific needs – not a one-size-fits-all approach. Each session should feel like it was designed just for you, with your goals and comfort as the top priorities.
Frequently Asked Questions about Lymphatic Drainage Massage in Brooklyn
Is it safe right after cosmetic surgery?
When considering lymphatic drainage massage in Brooklyn after cosmetic procedures, timing is everything. While generally beneficial for post-surgical recovery, you'll want to coordinate with your surgeon about when to begin.
Many of our Brooklyn specialists recommend starting gentle lymphatic drainage within 24-48 hours after surgery. This early intervention can help manage swelling before it becomes problematic. As one of our experienced post-op specialists with over 69,000 treatments under their belt explains, "Beginning lymphatic drainage early tends to produce better outcomes, even if some surgeons traditionally recommend waiting longer."
In those initial sessions, our approach is extremely gentle. We focus on areas surrounding the surgical site rather than directly on it, gradually increasing intensity as your healing progresses. Your comfort and safety always come first.
Before booking your post-surgery appointment, make sure to obtain clearance from your surgeon and bring their note to your session. Our therapists at Evolve are experienced in post-surgical care and will adapt techniques to your specific procedure and healing stage.
Can I combine it with workouts or PT sessions?
Absolutely! Lymphatic drainage massage in Brooklyn works beautifully alongside both exercise routines and physical therapy sessions. In fact, we often recommend this combination for improved results.
If you're planning a workout on the same day as your lymphatic session, the timing makes a difference. Coming in for lymphatic drainage before a workout can actually prepare your body by reducing inflammation and improving circulation. Many of our clients report feeling more energized and mobile during their subsequent exercise.
After intense physical activity, it's best to wait about 1-2 hours before receiving lymphatic drainage. This allows your body to begin its natural recovery processes. The gentle lymphatic techniques then complement these processes rather than interrupting them.
For our physical therapy patients at Evolve, we frequently incorporate lymphatic techniques directly into treatment plans. When swelling limits your range of motion or causes discomfort, addressing lymphatic congestion first often allows for more productive therapy sessions afterward.
"We see the best outcomes when treatments work together," explains our lead therapist. "For someone recovering from a knee injury, for example, combining targeted lymphatic drainage with therapeutic exercises creates a more comprehensive approach than either treatment alone."
How soon will I see visible results?
The timeline for seeing results from your lymphatic drainage massage in Brooklyn varies depending on your specific condition and goals, but many clients notice changes right away.
After your very first session, you might experience what we call "immediate effects" – reduced facial puffiness, a noticeable decrease in water retention, and that wonderful sense of lightness that clients often describe as "feeling less bloated." Many leave their first appointment already seeing subtle improvements in their body contours.
With consistent treatment, these benefits build progressively. By your third to fifth session, you'll likely notice more significant changes: swelling noticeably reduced, skin texture improved, energy levels higher, and even better digestion. These aren't just temporary effects – your body is responding to the improved lymphatic function.
The most dramatic changes typically appear after 5-10 regular sessions. This is when our clients report substantial improvements in chronic swelling, visible reduction in cellulite appearance, more defined body contours, and stronger immune function. As one client shared after her eighth session, "I didn't realize how much fluid I was retaining until it was gone – my clothes fit differently now."
For our post-surgical patients, the timeline often follows the healing process itself. Initial sessions focus on managing acute swelling, while later treatments address tissue remodeling and long-term recovery goals. Each body responds uniquely, which is why our therapists at Evolve create customized treatment plans based on your specific needs and recovery patterns.
Conclusion
Lymphatic drainage massage in Brooklyn isn't just another wellness trend—it's a therapeutic approach that beautifully bridges the gap between medical treatment and self-care. Throughout Brooklyn's vibrant neighborhoods, from the trendy studios of Williamsburg to the established wellness centers in Bay Ridge, this gentle yet powerful technique has earned its place in the holistic health landscape.
The beauty of lymphatic drainage lies in its versatility. Whether you're healing from surgery, managing chronic swelling, boosting your immune system, or simply seeking to feel lighter and more energetic, this specialized massage offers tangible benefits backed by science and centuries of practice.
At Evolve Physical Therapy + Sports Rehabilitation, we see the lymphatic system as a crucial but often overlooked component of overall wellness. Our approach integrates lymphatic drainage massage in Brooklyn with other therapeutic techniques to create truly personalized care plans. We've witnessed how improved lymphatic flow can accelerate healing, reduce pain, and improve quality of life for our diverse clientele.
Consistency is key when it comes to lymphatic health. The professional sessions you receive are powerful interventions, but the daily habits you maintain between visits—gentle movement, proper hydration, stress management—multiply those benefits exponentially. Think of your lymphatic system as a garden that thrives with regular, gentle tending rather than occasional intensive care.
The Brooklyn wellness community offers an impressive array of options for lymphatic care, from traditional manual techniques to cutting-edge technologies like the Ballancer Pro. Whatever approach resonates with you, the most important factor is finding a qualified practitioner who understands your unique needs and goals.
We invite you to experience the Evolve difference in your lymphatic health journey. Our team brings together extensive training, compassionate care, and a truly holistic perspective to help you achieve optimal wellness. Whether you're recovering from surgery or simply seeking to feel your best, we're here to support you every step of the way.
Learn more about our massage therapy services or reach out today to schedule your consultation. Your body has an incredible capacity to heal and thrive—sometimes it just needs a gentle helping hand to get things flowing in the right direction.

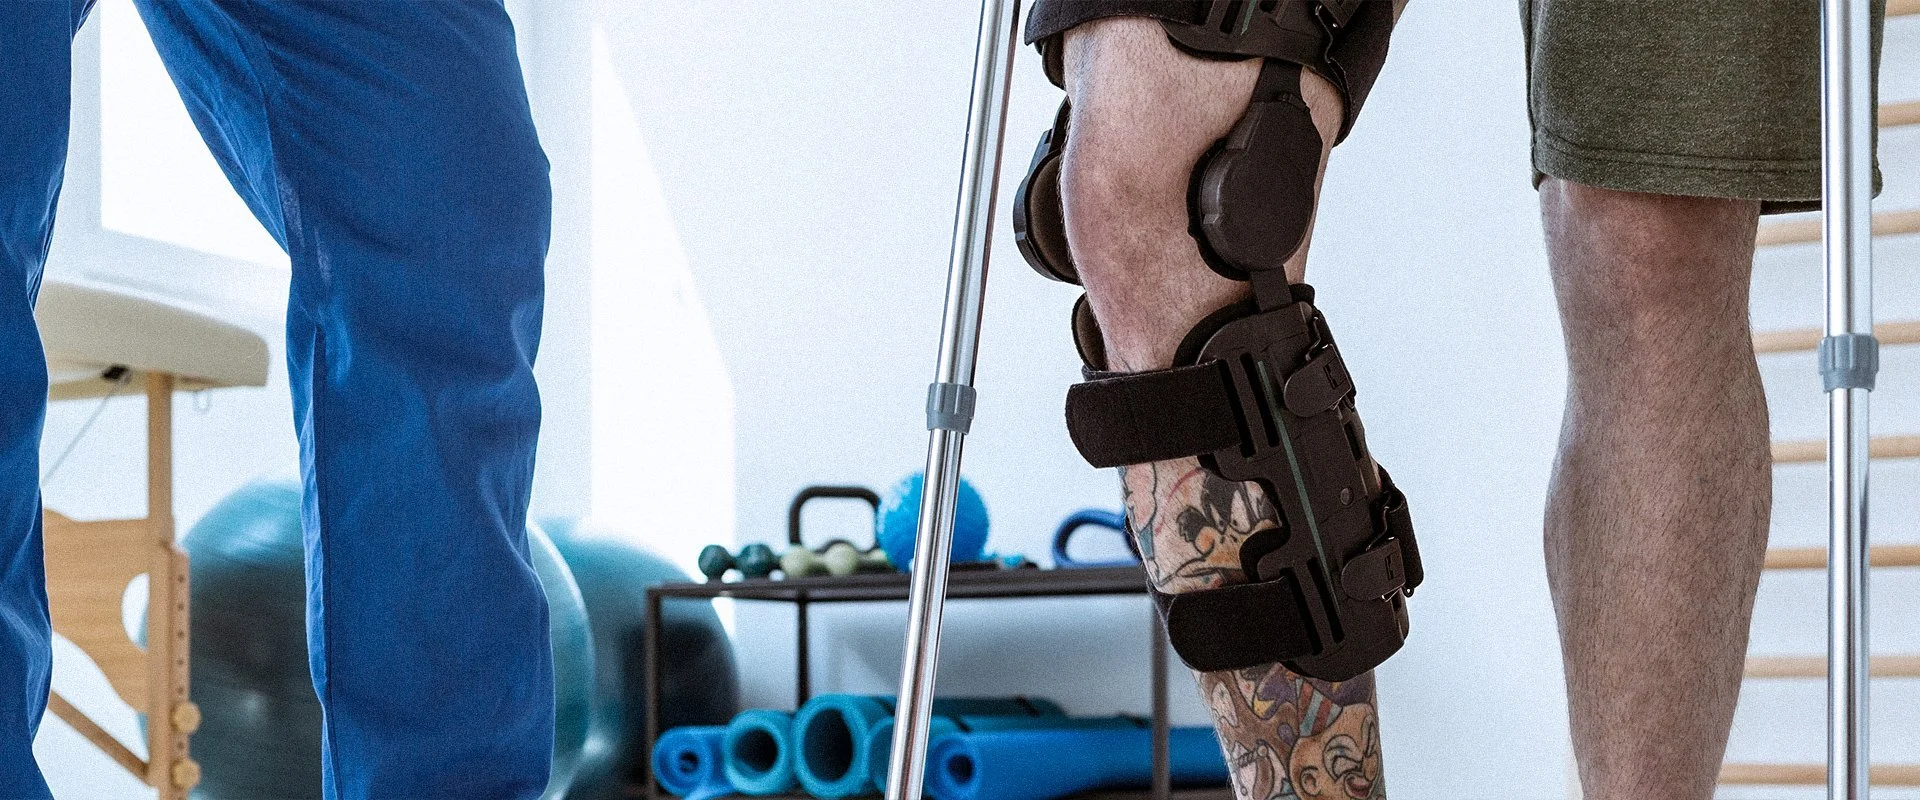
Knee Deep in Comfort: Physical Therapy for Knee Pain Explained
Understanding Physical Therapy for Knee Pain: Your Path to Relief
Ever wonder why your knee hurts when you climb stairs? You're not alone. That simple motion puts a whopping 346% of your body weight through your knee joint! Even walking places 261% of your weight on your knees with each step. It's no wonder that knee pain accounts for nearly 40% of all physical therapy visits.
Physical therapy for knee pain isn't just about managing discomfort—it's about addressing the root cause of your pain and building a stronger foundation for long-term joint health. At Evolve Physical Therapy in Brooklyn, we see knee pain as a puzzle that needs solving, not just symptoms that need masking.
Many people believe rest is the best medicine for knee pain, but that's often a myth. Targeted, therapeutic movement is actually what your knee needs most. Physical therapy for knee pain provides precisely that—carefully designed exercises that pump fluid through your joint while strengthening the muscles that support it.
When you visit us for knee pain, we start with a comprehensive evaluation to understand exactly how your knee functions. From there, we create a personalized treatment plan that may include hands-on manual therapy to improve joint mobility, customized exercises to build strength, and education about proper movement patterns to reduce stress on your knee.
What makes physical therapy particularly effective is its holistic approach. Rather than just treating the painful area, we look at how your entire body moves. Sometimes knee pain actually stems from weak hips or tight ankles—connections we're trained to identify and address.
The research backs this up too. Studies show physical therapy can be just as effective as surgery for certain knee conditions. In fact, among patients with meniscal tears, 70% who tried physical therapy first were able to avoid going under the knife altogether.
My name is Lou Ezrick, and after nearly two decades helping patients overcome knee pain, I've seen how the right physical therapy approach can transform lives. Whether you're dealing with osteoarthritis, a sports injury, or post-surgical rehabilitation, our evidence-based techniques can help you get back to the activities you love.

At Evolve Physical Therapy + Sports Rehabilitation, we don't just treat your knee pain—we partner with you on your journey back to an active, pain-free life. The combination of hands-on care, personalized exercise, and evidence-based approaches means you're getting the most effective treatment available, without unnecessary medications or procedures.
Knee Pain 101: Anatomy, Common Causes & Red Flags
Ever wonder why your knee hurts when you climb stairs? Understanding your knee's structure helps explain why physical therapy for knee pain works so well. Your knee isn't just a simple hinge—it's an engineering marvel that bears your weight while allowing you to move freely throughout your day.
Your knee joint brings together several important structures that work as a team:
The femur (thigh bone), tibia (shin bone), and patella (kneecap)
Four main ligaments (ACL, PCL, MCL, LCL) that stabilize the joint
Two C-shaped menisci that cushion between the femur and tibia
Articular cartilage that provides smooth movement
Muscles including the quadriceps (front of thigh) and hamstrings (back of thigh)
What makes your knee particularly vulnerable is its position between two long lever arms—your thigh and lower leg. Imagine trying to connect two broomsticks while keeping the connection both stable and flexible. That's essentially what your knee does all day! This balancing act explains why knee problems are so common.
As our own Dr. Kristina DeMatas often tells patients: "Your knee doesn't exist in isolation. It's greatly influenced by the mechanics of your hip and ankle. Many times what feels like knee pain actually stems from problems elsewhere in your movement chain."
Common Causes Physical Therapists Treat
At Evolve Physical Therapy in Brooklyn, we see a wide variety of knee conditions. Here are the most common ones we help patients overcome:
Osteoarthritis (OA) happens when the cushioning cartilage in your knee gradually wears down. If you're over 50 and notice your knee feels stiff in the morning or after sitting for a while, this might be the culprit. Physical therapy for knee pain from arthritis focuses on maintaining your mobility while building strength in the muscles that support your knee, taking pressure off the joint itself.
Meniscus Tears affect those C-shaped shock absorbers in your knee. You might have heard a friend say they "tore their cartilage." These tears can happen suddenly during a tennis match or develop slowly over time. Good news: research shows that physical therapy often works just as well as surgery for many meniscus tears, helping you avoid the operating room altogether.
Patellofemoral Pain Syndrome (also called Runner's Knee) causes pain around and behind your kneecap. If stairs, squatting, or sitting through a movie makes your knee ache, this might be your issue. We typically focus on improving how your kneecap tracks and strengthening your hip muscles, which surprisingly have a huge impact on knee alignment.
Ligament Sprains happen when one of the four main stabilizing bands in your knee gets stretched or torn. The ACL (anterior cruciate ligament) is the most famous, but the MCL, PCL, and LCL can also cause trouble. Depending on the severity, physical therapy for knee pain from ligament injuries might help you avoid surgery or be essential in your post-surgical recovery.
Tendinopathy develops when tendons around your knee become irritated from overuse. "Jumper's knee" is a common example, affecting the patellar tendon just below your kneecap. Our approach addresses both your pain and the movement patterns that contributed to the problem in the first place.
Warning Signs to See a Doctor ASAP
While physical therapy for knee pain helps most knee problems, some symptoms shouldn't wait. Contact your doctor immediately if you notice:
Can't put weight on your leg without severe pain? That needs medical attention right away. The same goes for any obvious deformity or misalignment of your knee.
Intense pain that doesn't improve with rest, ice, or over-the-counter medications deserves a doctor's evaluation. Significant swelling that develops rapidly (within hours) is also concerning.
If you notice redness, warmth, and swelling accompanied by fever, don't wait—this could indicate an infection. Similarly, pain, swelling, and redness in your calf might signal a blood clot, which requires urgent care.
Did you hear a pop when you injured your knee, followed by immediate swelling? Or does your knee regularly buckle or give way during normal activities? These symptoms warrant prompt medical attention.
At Evolve Physical Therapy, we work closely with physicians to ensure you receive appropriate care. Sometimes this means starting with a medical evaluation before beginning your physical therapy journey. Your safety always comes first, and we're committed to getting you the right care at the right time.
When and Why to Choose Physical Therapy for Knee Pain
"While reducing movement for a short time can help, there's always something you can do to improve your knee pain, and it often starts with moving more—or moving smarter," explains Dylan Peterson, PT, DPT. This insight captures the essence of what we believe at Evolve about physical therapy for knee pain.
Many of our patients are pleasantly surprised to learn they don't need to wait for a doctor's appointment to start healing. Thanks to direct access laws in New York and most other states, you can come straight to physical therapy without a physician referral. This means you can begin treatment sooner—often saving weeks of unnecessary pain and preventing your condition from worsening.
The financial benefits are compelling too. One study found that choosing PT over steroid injections for knee osteoarthritis saved patients nearly $14,000 in total costs. Your wallet will thank you, and so will your knee! More importantly, research consistently shows that for many knee conditions, physical therapy for knee pain produces outcomes equal to or better than surgery, with significantly lower risks.
Insurance coverage is typically available when physical therapy is deemed medically necessary, though plans may limit the number of visits. At Evolve Physical Therapy + Sports Rehabilitation, we'll help you steer these details to maximize your benefits and minimize out-of-pocket expenses.
The scientific evidence supporting physical therapy as a first-line treatment continues to grow stronger. Scientific research on PT vs surgery includes a landmark study published in the New England Journal of Medicine that found physical therapy was equally effective as surgery for meniscal tears in improving function and reducing pain over a 6-month period—without the risks of anesthesia or post-surgical complications.
Physical Therapy or Physician? Decision Tree
Wondering whether to start with PT or see your doctor? Here's a simple way to decide:
If your knee pain has lingered for more than a week despite home remedies, physical therapy for knee pain is often your best next step. Consider the severity: for mild pain (1-3 on a 0-10 scale), continue with home exercises for another week. For moderate pain (4-6), direct access to physical therapy makes sense. For severe pain (7-10), especially with sudden onset, see a physician first.
Have you tried RICE (Rest, Ice, Compression, Elevation) and over-the-counter medications without improvement? That's another sign PT might be your answer. However, remember those red flags we mentioned earlier—inability to bear weight, obvious deformity, intense unrelenting pain, significant swelling, signs of infection, or a popping sound at injury—all warrant immediate medical attention before starting physical therapy.
Conditions That Benefit Most From Early PT
Not all knee problems are created equal, and some particularly benefit from early intervention with physical therapy for knee pain:
Osteoarthritis responds remarkably well to structured exercise programs. Clinical guidelines consistently recommend PT as a core treatment for knee OA. Starting early can slow progression and help you maintain function for years longer.
People with patellar tracking issues often experience dramatic improvement with proper PT. When your kneecap doesn't glide smoothly, it can lead to pain and cartilage damage if not addressed promptly. The right exercises can retrain the muscles that control this movement.
Post-operative rehabilitation outcomes are significantly better when PT starts early. In fact, many of our Brooklyn patients benefit from "prehab"—physical therapy before surgery—which can lead to faster recovery afterward.
For sports injuries, early and appropriate loading of injured tissues actually promotes proper healing. This prevents those compensatory patterns where you favor one side, potentially creating a whole new set of problems.
At Evolve Physical Therapy + Sports Rehabilitation, we specialize in getting you started on the right treatment path quickly. Whether you come to us directly or through physician referral, our hands-on approach focuses on identifying the true source of your knee pain and creating a personalized plan to address it.
Inside the PT Session: Evaluation, Goal-Setting & Modalities
Your first physical therapy for knee pain session at Evolve Physical Therapy + Sports Rehabilitation is comprehensive and personalized. We believe that understanding your unique situation is the foundation for effective treatment.
What Happens at Your First Visit
Your initial evaluation typically includes:
Subjective Interview: We'll discuss your symptoms, medical history, activity level, and goals. This conversation helps us understand not just your knee pain, but how it's affecting your life.
Pain Assessment: Using a numerical rating scale (NRS) from 0-10, we'll document your pain levels during various activities to track progress over time.
Gait Analysis: We'll observe how you walk to identify any compensatory patterns that may be contributing to your knee pain.
Range of Motion and Strength Testing: Using specialized tools, we'll measure exactly how much your knee can bend and straighten, and how strong the surrounding muscles are.
Balance Assessment: Simple tests like standing on one leg help us evaluate your proprioception (body awareness) and stability.
Special Orthopedic Tests: These specific maneuvers help us identify particular structures that may be involved in your knee pain.
Functional Task Analysis: We'll assess how your knee functions during everyday activities like squatting, stair climbing, or sport-specific movements.
Swelling Measurement: If swelling is present, we'll take measurements to track improvements over time.
Erica Fritz Eannucci, DPT, OCS, CMP, SFMA, notes that "Orthopedic physical therapists are highly skilled in the management of knee injuries," and this expertise is evident in the thoroughness of our evaluations at Evolve.
Core Goals of Therapy
Based on your evaluation, we'll establish SMART goals (Specific, Measurable, Achievable, Relevant, Time-bound) that typically address:
Pain Reduction: Using a combination of manual therapy, modalities, and targeted exercises to decrease pain and inflammation.
Restore Range of Motion: Improving how far your knee can bend and straighten safely.
Muscle Strength: Building strength in the quadriceps, hamstrings, calves, and hip muscles that support the knee.
Balance and Proprioception: Enhancing your body's awareness of knee position to improve stability and prevent future injuries.
Functional Independence: Ensuring you can perform daily activities and return to sports or hobbies without limitation.
Prevention: Developing strategies to prevent recurrence of knee pain.
We may employ various modalities to complement your exercise program:
Manual Therapy: Hands-on techniques including joint mobilization, soft tissue massage, and patellar mobilization.
Ultrasound: Using sound waves to treat muscle spasms and pain.
Transcutaneous Electrical Nerve Stimulation (TENS): A mild electrical current that blocks pain signals and promotes circulation.
Heat and Ice: Applied strategically to reduce pain and inflammation or improve tissue extensibility.
Bracing or Taping: To provide support and improve movement patterns.
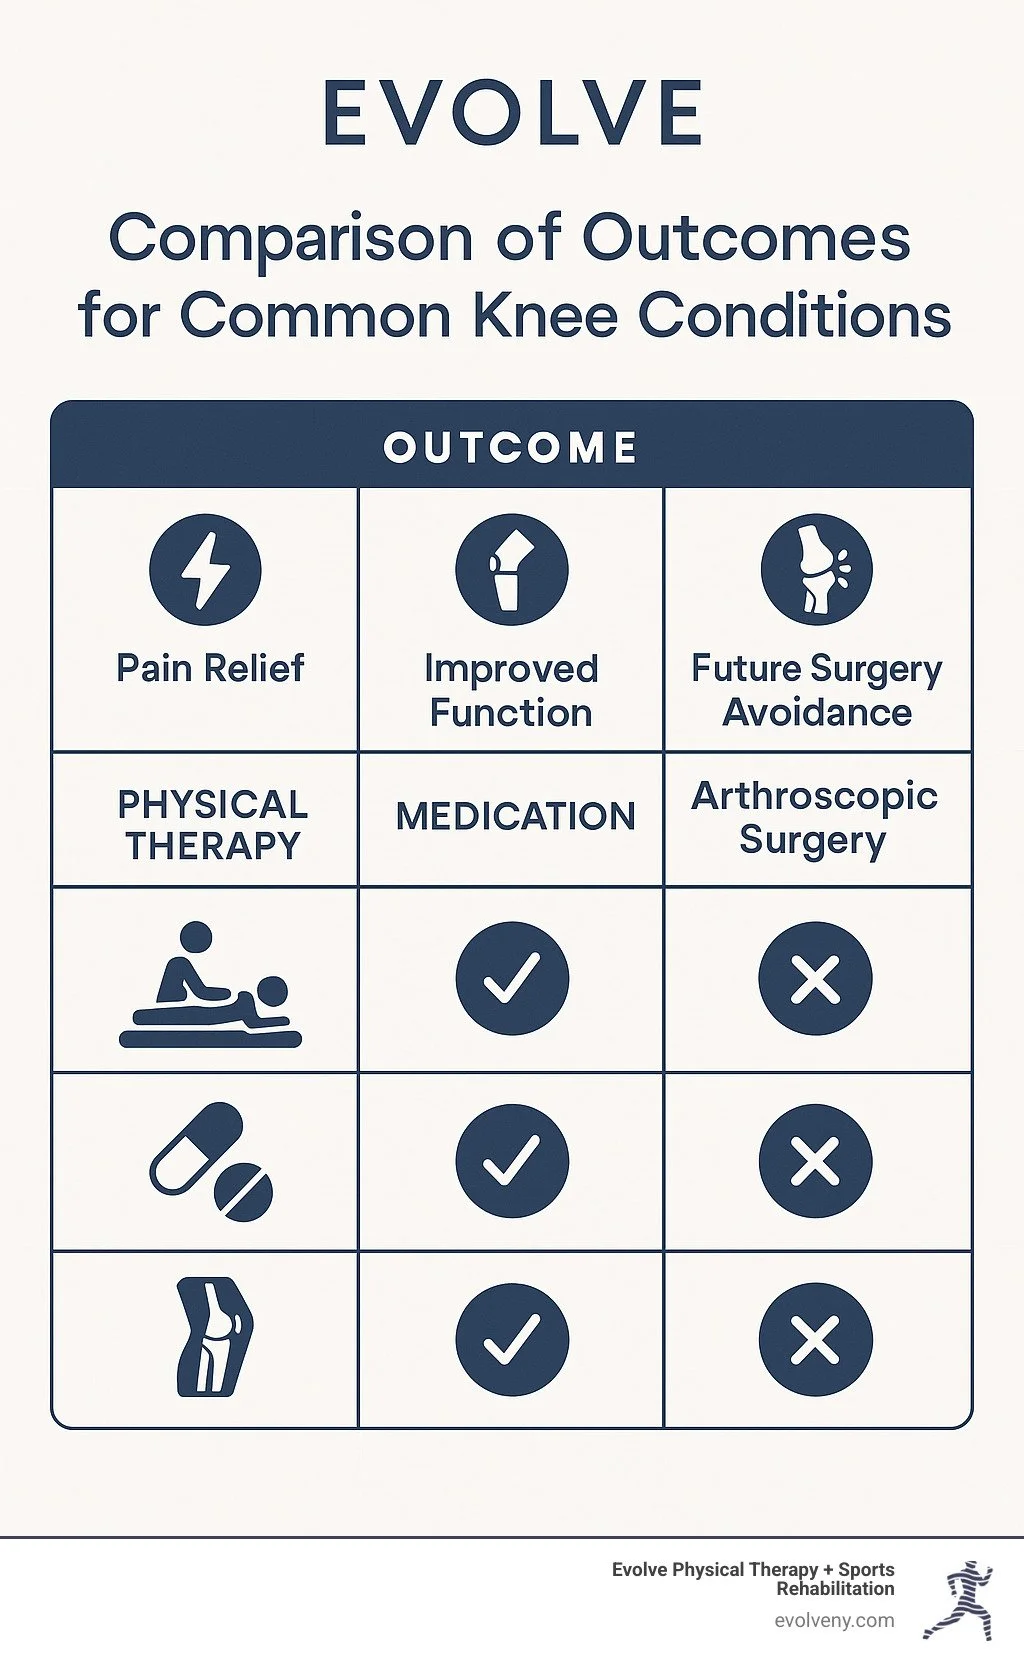
The Big Three Exercise Pillars
When it comes to physical therapy for knee pain, exercises are the heart and soul of your recovery. At Evolve Physical Therapy + Sports Rehabilitation, we've found that focusing on three key pillars creates the strongest foundation for healing.
Strengthening Exercises in Physical Therapy for Knee Pain
Building strength in the muscles surrounding your knee isn't just about getting stronger—it's about creating a natural support system that takes pressure off your joint.
Quad sets might look simple (you're just tightening your thigh muscle while your leg is straight), but they're incredibly powerful. As Dr. Erica Fritz Eannucci often tells our patients, "These simple contractions effectively re-educate your muscles to fire properly and can significantly relieve pain early in rehabilitation."
When you're ready to progress, we'll introduce straight leg raises, where you'll lift your straightened leg while lying on your back. This gentle movement strengthens your quadriceps without putting stress on your knee joint.
Short arc quads target those final degrees of knee extension that are so crucial for activities like walking and climbing stairs. With a small towel roll placed under your knee, you'll focus on straightening your leg completely—a movement that's surprisingly challenging for many people with knee pain.
Bridges are a personal favorite of mine for patients. As you lie on your back with knees bent and lift your hips toward the ceiling, you're strengthening your glutes and hamstrings—key muscles that support healthy knee function—without putting direct pressure on the knee itself.
Don't underestimate the humble calf raise. Standing and rising onto your toes not only strengthens your calves but also improves ankle stability, which directly affects how your knee moves during walking and running.
Many people are surprised when we focus on hip abduction exercises. "Why am I working my hips when my knee hurts?" is a common question. The answer is simple—weak outer hip muscles can cause your knees to cave inward during activities, creating pain and dysfunction. Some specialists in our field believe that "sidelying hip abduction is arguably the single most important exercise for knee health."
Need a quick start? Check out our 6 Knee Strengthening Exercises You Can Do Right Now for some moves you can try at home.
Stretching & Mobility in Physical Therapy for Knee Pain
Tight muscles can pull your knee out of alignment, which is why stretching is just as important as strengthening in physical therapy for knee pain.
Heel slides are gentle yet effective. Sitting or lying down, you'll simply slide your heel toward your buttocks, bending your knee as far as feels comfortable. This helps restore normal knee flexion in a controlled way.
Tight hamstrings can create excessive pull on your knee, so we'll teach you several variations of hamstring stretches to keep these muscles at an optimal length. When done consistently, you'll feel the difference not just in your knee but in your overall movement quality.
Your calf muscles might seem far from your knee problem, but tight calves can dramatically alter how your knee moves. A simple stretch against the wall can make a world of difference in how your knee feels during walking.
The IT band runs along the outside of your thigh and can be a hidden source of knee pain when tight. We'll show you effective ways to address this often-overlooked tissue.
Before jumping into any exercise session, we always recommend a dynamic warm-up. Gentle movements like leg pendulum swings prepare your joints and muscles for activity, reducing the risk of aggravating your knee pain.
Balance & Proprioception Drills
The third pillar focuses on your body's awareness of where your knee is in space—something called proprioception that's often damaged when knee pain strikes.
Single-leg stance might sound simple, but it's surprisingly challenging and effective. Standing on one leg forces the small stabilizing muscles around your knee to engage, improving both strength and coordination.
For more challenge, we might introduce a wobble board or balance pad. These unstable surfaces create a controlled environment where your knee learns to respond to unexpected movements—crucial for preventing future injuries.
Step-downs are particularly valuable for reinforcing proper knee alignment. As you step down from a small platform, we'll guide you to maintain good form, training your body to move in ways that protect your knee.
As you progress, we'll introduce lunges in a carefully controlled manner. These functional movements build strength while challenging your balance and control—key components for activities like climbing stairs or getting in and out of a car.
For our athletic patients, specific return-to-sport tests ensure you're truly ready to get back in the game safely, not just feeling better temporarily.
Hands-On & Modalities That Amplify Results
At Evolve Physical Therapy + Sports Rehabilitation, we believe that exercises alone aren't always enough. Our hands-on approach often makes the difference between good and great outcomes.
Joint mobilizations involve gentle, skilled movements of your knee joint to improve mobility and reduce pain. These techniques can access restrictions that exercises alone can't address.
Soft tissue massage works on tight muscles and fascia to release tension and improve flexibility. Many patients find immediate relief from this hands-on work, making their exercises more effective afterward.
For kneecap (patella) issues, patellar glides help ensure proper tracking of this important bone. These specific manual techniques can dramatically reduce pain during activities like stair climbing.
We often complement our hands-on work with kinesiology taping. This strategic application of elastic tape provides support and feedback to muscles, improving joint alignment during daily activities.
According to scientific research on knee OA exercise, combining these manual techniques with a targeted exercise program produces better outcomes than exercise alone—especially for conditions like osteoarthritis.
The beauty of these three pillars—strengthening, flexibility, and balance—is that they work together to create a comprehensive approach to knee health. As one area improves, the others tend to follow, creating a positive cycle of healing that extends far beyond your time in our clinic.
Home Program, Safety & Motivation
What you do between physical therapy sessions can make or break your recovery journey. At Evolve, we design home exercise programs that fit realistically into your life while still delivering results – because the most effective program is one you'll actually do.
"The magic happens between sessions," explains Lou Ezrick, PT. "Those daily 15 minutes of home exercises often determine whether someone gets back to hiking or continues to struggle with stairs."
Most physical therapy for knee pain home programs involve performing exercises 2-3 times daily with 2-3 sets of 10 repetitions each. We typically recommend progressing every 2-3 weeks, either by adding resistance or increasing complexity – but always staying within a pain-free range.
The RICE protocol (Rest, Ice, Compression, Elevation) remains a cornerstone of home care for flare-ups. Some patients benefit from adjunct supports like knee braces or kinesiology tape, which we can recommend based on your specific needs.
When it comes to heat versus ice, the general rule is: use ice for acute pain and swelling, especially after activity, and heat for chronic stiffness, particularly before exercise. However, pay attention to what feels best for your body – your response is the ultimate guide.
Building consistency is often the biggest challenge. Try habit stacking – attaching your exercises to an existing daily habit like brushing your teeth or watching the news. Tracking apps can provide helpful reminders and progress visualization, while finding an accountability partner (even your physical therapist!) can boost adherence by up to 65%, according to research.
Sample 15-Minute At-Home Circuit
Here's a quick, effective routine many of our patients perform daily:
Quad Sets: 10 repetitions, holding each for 5 seconds
Bridges: 10 repetitions, focusing on proper form
Heel Slides: 10 repetitions each leg, moving slowly and controlled
Calf Raises: 15 repetitions, using a counter for balance if needed
Single-Leg Stand: 30 seconds per side, near a wall for safety
Remember to warm up with a few minutes of gentle movement before starting. Safety is paramount – stop any exercise that causes sharp pain (though some therapeutic discomfort is normal), and don't hesitate to reach out if you're unsure.
"I tell my patients to imagine their knee rehabilitation like tending a garden," says Brooklyn-based physical therapist Sarah Johnson. "Daily attention, even briefly, yields far better results than occasional intensive work."
For more guidance on whether your specific knee condition would benefit from physical therapy, visit our detailed resource: Does Your Knee Need Physical Therapy?
Staying Consistent & Preventing Relapse
The journey doesn't end when your knee pain subsides. Physical therapy for knee pain is also about preventing future problems.
Set meaningful personal goals that inspire you – whether that's walking your daughter down the aisle pain-free, returning to your weekly tennis matches, or simply playing with grandchildren without thinking about your knees.
Celebrate every milestone, no matter how small. Did you climb a flight of stairs without pain? That's worth acknowledging! These victories build momentum and confidence in your recovery process.
As your knee strengthens, incorporate cross-training activities like swimming, cycling, or using an elliptical. These build overall fitness while being gentler on your joints than high-impact activities.
"One of the most impactful things you can do for knee health is maintain a healthy weight," emphasizes Dr. Peterson. "Each pound lost reduces knee pressure by four to six pounds during walking." This mechanical advantage makes weight management a powerful complement to your physical therapy for knee pain program.
Don't underestimate the importance of supportive footwear. Proper shoes that match your foot type and activities can dramatically improve alignment and reduce knee strain – something we often assess during your therapy sessions.
As Maria, one of our Brooklyn patients, shared: "I never thought I'd say this, but I actually look forward to my knee exercises now. They've become my 'me time' each morning, and I can feel the difference when I skip them. Plus, being able to take stairs again without wincing is pretty amazing."
Frequently Asked Questions about Physical Therapy for Knee Pain
How long does recovery usually take?
One of the most common questions we hear at Evolve is about recovery timelines. The truth is, healing isn't one-size-fits-all. Your journey depends on several factors—your specific knee condition, age, overall health, and how consistently you perform your home exercises.
As a general guideline, mild strains or sprains typically improve within 2-4 weeks of dedicated therapy. For moderate injuries or early osteoarthritis, expect a 6-12 week timeline to see significant improvements. If you're recovering from surgery, post-surgical rehabilitation usually spans 3-6 months, with milestones along the way. And for those managing severe osteoarthritis, physical therapy becomes more about ongoing management with periodic "tune-ups" to maintain function.
Most of our patients start with 2-3 sessions weekly at our Brooklyn clinic. As you gain confidence with your exercises and show improvement, we'll gradually decrease frequency, empowering you to take control of your rehabilitation.
How often should I do my exercises?
"The exercises that work best are the ones you'll actually do," is something I often tell my patients. Consistency truly is the secret ingredient to successful physical therapy for knee pain.
For most knee conditions, your stretching exercises should become part of your daily routine—ideally once in the morning and again in the evening. Your strengthening exercises need a bit more strategy; performing them every other day gives your muscles the recovery time they need to build strength effectively. Balance exercises can be brief (just 5-10 minutes) but should be practiced daily to reinforce those neural pathways.
A modest 15-minute routine that you perform regularly will produce far better results than an occasional hour-long workout when you happen to remember. Many of our most successful patients at Evolve integrate their exercises into existing habits—like doing heel slides while watching the morning news or practicing balance while brushing their teeth.
Can PT really help me avoid knee surgery?
"I was convinced I needed surgery until my physical therapist showed me another way," is feedback we hear surprisingly often. Research increasingly supports what we see in our clinic every day—physical therapy for knee pain can help many patients avoid or delay surgery.
The numbers tell a compelling story. Studies show that approximately 70% of patients with meniscal tears who commit to physical therapy first successfully avoid surgical intervention. For knee osteoarthritis, structured exercise programs demonstrably reduce pain and improve function, potentially pushing back or even eliminating the need for joint replacement.
Even with ACL injuries, which were once considered automatic surgical cases, rehabilitation through physical therapy can be successful for patients with lower activity demands or those who don't participate in cutting and pivoting sports.
That said, we're also realistic about limitations. Some conditions—like complete ligament tears in competitive athletes or advanced osteoarthritis with significant structural changes—may still require surgical intervention. In these cases, physical therapy serves a different but equally crucial role: pre-surgical preparation (what we call "prehab") and post-surgical rehabilitation dramatically improve surgical outcomes.
At Evolve Physical Therapy + Sports Rehabilitation, we're committed to giving you honest, evidence-based guidance about whether physical therapy alone might resolve your knee issues or whether a combined approach with surgical intervention would serve you better. Either way, we're here to support your journey back to pain-free movement.
Conclusion
The journey to healthier knees doesn't have to involve surgery or endless medication. Physical therapy for knee pain offers a safer, often more effective path to recovery that empowers you with skills to maintain joint health for years to come.
At Evolve Physical Therapy + Sports Rehabilitation in Brooklyn, we've witnessed countless success stories – from the marathon runner who thought her racing days were over to the grandfather who simply wanted to play with his grandkids without wincing. Each recovery journey is unique, but the fundamentals remain the same: targeted exercises, hands-on techniques, and education that puts you in control of your knee health.
Healing isn't always a straight line. Some days you'll feel remarkable progress, while others might seem like a step backward. This is completely normal! What matters most is consistency and patience. The exercises and movements that feel challenging today will become second nature tomorrow.
One of our patients recently told us, "I came in thinking my knee pain was just part of getting older. Now I understand it was simply a problem that needed the right solution." This perspective shift is something we see regularly – knee pain isn't inevitable, and you don't have to simply live with it.
The knowledge you gain through physical therapy for knee pain becomes a toolbox you'll carry with you long after your formal treatment ends. You'll learn how your body moves, what strengthens and what strains your knees, and how to adjust your activities to maintain joint health without giving up the things you love.
Whether you're dealing with a fresh injury, chronic pain that's been bothering you for years, or recovering from surgery, our team at Evolve is ready to create a personalized plan that addresses your specific needs. We blend evidence-based techniques with compassionate care, understanding that your knee pain is more than just a medical issue – it's something affecting your quality of life.
Don't wait until your pain becomes unbearable. Early intervention typically means faster recovery and better outcomes. If home remedies haven't resolved your knee pain within a week, it's time to reach out for professional help.
For athletes and active individuals looking to return to sports, our specialized sports rehabilitation services can help you not just recover, but come back stronger. Learn more about our comprehensive approach at More info about sports rehab services.
Your knees carry you through life's trips – from everyday errands to your favorite recreational activities. Our mission at Evolve Physical Therapy + Sports Rehabilitation is to keep you moving comfortably, confidently, and joyfully for years to come.

Hip Labral Tear Treatment: A Physical Therapy Guide
Understanding Hip Labral Tears and Physical Therapy Treatment
Living with hip pain can be frustrating and limiting, especially when it's caused by something you may have never heard of before – a hip labral tear. If you're reading this, you might be experiencing that deep ache in your hip or that annoying click when you move in certain ways.
Hip labral tears are surprisingly common, affecting between 22-55% of people who experience hip or groin pain. The good news? Many cases don't require surgery and can be effectively managed with the right approach.
I'm Louis Ezrick, founder of Evolve Physical Therapy, and over my nearly twenty years of practice, I've helped countless patients overcome hip labral tears through specialized rehabilitation techniques. Let me walk you through what you need to know.
The labrum is essentially a ring of cartilage that surrounds your hip socket. Think of it as a rubber gasket that deepens your socket, provides stability, and absorbs shock when you move. When torn, it can cause that familiar deep aching in the front of your hip or groin, clicking sensations, and pain with everyday movements like sitting, squatting, or pivoting.
What surprises many of my patients is learning that about 74% of hip labral tears can't be traced back to a specific injury. Instead, they often develop gradually due to repetitive stress, structural abnormalities like hip impingement, or simply the natural wear and tear that comes with an active lifestyle.
Physical therapy treatment for hip labral tear conditions is a comprehensive process that evolves over time. At Evolve, we focus on a structured rehabilitation approach that addresses not just the tear itself, but the entire movement system that may have contributed to it.
While the labrum itself doesn't typically "heal" with physical therapy, we can effectively address the surrounding muscle weaknesses and movement patterns that allow you to function pain-free despite the tear. Think of it as creating a more supportive environment for your hip to work within.
Our approach typically includes hands-on manual therapy to improve joint mobility, targeted strengthening exercises for the hip and core, movement retraining to correct problematic mechanics, and smart activity modifications to avoid painful positions. For non-surgical cases, you can expect a progressive rehabilitation program lasting about 8-12 weeks, though everyone's timeline is unique.

The journey back to pain-free movement isn't always linear, but with patience and the right guidance, most people can return to the activities they love. In the following sections, we'll dive deeper into the anatomy, causes, diagnosis, and specific treatments that make up an effective physical therapy treatment for hip labral tear conditions.
Anatomy & Function of the Hip Labrum
Your hip is an engineering marvel - one of the largest and most stable joints in your body. It bears your weight while still allowing you to walk, run, and dance with ease. At the heart of this remarkable joint is the labrum, a ring of specialized cartilage that lines the rim of your acetabulum (hip socket).
This unassuming ring of tissue plays a starring role in your hip health. Think of your labrum as nature's perfect gasket - creating a tight seal around the femoral head (the ball part of your hip). This seal generates a vacuum effect that helps keep everything perfectly aligned.
Your labrum isn't uniform all the way around - it's actually thicker in some areas and thinner in others, cleverly designed to handle different forces depending on how you move. The labrum deepens your hip socket by about 21%, which significantly increases stability while still allowing freedom of movement.
When you walk, run, or jump, your labrum also acts as a shock absorber, cushioning impact forces that would otherwise cause wear and tear. It helps distribute pressure evenly across your joint surface - like how a good mattress distributes your body weight to prevent pressure points.
What the Labrum Does for Your Hip
"The labrum is truly a wonder of anatomical design," our physical therapists at Evolve often explain to patients. "It transforms your hip socket into something much more stable and efficient than bone alone could provide."
This remarkable structure improves your hip function in several key ways. The suction effect created by an intact labrum significantly improves socket depth, which means greater stability during movement. Without this added depth, your hip would be more prone to slipping out of place.
Your labrum also plays a crucial role in proprioception - your body's awareness of where it is in space. This helps with coordination and balance, especially during complex movements like dancing or sports.
By maintaining proper joint fluid pressure, your labrum ensures smooth, friction-free movement. It's like having the perfect amount of oil in an engine - not too much, not too little.
When a labral tear occurs during our physical therapy treatment for hip labral tear patients, we focus on understanding exactly how this delicate system has been disrupted. The location and extent of the tear help us determine the best approach to rehabilitation.
At our Brooklyn clinic, we see how labral tears affect people differently based on their activity levels, anatomy, and the specific function the labrum serves in their unique hip structure. This understanding guides our personalized treatment approaches, helping patients regain function even when the labrum itself cannot fully heal.
Why Do Hip Labral Tears Happen? Causes & Risk Factors
Ever wondered why your hip started giving you trouble? Hip labral tears rarely happen out of the blue. Most often, they're part of a bigger picture of hip issues or related to specific anatomical factors you might have been born with.
Understanding what's really behind your labral tear is crucial for getting the right treatment. At Evolve, we dig deep to identify these underlying causes.
The most common culprits we see include:
Femoroacetabular Impingement (FAI) tops the list. This condition involves abnormal bone shapes that create friction against your labrum with every movement. Research shows that a striking 95% of patients with labral tears also show signs of FAI.
Hip dysplasia is another frequent offender. When your socket doesn't provide enough coverage for your femoral head, your labrum takes on extra stress to compensate.
Trauma can certainly tear a labrum directly. This might happen during a car accident, a fall, or a sports collision that forces your hip into an extreme position.
For our active Brooklyn residents, repetitive stress from activities requiring extreme hip movements or constant pivoting (think dance, hockey, or yoga) can gradually wear down the labrum over time.
As we age, degenerative changes become more common, particularly after 40, when natural wear and tear accelerates.
Some people have capsular laxity – essentially, their hip joint is too mobile, placing additional stress on the labrum as it works overtime to maintain stability.
FAI TypeBone AbnormalityCommon inTypical Labral DamageCAMBony bump on femoral head/neckYoung male athletesAnterior-superior tearsPincerOvercoverage of acetabulumMiddle-aged femalesCircumferential tearsCombinedBoth CAM and Pincer presentEither sexMore extensive damage
Common Mechanisms of Injury
At our Brooklyn clinic, we frequently see labral tears that develop through specific movement patterns:
"The body tells us a story about how these injuries develop," says our team at Evolve. "It's rarely just bad luck."
Pivoting under load is a common culprit. When you cut or change direction with your full body weight on one leg – like in basketball, soccer, or tennis – your labrum endures significant rotational stress.
High flexion with rotation positions are particularly problematic. We see this in dancers, gymnasts, and martial artists who regularly push their hips to extreme positions.
Microinstability issues often fly under the radar. People with natural hypermobility or poor core control may experience subtle but damaging joint movements that gradually fray the labrum.
As our physical therapist Keesha Vaughn points out, "These sorts of tears have always been there — we're just getting better at diagnosing them." In fact, imaging studies have found hip labral tears in nearly 40% of people with no symptoms in their 20s and 30s. This suggests many tears exist without causing problems until something changes in how we move or load our hips.
Modifiable Risk Factors
The good news? While some risk factors like bone shape can't be changed without surgery, many contributing factors can be addressed through physical therapy treatment for hip labral tear.
Training errors are common among our Brooklyn athletes and fitness enthusiasts. Too much, too soon, or poor progression in your workout routine can overload tissues before they're ready.
Muscle imbalances – particularly weak gluteal muscles paired with tight hip flexors – create a perfect storm for labral issues. This imbalance is especially common in people who sit for long workdays.
Movement faults like poor squatting patterns or knees caving inward during exercise place uneven stress on your labrum.
Even your footwear choices matter. Inappropriate shoes for your specific activities or foot type can alter how forces travel up through your legs to your hips.
Workstation ergonomics affect more people than you might think. "I see so many patients who developed symptoms after their work-from-home setup changed during the pandemic," notes Keesha Vaughn, PT, DPT.
"A lot of people with labral issues feel like their hips are tight, so they try to do yoga, or aggressively stretch their hips, which can make irritated tissues feel even more sensitive," Keesha adds. At Evolve, we focus on addressing these modifiable factors with a smarter, more targeted approach to rehabilitation.
Recognizing a Hip Labral Tear: Symptoms & Diagnosis
Let's face it—hip pain can be confusing. Is it a muscle strain? Bursitis? Or could it be a labral tear? While many hip conditions share similar symptoms, labral tears tend to announce themselves in distinctive ways that, once you know what to look for, can help point us in the right direction.
Most people with labral tears describe a deep, hard-to-pinpoint pain in the front of the hip or groin. In fact, about 90% of patients report this anterior hip pain as their primary complaint. It's not the kind of surface pain you feel with a muscle strain—it's deeper, like it's coming from inside the joint itself.
"Patients often use what we call the 'C-sign' when describing where their pain is," explains our hip specialist at Evolve. "They'll cup their hand in a C-shape over the side of their hip, trying to indicate that deep, internal discomfort that's hard to put a finger on."
Beyond the pain, you might notice catching, clicking, or even locking sensations during certain movements. Many people find sitting uncomfortable, especially in low chairs or car seats (think getting in and out of your car after a long drive). Pivoting or twisting motions typically provoke symptoms, and you might experience stiffness after periods of inactivity or even feelings of your hip "giving way" during activities.
Physical Examination Highlights
When you visit us at Evolve Physical Therapy in Brooklyn, we'll conduct a thorough examination to assess several key areas:
Your range of motion often tells us a lot. People with labral tears typically show restricted internal rotation and pain when we bring the hip into certain positions. The discomfort is usually most noticeable with combined movements—like when we flex, adduct, and internally rotate the hip all at once.
We'll also check your strength, where we commonly find weaknesses in the hip abductors (particularly the gluteus medius), reduced hip extensor strength, and limitations in core stability. These deficits don't cause the tear but often develop as a result of it.
Watching you walk provides additional clues. We might observe a subtle drop of the pelvis on the affected side (called a Trendelenburg sign), decreased hip extension, or various compensatory movements you've developed to avoid pain.
Finally, we'll perform several provocative tests—not to cause discomfort, but to reproduce your symptoms in a controlled way that helps confirm our diagnosis. Rather than relying on any single test, we use combinations like the FADIR test (Flexion, Adduction, Internal Rotation), FABER test (Flexion, Abduction, External Rotation), and others. Research shows the FADIR test alone elicits pain in 88% of patients with hip joint pathology.
Imaging & Special Tests
While we can begin physical therapy treatment for hip labral tear based on our clinical findings, imaging often confirms our diagnosis and reveals underlying causes:
X-rays don't show the labrum itself but help us identify bony abnormalities like impingement or dysplasia that might be contributing to your tear.
MRI with contrast (arthrogram) has traditionally been considered the gold standard. This involves injecting contrast material into the joint to better visualize the labrum.
3T MRI technology offers high-resolution images that may detect labral tears without the need for contrast injection. Scientific research on 3T MRI suggests it may be at least as effective as MR arthrogram for detecting these tears.
Ultrasound is sometimes used as a screening tool, though it's generally less sensitive than MRI for detecting labral tears.
One important note: imaging findings must always be correlated with your symptoms. Many people without any hip pain show labral tears on imaging, so we never treat the picture—we treat you, the person experiencing the symptoms.
At Evolve, we're also careful to rule out other conditions that can mimic labral tear symptoms, including hip bursitis, sports hernias, and even back problems that refer pain to the hip region. Getting the diagnosis right is the crucial first step in your recovery journey.
Physical Therapy Treatment for Hip Labral Tear
Physical therapy treatment for hip labral tear isn't about "healing" the tear itself. Since cartilage has limited blood supply, the labrum typically doesn't repair on its own. Instead, our approach focuses on the bigger picture – addressing underlying causes and compensations to help you move better and feel better, even with the tear.
Think of it like this: while we can't patch the hole in your labrum, we can strengthen everything around it to take pressure off the damaged area and help you function at your best.
Core Goals of physical therapy treatment for hip labral tear
At Evolve Physical Therapy in Brooklyn, we build our treatment plans around four essential objectives:
First, we work to reduce joint irritation and inflammation. This means identifying activities that aggravate your hip, implementing effective pain management strategies, and decreasing forces that stress your labrum. Those first few pain-free steps are always cause for celebration!
Second, we focus on restoring optimal movement patterns. Your body has likely developed compensations to avoid pain, which can create new problems. We address muscle imbalances, correct faulty biomechanics, and improve joint mobility without compromising stability.
Third, we build strength and endurance in key muscle groups. The gluteal muscles and core are particularly important for hip stability. We progress from isolated exercises to functional movement patterns, eventually developing capacity specific to your sport or daily activities.
Finally, we work to prevent long-term complications. This includes reducing your risk of developing osteoarthritis, minimizing compensatory movements that could lead to other issues, and establishing sustainable routines you can maintain independently.
As Keesha Vaughn, PT, DPT explains, "If you want to improve your tolerance to things like sitting at your desk, playing with your kids, and going to the gym without excessive pain, a physical therapist can show you how to improve the strength and mobility of your hips without irritating sensitive tissues."
Conservative Program Components
Our comprehensive physical therapy treatment for hip labral tear typically blends several approaches:
We use manual therapy techniques to address restrictions and manage pain. This includes soft tissue mobilization for tight muscles, joint mobilizations that don't stress the labrum, trigger point release, and specialized techniques like hip mobilization in prepositioned extension – particularly beneficial for labral tissue.
Movement re-education is crucial for long-term success. We'll work on neuromuscular retraining to optimize hip mechanics, analyze and correct your walking pattern, teach proper squat and lunge techniques, and integrate core stability with hip movement. Many patients are surprised to find how small adjustments in movement can dramatically reduce pain.
Activity modification helps you steer daily life while protecting your hip. We'll adjust sitting positions (often using raised seats to avoid deep hip flexion), modify exercise routines to avoid painful movements, make ergonomic recommendations for work and home, and refine sport-specific techniques.
We also incorporate modalities and adjunctive treatments when appropriate, including ice and heat, aquatic therapy for early-stage rehabilitation, kinesiology taping for proprioceptive feedback, and education on self-management strategies.
For more details about our approach to hip problems, visit our Hip Physical Therapy page.
Foundational Exercises Prescribed
Our evidence-based exercise protocol typically progresses through several stages:
In the early stage, we focus on gentle activation with exercises like clamshells (lying on your side with knees bent, lifting the top knee while keeping feet together) to target the gluteus medius. Bridges help strengthen gluteal muscles and improve pelvic stability, while dead bug exercises improve core control. Hip CARs (Controlled Articular Rotations) maintain mobility without compression – essential for sensitive labral tissue.
As you progress to the intermediate stage, we introduce side-stepping with resistance bands (Monster Walks) to build lateral hip strength. Single-leg deadlifts target your posterior chain while improving balance. The Copenhagen plank – a side plank variation with the top leg supported on a bench – challenges hip adductors. Wall sits combined with clam shells integrate isometric quad work with active gluteal engagement.

Advanced exercises might include single-leg bridges on unstable surfaces, lateral step-downs with controlled lowering from a step, lunges with rotation to integrate core and hip stability, and hip hinges with resistance to build functional strength.
Each exercise is carefully selected based on your specific presentation and modified as needed to ensure it doesn't aggravate your symptoms. What works beautifully for one person might be completely wrong for another – that's the art of physical therapy.
Exercise Progressions in physical therapy treatment for hip labral tear
At Evolve, we don't believe in one-size-fits-all timelines. Instead, we follow a criterion-based progression where you advance when you demonstrate readiness, not simply after a predetermined time period.
Our movement pattern progressions typically flow from open-chain to closed-chain exercises, double-leg to single-leg activities, stable to unstable surfaces, slow to fast velocities, and simple to complex patterns. We're essentially rebuilding your movement vocabulary from the ground up.
Loading progressions are equally important. We start with bodyweight exercises before adding external resistance. We progress from isometric holds to concentric contractions, then eccentric control, and finally plyometric movements. We'll move from short lever to long lever exercises and gradually increase volume as your tolerance improves.
Functional progressions connect your exercises to real life – starting with basic daily activities, advancing to more demanding tasks, then recreational activities, and finally sport-specific training if relevant to your goals.
Throughout this journey, we monitor key criteria: pain levels should stay below 3/10 during and after exercise, you should maintain proper form throughout, have adequate recovery between sessions, and show no compensatory movements. If any of these criteria aren't met, we adjust accordingly.
Expected Recovery Timeline with physical therapy treatment for hip labral tear
While everyone heals differently, non-surgical rehabilitation typically follows this general timeline:
Phase 1: Protection and Pain Control (0-4 weeks) focuses on reducing inflammation and modifying aggravating activities. Key milestones include pain rated less than 3/10 with daily activities and regaining at least 75% of your hip range of motion. This phase can feel slow, but it builds the foundation for everything that follows.
During Phase 2: Strength and Stability Building (5-8 weeks), we emphasize progressive strengthening and normalizing your walking pattern. You'll know you're ready to advance when you've achieved 75-80% hip abductor strength compared to your uninvolved side and can walk without pain.
Phase 3: Advanced Strengthening and Power (9-12 weeks) introduces sport-specific movement patterns and power development. Milestones include reaching 90% hip strength compared to your unaffected side and performing controlled plyometric exercises without pain or compensation.
Phase 4: Return to Sport/Full Activity (12+ weeks) focuses on sport-specific drills and gradual return to full participation. You'll know you're ready when you pass return-to-sport testing and feel confident in your hip function.
For runners, we typically require 90% abductor strength compared to the uninvolved side before starting a return-to-run program. Patience pays off here – rushing back too soon often leads to setbacks.
Tracking Success: Outcome Measures
To objectively monitor your progress, we use validated assessment tools:
We track patient-reported outcomes using questionnaires like the iHOT-12 (International Hip Outcome Tool), which specifically evaluates hip-related quality of life. The HOS (Hip Outcome Score) has separate scales for daily activities and sports. The Harris Hip Score evaluates pain, function, and range of motion, while the LEFS (Lower Extremity Functional Scale) provides a broader assessment of lower limb function.
Objective measures include strength testing with dynamometry, range of motion measurements, functional performance tests like the single-leg squat or step-down test, and pain ratings during specific activities.
Most importantly, we track your specific goals – whether that's sitting through your child's recital without pain, returning to your weekend tennis matches, or simply sleeping through the night without your hip waking you up.
Potential Complications & How We Address Them
Several challenges can arise during rehabilitation:
Hip flexor tendinitis is common due to altered mechanics and compensatory patterns. We address this through activity modification, specific soft tissue techniques, and progressive loading to build resilience.
Persistent stiffness may indicate ongoing impingement or protective muscle guarding. Gentle joint mobilizations and controlled mobility exercises can help overcome this barrier.
Poor exercise adherence often stems from confusion about exercise purpose or technique. We focus on education, simplified home programs, and regular check-ins to keep you on track. The exercises that work are the ones you'll actually do!
Movement compensations typically develop as pain-avoidance strategies. We use visual feedback (often with video), tactile cues, and gradual progression to restore optimal patterns without triggering pain.
Preventing Re-Injury After Rehab
Once you've achieved your rehabilitation goals, we emphasize long-term management strategies:
A maintenance exercise program typically includes core hip and core exercises 2-3 times weekly, regular mobility work to maintain optimal joint function, and periodic "check-in" sessions to address any emerging issues before they become problems.
Sport and activity modifications might include technique refinement for high-risk activities, equipment adjustments (like bike seat height), and training load management strategies to prevent overuse.
Ergonomic considerations include workstation setup recommendations, sleeping position adjustments, and proper footwear selection – all of which can significantly impact hip health over time.
For additional exercises that can help maintain hip health after formal therapy ends, visit our Labral Tear Recovery Exercises page.
The goal isn't just to get better – it's to stay better for the long haul.
When Is Surgery Needed & Post-Surgical Rehab
While many patients with hip labral tears respond well to conservative management, surgery may be indicated in certain situations:
Failed conservative treatment after 3+ months of dedicated physical therapy
Large, unstable tears with mechanical symptoms (catching, locking)
Significant functional limitations despite appropriate rehabilitation
Combined issues requiring correction (e.g., labral tear with significant FAI)
Elite athletes with specific performance demands
The most common surgical procedure is hip arthroscopy, a minimally invasive approach that allows the surgeon to repair the torn labrum and address any contributing factors like FAI.
Scientific research on arthroscopy vs PT suggests that both hip arthroscopy and physical therapy can improve symptoms in patients with symptomatic acetabular labral tears, particularly in those over 40 years old.
Post-surgical rehabilitation is a critical component of the recovery process. At Evolve Physical Therapy in Brooklyn, we work closely with surgeons to implement evidence-based protocols custom to each patient's specific procedure.
Phases of Post-Surgical Rehabilitation
Phase I: Protection Phase (0-4 weeks)
Focus: Protect the surgical repair, manage pain and swelling
Weight-bearing: Typically partial weight-bearing with crutches for 4-6 weeks
ROM: Passive and active-assisted within surgeon-specified limitations
Exercises: Gentle isometrics, ankle pumps, quadriceps sets
Precautions: Avoid flexion >90°, adduction past midline, and internal rotation
Phase II: Mobility Restoration (4-8 weeks)
Focus: Restore normal ROM, normalize gait, initiate basic strengthening
Weight-bearing: Progressive weaning from crutches (surgeon dependent)
ROM: Active and passive within expanding parameters
Exercises: Stationary biking, pool exercises, light resistance training
Precautions: Avoid positions of impingement, monitor for hip flexor tendinitis
Phase III: Strengthening & Neuromotor Control (8-12 weeks)
Focus: Build strength, endurance, and controlled movement patterns
Exercises: Closed-chain strengthening, balance activities, functional training
Progression: From basic exercises to more sport-specific movements
Testing: Strength assessment to guide progression
Phase IV: Advanced Conditioning & Return to Sport (12-16+ weeks)
Focus: Sport-specific training, plyometrics, agility, and power development
Return-to-run criteria: Typically 90% hip strength, normal gait pattern
Return-to-sport testing: Movement quality, power, and confidence assessments
Maintenance: Long-term program to prevent recurrence
Precautions You Must Respect
Following hip arthroscopy, several precautions are essential to protect the surgical repair:
Early Post-Op Precautions (typically first 4-6 weeks):
Avoid hip flexion beyond surgeon-specified limits (usually 90°)
No internal rotation past neutral in flexed positions
Avoid crossing the operated leg past midline (adduction)
No pivoting or twisting on the affected leg
Follow weight-bearing restrictions precisely
Intermediate Precautions (typically 6-12 weeks):
Avoid positions that cause pinching or pain
Monitor for signs of hip flexor irritation
Gradually increase activity duration and intensity
No high-impact activities until cleared
Long-term Considerations:
Avoid prolonged positions that previously caused impingement
Maintain hip and core strength
Use proper technique during sports and exercise
Specific precautions may vary based on the exact procedure performed and your surgeon's protocol. At Evolve, we maintain close communication with referring surgeons to ensure alignment with their specific post-operative guidelines.
Frequently Asked Questions about Hip Labral Tears
Can a labral tear heal without surgery?
One of the most common questions we hear at Evolve is whether a labral tear can heal on its own. The truth is, the labrum has limited blood supply, which means complete healing of the actual tear is unlikely without surgical intervention. But here's the good news – many patients can become completely pain-free and return to full function through conservative management.
Physical therapy treatment for hip labral tear doesn't necessarily "heal" the tear itself. Instead, it works by addressing everything around it. Think of it like compensating for a small crack in your foundation by reinforcing the surrounding structure. We focus on reducing inflammation around the tear, strengthening the muscles that support your hip, improving how you move to take pressure off the damaged area, and teaching you modifications that minimize irritation.
Many of our patients with small, stable tears manage quite well for years – sometimes indefinitely – without surgery. In fact, research backs this up. A randomized controlled trial found that both hip arthroscopy and physical therapy improved symptoms in patients over 40 with symptomatic acetabular labral tears. Your body is remarkably adaptable!
How long until I can run again?
If you're a runner, this question is probably top of mind. The timeline for returning to running depends on several factors – the severity of your symptoms, whether you've had surgery, your baseline fitness level, and how your body responds to treatment.
For non-surgical cases, we typically see patients begin modified running programs around 8-12 weeks after starting therapy. But this isn't based on the calendar alone – you need to meet specific milestones first:
Your pain with daily activities should be minimal (less than 2 out of 10) Your hip abductor strength should be at least 90% compared to your unaffected side You should be walking normally without any compensation You need to demonstrate good control during single-leg exercises
Post-surgery, the timeline extends a bit. Most patients return to running around 12-16 weeks after their procedure, following their surgeon's protocol and individual progress.
At Evolve, we don't just say "start running at week 12" and hope for the best. We implement a thoughtful, gradual return-to-run program that typically begins with short walk/run intervals. We'll monitor how your body responds and progressively increase your running volume while keeping a close eye on any symptoms.
What movements should I avoid early on?
During early rehabilitation, certain movements can put extra stress on your labrum and potentially slow your progress. Think of these as "caution zones" for your hip.
Early in your recovery, be mindful of deep squatting or sitting in low chairs, which can push your hip into positions that compress the labrum. Crossing your legs when seated might feel natural, but it can place stress on the healing tissues. Pivoting or twisting on your affected leg can be particularly problematic, as can movements that combine hip flexion with internal rotation (like bringing your knee across toward the opposite shoulder). High-impact activities like jumping or running should wait until you've built sufficient strength and stability.
Instead, we recommend using raised seating surfaces when possible – a simple cushion can make a big difference. Sit with your feet flat and knees comfortably apart. When you need to change direction, turn your whole body rather than pivoting at the hip. Focus on keeping movements within pain-free ranges, and choose low-impact activities like swimming or stationary biking (with proper seat height adjustments) during your recovery.
The good news is that these restrictions are temporary. As your rehabilitation progresses and your hip becomes stronger and more stable, we'll gradually reintroduce these movements based on how your body responds. Everyone's recovery journey is different, and at Evolve, we tailor these guidelines to your specific situation and the nature of your labral tear.
These restrictions aren't about limiting you permanently – they're about creating the optimal environment for recovery so you can return to all the activities you love with confidence.
Conclusion
Living with a hip labral tear can feel overwhelming, but there's plenty of reason for hope. Throughout my years helping patients recover at Evolve Physical Therapy, I've seen how the right approach can make all the difference in your journey back to an active, pain-free life.
Early intervention truly matters when it comes to hip labral tears. The sooner you address your symptoms, the less likely you'll develop those tricky compensation patterns that can create a whole cascade of additional problems. Many patients are surprised to learn that physical therapy treatment for hip labral tear is often remarkably effective without ever needing surgery. By addressing not just your pain but the underlying movement issues and strength deficits, we can help you build a foundation for lasting relief.
Recovery isn't an overnight process – whether you're pursuing conservative management or healing from surgery, rehabilitation typically takes several months of consistent work. But those months of dedication pay off in years of improved function and comfort.
What makes our approach at Evolve different is our commitment to truly individualized care. Your hip labral tear has its own unique story, and cookie-cutter treatment plans simply don't work. Your body, your goals, and your lifestyle all inform how we craft your recovery journey.
Our Brooklyn team specializes in treating hip labral tears with an approach that considers the whole person, not just the tear on your MRI. We combine hands-on techniques with progressive exercise programs that target the root causes of your hip dysfunction. This comprehensive strategy empowers you to take an active role in your recovery.
If you're experiencing that deep groin pain, catching sensations, or discomfort with certain movements, don't wait to see if it goes away on its own. Early intervention often leads to better outcomes and might help you avoid more invasive treatments down the road.
The path forward may require patience, but with the right guidance, most people with hip labral tears achieve significant improvements in both pain and function. Your hip can feel better – and we're here to help you every step of the way.
For more information about our specialized approach to hip labral tears, visit our Hip Labral Tear specialists page or contact our Brooklyn office to schedule an evaluation.


From Aches to Arthritis: What Causes Hip Pain?
Understanding the Hip Pain Epidemic
If you've ever experienced that nagging ache in your hip that just won't quit, you're in good company. Millions of Americans wake up each day wondering what causes hip pain in their lives and how they can find relief.
The hip is an engineering marvel – a ball-and-socket joint designed for both stability and incredible range of motion. But this complexity also means there are numerous ways things can go wrong. From the wear-and-tear of osteoarthritis that gradually erodes cartilage, to the sharp pain of bursitis when those tiny fluid-filled cushions become inflamed, hip discomfort comes in many forms.
Some people experience labral tears – damage to the cartilage ring that helps keep the ball securely in the socket. Others develop tendinitis, where the tough cords connecting muscle to bone become irritated and painful. Hip impingement might be your challenge if bone shapes don't quite match up perfectly, creating friction with movement.
What surprises many of my patients is that hip pain isn't always straightforward. That ache in your hip might actually be sciatica originating from your lower back, or it could be radiating from your sacroiliac joint. The pain might show up in your groin, outer thigh, buttock, or even travel down your leg – making diagnosis challenging sometimes.
The statistics are eye-opening: more than one-third of adults report that hip pain disrupts their sleep. And as we age, the numbers climb even higher. For those in their 50s and beyond, osteoarthritis becomes increasingly common, often leading to that characteristic morning stiffness that improves with movement.
Risk factors include age, previous injury, excess weight, and even genetics. Women, particularly those who've experienced pregnancy-related changes to their pelvis, may face unique challenges with hip stability and pain.

Night pain deserves special mention because it's particularly disruptive. When hip pain wakes you at 2 AM, it's not just uncomfortable – it affects your entire well-being the next day. This nighttime discomfort often signals inflammatory conditions like bursitis or certain types of arthritis that flare when you're still.
As a physical therapist who's spent nearly two decades working with hip pain, I've seen how proper diagnosis and targeted treatment can transform lives. Understanding what causes hip pain in your specific case is the crucial first step toward finding relief and returning to the activities you love.
What Causes Hip Pain? 15 Common Culprits
Your hip is an engineering marvel—a ball-and-socket joint supported by an intricate network of ligaments and over 20 muscles stretching from your lower back to your inner thigh. This complexity explains why pinpointing what causes hip pain can sometimes feel like solving a puzzle.
"The hip seems like a simple joint, but in reality, it bears forces of up to 6-8 times your body weight during everyday activities like walking," explains Dr. Mary Kimbrough, a physical therapist specializing in hip disorders. "This makes it vulnerable to a wide variety of problems."
Let's explore the most common culprits behind that nagging hip discomfort you've been experiencing.
Acute Injuries: Understanding What Causes Hip Pain Suddenly
That sharp, unexpected pain that stops you in your tracks often stems from trauma or overdoing it. Hip fractures are particularly common in older adults with osteoporosis—and timing matters. Surgery within 1-2 days of injury significantly reduces complication risks.
Dislocations happen when the femoral head pops out of the acetabulum during high-impact activities or accidents. This isn't something to wait out—it's a genuine medical emergency requiring immediate attention.
Labral tears affect the cartilage ring stabilizing your hip joint. As one Brooklyn dancer shared with us, "I felt a catching sensation and then a sharp pain deep in my groin during a performance. It turned out to be a labral tear that needed surgical repair." These tears typically occur during pivoting sports or activities requiring extreme ranges of motion.
Sprains and strains result from overstretching or tearing ligaments and muscles around the hip. Hip flexor strains are especially common among runners and soccer players who make sudden directional changes.
Sports enthusiasts should be aware of contusions—bruising of hip muscles or bone that commonly occurs in high-contact activities like football, hockey, and martial arts.
Chronic Conditions: Long-Term Factors That Cause Hip Pain
Not all hip pain arrives with a bang. Sometimes it creeps in gradually, whispering before it shouts.
Osteoarthritis tops the list of chronic hip pain culprits. This wear-and-tear condition breaks down cartilage until bones begin rubbing against each other. Nearly 1 in 4 people will develop symptomatic hip osteoarthritis in their lifetime—that's millions of Americans living with this progressive condition.
Inflammatory arthritis conditions like rheumatoid arthritis, psoriatic arthritis, and ankylosing spondylitis attack joint tissues through immune system dysfunction, causing pain, swelling, and eventual joint damage.
Bursitis involves inflammation of those small, fluid-filled cushions (bursae) that reduce friction between tissues. Trochanteric bursitis affects the outer hip and becomes increasingly common after age 60.
Tendinopathy represents chronic tendon injury characterized by degeneration rather than inflammation. Gluteal tendinopathy particularly affects middle-aged women, causing persistent outer hip pain that worsens with activity and side-sleeping. Scientific research on gluteal tendinopathy has shown promising results with targeted exercise therapy.
Avascular necrosis occurs when bone tissue dies due to insufficient blood supply. Risk factors include long-term steroid use, excessive alcohol consumption, and previous hip fractures.
Femoroacetabular impingement (FAI) involves abnormal bone shapes causing friction during hip movement. Interestingly, up to two-thirds of people with radiographic evidence of FAI experience no symptoms whatsoever. More info about Hip Impingement?
Soft-Tissue & Overuse Disorders
At Evolve Physical Therapy, we frequently see patients whose hip pain stems from soft tissue problems rather than joint issues.
IT Band Syndrome involves tightness and inflammation of the iliotibial band running from hip to knee along the outer thigh. Runners, cyclists, and hikers are particularly vulnerable to this frustrating condition.
Gluteal tendinopathy creates deep pain where the powerful gluteal tendons attach to the greater trochanter. Dr. Shane Nho notes, "People who do very specific activities over and over, like kicking a soccer ball, can be at risk for this severe pain."
Hip flexor strains affect the iliopsoas and rectus femoris muscles that flex your hip. These injuries plague dancers, martial artists, and soccer players who repeatedly lift their legs against resistance.
Piriformis syndrome occurs when the piriformis muscle in your buttock compresses the sciatic nerve, causing pain that radiates down your leg. Many patients mistake this for sciatica, though the underlying cause differs.
Trochanteric bursitis inflames the bursa on your outer hip. "Though walking for a long time or climbing stairs can make it worse, bursitis usually is not associated with activity-related pain," explains Dr. Nho. Instead, it often creates sharp pain when lying on the affected side.
Structural or Anatomical Problems
Some of us are simply built in ways that predispose us to hip pain.
Femoroacetabular impingement (FAI) comes in three varieties: cam impingement (abnormal femoral head shape), pincer impingement (acetabular overcoverage), or mixed impingement (both problems simultaneously). These structural issues can lead to labral tears and early arthritis.
Hip dysplasia represents the opposite problem—insufficient coverage of the femoral head by the acetabulum. This instability stresses the labrum and supporting structures, eventually leading to arthritis if untreated.
Leg-length discrepancy might seem minor, but when one leg is shorter than the other, it creates abnormal stress throughout the kinetic chain, including the hip joint and surrounding muscles.
Core muscle injury—previously called "sports hernia" or "athletic pubalgia"—involves injury to muscles and tendons in the lower abdomen and groin. Athletes in rotational sports like hockey, soccer, and baseball frequently develop this condition.
Pelvic tilt abnormalities (anterior or posterior) alter hip mechanics and can trigger pain. Poor posture, sitting habits, and muscle imbalances often contribute to these alignment issues.
Referred & Outside-the-Hip Sources
Sometimes what causes hip pain isn't the hip at all. Your body can be tricky that way.
Lumbar spine issues like herniated discs or spinal stenosis frequently refer pain to the hip region. Many patients arrive convinced they have hip arthritis when the true culprit lurks in their lower back.
Sciatica compresses the sciatic nerve in the spine, creating pain that radiates down the leg. This nerve pain can masquerade as hip joint pain, leading to misdiagnosis if not carefully evaluated.
Sacroiliac joint dysfunction affects the connection between your sacrum and ilium in the pelvis. SI joint pain commonly mimics hip pain, creating confusion for patients and healthcare providers alike. Scientific research on pain referral patterns has helped clarify these complex relationships.
Meralgia paresthetica compresses the lateral femoral cutaneous nerve, causing burning pain, numbness, and tingling in the outer thigh. Tight clothing, pregnancy, and weight gain can all trigger this condition.
Gynecological or pelvic issues can refer pain to the hip area. As Dr. Nho points out, "The pain you feel in your hip could actually be coming from elsewhere in your pelvis." Conditions like endometriosis, ovarian cysts, or prostatitis deserve consideration in cases of persistent hip pain.
Hernias, particularly inguinal hernias, can cause groin pain that patients may attribute to hip problems. Careful assessment helps distinguish between these distinct conditions.
Less Common & Serious Causes
While rare, these conditions require prompt recognition:
Septic arthritis represents a joint infection requiring immediate medical attention. Signs include severe pain, fever, and inability to bear weight. This constitutes a true medical emergency.
Osteomyelitis infects bone tissue and can affect the hip. Symptoms typically include fever, severe pain, and sometimes visible redness or swelling.
Bone cancer—whether primary or metastatic—rarely affects the hip, but demands consideration when symptoms include night pain, unexplained weight loss, and pain unrelieved by rest or position changes.
Legg-Calvé-Perthes disease temporarily disrupts blood supply to the femoral head in children, causing pain and limping. Early diagnosis improves outcomes for these young patients.
Transient osteoporosis creates temporary bone loss in the hip, most commonly affecting pregnant women in their third trimester and middle-aged men. Scientific research on osteonecrosis has improved our understanding of this and related conditions.
Understanding what causes hip pain is the crucial first step toward finding relief. At Evolve Physical Therapy, we specialize in thorough assessment to identify the true source of your discomfort, whether it's directly in the hip or coming from somewhere else entirely.
Diagnosing Hip Pain: Tests & Red Flags

Getting to the bottom of what causes hip pain is like solving a mystery. The hip is complex, with pain that could stem from the joint itself or be referred from somewhere else entirely. At Evolve Physical Therapy in Brooklyn, we take a detective's approach to your hip pain, gathering clues through conversation, hands-on assessment, and when needed, advanced imaging.
History & Physical Examination Essentials
Your story matters most. When you come in with hip pain, we'll start by simply listening. Where exactly do you feel it? Pain in the groin often signals problems within the joint itself, while outer hip discomfort might point to bursitis or IT band issues. Buttock pain? That could be your SI joint or piriformis muscle acting up. And when pain shoots down your leg, we're immediately thinking about nerve involvement.
The character of your pain tells us a lot too. Is it sharp and stabbing or more of a dull ache? Does it come and go, or is it your constant companion? That burning sensation some people describe often means a nerve is irritated somewhere along the path.
"I remember one patient who insisted her hip pain was just from 'getting old,'" shares Lou from Evolve PT. "But when she mentioned it was worst first thing in the morning and improved with movement, that classic pattern immediately suggested inflammatory arthritis—which we confirmed and successfully treated."
We'll also explore when your pain started. Was there a memorable "ouch" moment during tennis, or did it creep up gradually? What makes it better or worse? Many people find that certain movements—climbing stairs, crossing their legs, or even just sitting too long—can trigger their pain.
The physical exam is where theory meets reality. We'll observe your walking pattern, looking for subtle shifts or compensations. We'll measure how well your hip moves in all directions and test the strength of the surrounding muscles. Special orthopedic tests help us check for specific conditions like impingement or labral tears. And yes, we'll gently feel around the area, identifying tender spots and tight muscles that might be contributing to your discomfort.
Imaging and Advanced Tests
Sometimes we need to see beneath the surface. X-rays serve as our first window into the bone structure, showing arthritis, fractures, or abnormal hip shapes. They're quick, accessible, and relatively inexpensive—a good starting point when what causes hip pain isn't immediately clear.
For a more detailed look at soft tissues—the muscles, tendons, ligaments, and cartilage—MRI is our go-to option. For suspected labral tears, we might recommend an MRI arthrogram, where contrast dye is injected into the joint before imaging to highlight subtle tears more clearly.
CT scans offer incredibly detailed bone images, proving especially helpful for complex fractures or pre-surgical planning. Ultrasound gives us real-time visualization of tissues in motion and can guide therapeutic injections with precision.
When bone health is in question, a bone scan might be appropriate. This test detects areas of increased bone activity, helping identify stress fractures or avascular necrosis (where bone tissue dies due to lack of blood supply).
Blood tests help us see the bigger picture, potentially revealing inflammatory markers, signs of infection, or other systemic issues. And sometimes, analyzing fluid from the hip joint itself provides the definitive answer, especially when infection is suspected.
Diagnostic injections serve a dual purpose—both treatment and diagnosis. If an anesthetic injection into a specific structure eliminates your pain temporarily, we've likely found the culprit.
Fascinating research by Lesher and colleagues has mapped out where hip joint pain tends to refer to in the body, giving us better insight into distinguishing true hip joint pain from imposters. This knowledge proves invaluable when what causes hip pain isn't straightforward.
Red Flags You Shouldn't Ignore
While most hip pain can be addressed with proper care, certain symptoms should send you straight to urgent care or the emergency room:
Inability to bear weight after a fall or injury tops the list—this could indicate a fracture, especially in older adults where bones may be more fragile. Similarly, if your leg appears visibly deformed or is turning outward unusually, seek immediate care.
Fever accompanying hip pain is a red flag that shouldn't be ignored, as it could signal infection in or around the joint. Joint infections require prompt medical intervention to prevent permanent damage.
Numbness or tingling that extends below the knee suggests nerve involvement that needs immediate attention. And severe, sudden pain—especially in older adults—could indicate a fracture even without obvious trauma.
Unexplained weight loss alongside hip pain warrants thorough investigation, as it could indicate something more serious. Similarly, pain that doesn't improve with rest or consistently wakes you at night may suggest conditions requiring prompt medical attention.
One of our patients shared a powerful cautionary tale: "I dismissed my hip pain as just another gym injury. But when fever developed and walking became impossible, I finally went to the ER. Turns out I had a joint infection that needed immediate treatment. Looking back, the warning signs were there—I just didn't know what they meant."
Understanding what causes hip pain is the crucial first step toward effective treatment. At Evolve Physical Therapy, we're committed to thorough, thoughtful diagnosis—because the right treatment depends on identifying the right problem.
Treatment, Prevention & Daily Habits
The good news is that most hip pain can be effectively managed with the right approach. Treatment options range from simple home remedies to advanced surgical procedures.
Conservative Care & Home Remedies
When you're dealing with mild to moderate hip pain, you don't always need to rush to medical intervention. Many people find relief through simple at-home approaches.
For acute injuries, the classic RICE protocol remains valuable - Rest the affected area, apply Ice for 15-20 minutes several times daily, use Compression with elastic bandages, and Lift your hip when possible. This approach helps reduce swelling and pain in those first critical days.
More recently, medical professionals have begun recommending the PEACE & LOVE approach, which builds on RICE but adds important nuances. This approach suggests Protection without excessive rest, Elevation, Avoiding anti-inflammatories initially (as they may impede natural healing), and applying Compression. The LOVE portion emphasizes Loading the area gradually, maintaining Optimism (yes, your mindset matters!), promoting Vascularization through gentle movement, and gradually returning to Exercise.
Over-the-counter medications can provide temporary relief - acetaminophen helps with pain, while NSAIDs like ibuprofen address both pain and inflammation. Many of my patients have found topical creams and gels particularly helpful for outer hip pain, as they deliver relief directly to the painful area without the stomach upset sometimes caused by oral medications.
"I was amazed at how much my hip pain improved just by changing how I slept," shared Maria, one of our Brooklyn patients. "Using a pillow between my knees made all the difference in the world." For side-sleepers with hip pain, this simple adjustment can significantly reduce pressure on the painful hip.
Physical Therapy & Exercise Programs
Physical therapy often provides the most sustainable path to recovery for what causes hip pain. At Evolve Physical Therapy + Sports Rehabilitation in Brooklyn, we create individualized treatment plans that address your specific needs.
Manual therapy techniques form a cornerstone of our approach. These hands-on methods include joint mobilization to improve movement, soft tissue mobilization to release tight muscles, myofascial release to address connective tissue restrictions, and trigger point therapy to release painful knots in muscles. These techniques help restore normal mobility and decrease pain before moving on to more active interventions.
The exercise component typically includes strengthening weak muscles (particularly the glutes, which often become inhibited with hip pain), improving flexibility in tight areas, enhancing core stability, and rebuilding balance and proprioception. We carefully progress these exercises as your body heals and adapts.
Some of our most effective exercises include glute bridges, which strengthen the powerful gluteal muscles while being gentle on the hip joint. Clamshells target the often-neglected gluteus medius, which plays a crucial role in hip stability during walking. Hip flexor stretches address the common tightness that develops from prolonged sitting, while figure-4 stretches help release tension in the piriformis and other external rotators.
"Movement is essential for relieving hip pain," explains Dr. Kimbrough. "People often think, 'Unless I fix the bony overgrowth, I'm not going to get better,' but remember, appropriate movement and exercise are key components of healing."
Beyond exercises, we may incorporate therapeutic modalities like ultrasound, electrical stimulation, or heat/cold therapy to complement your treatment. These tools can help manage pain and promote healing, though they're most effective when combined with active approaches.
Medical & Surgical Options
When conservative approaches aren't providing adequate relief, medical interventions may become necessary. These options range from minimally invasive procedures to major surgery.
Injections often serve as an intermediate step between conservative care and surgery. Corticosteroid injections can provide powerful anti-inflammatory effects, though their use is typically limited to a few times per year. Hyaluronic acid injections aim to improve joint lubrication, while platelet-rich plasma (PRP) uses components of your own blood to potentially stimulate healing. These injections are often performed under ultrasound guidance for precision.
For certain conditions like labral tears or femoroacetabular impingement, arthroscopic surgery may be recommended. This minimally invasive approach uses small incisions and a camera to perform procedures like labral repair, removal of bone spurs, or clearing out damaged tissue. Recovery typically takes weeks rather than months.
In more advanced cases, especially with severe arthritis, open surgical procedures may be necessary. These include osteotomy (cutting and realigning bone), hip resurfacing (replacing just the joint surfaces), or total hip replacement (replacing both the ball and socket with artificial components). Modern hip replacements can last 20+ years and allow people to return to active lifestyles.
If surgery is in your future, consider pre-surgical rehabilitation or "prehab." At Evolve, we offer specialized prehab for hip replacement surgery that helps patients enter surgery stronger and recover faster. Research consistently shows that patients who participate in prehab experience better outcomes and quicker returns to normal activities.

Everyday Habits That Protect Your Hips
Preventing hip problems is always preferable to treating them. Incorporating hip-friendly habits into your daily routine can help maintain joint health for years to come.
Maintaining a healthy weight is perhaps the most important preventive measure. Every extra pound puts additional stress on your hip joints—up to 4-6 times your body weight during activities like walking or climbing stairs. Even modest weight loss can significantly reduce hip pain for many people.
Your choice of activities matters too. Low-impact exercises like swimming, cycling, and elliptical training strengthen hip muscles without excessive joint stress. If you're a runner, consider cross-training rather than running every day. A Brooklyn runner who recovered from hip pain at Evolve shared: "Learning to cross-train instead of running every day made all the difference for my hips. Now I mix swimming, cycling, and strength training with my running, and I haven't had hip pain in over a year."
Don't underestimate the importance of proper footwear. Supportive shoes provide alignment and shock absorption that protect your hips. This is especially crucial if you spend long hours on your feet or have existing biomechanical issues.
Ergonomics play a surprising role in hip health. Many hip problems stem from prolonged sitting with poor posture. Ensure your workspace supports proper alignment, take regular movement breaks, and consider a standing desk option if possible.
Sleep position can make or break your hip comfort. Side-sleepers should use a pillow between their knees to maintain proper alignment. Back-sleepers might benefit from a small pillow under their knees. Your mattress should be supportive but not too firm—a medium-firm mattress often provides the best balance for hip pain sufferers.
Finally, nutrition matters. Adequate calcium and vitamin D are essential for bone health, while staying well-hydrated helps maintain joint lubrication. Anti-inflammatory foods like fatty fish, berries, and olive oil may help manage chronic inflammation that contributes to hip pain.
By combining these prevention strategies with appropriate treatment when needed, most people with hip pain can return to the activities they love. At Evolve Physical Therapy, we're committed to helping you not just recover from hip pain, but build habits that prevent its return.
FAQs: Quick Answers
What Causes Hip Pain at Night?
If you've ever tossed and turned with an aching hip, you're not alone. More than one-third of American adults report that what causes hip pain at night significantly disrupts their sleep.
"Nighttime hip pain is frustrating because it creates this vicious cycle – pain disrupts sleep, and poor sleep makes pain feel worse the next day," explains Dr. Kimbrough.
Your sleeping position often plays a major role. Side sleeping puts direct pressure on the hip joint and those sensitive bursae. Many people find relief by sleeping on their back or placing a pillow between their knees when side sleeping. One of our patients, Margaret, told us, "That simple pillow trick changed my life – I finally sleep through the night again!"
Your mattress matters too. Too soft, and your hips sink, creating misalignment. Too firm, and there's excessive pressure on the bony parts of your hips. A medium-firm mattress with a supportive topper often provides the right balance.
Bursitis tends to flare up at night, especially when lying directly on the affected hip. Osteoarthritis pain can worsen after being still for extended periods, which is why many people experience stiffness and pain upon waking. For expecting mothers, pregnancy-related discomfort increases as hormonal changes loosen ligaments and shift weight distribution.
Try taking a warm bath before bedtime to relax tight muscles, and consider applying a topical NSAID cream before sleep if you have arthritis pain. Just check with your doctor first to make sure it's safe for your situation.
Should I Exercise if My Hip Hurts?
This might be the question we hear most frequently at Evolve Physical Therapy. The answer isn't simply yes or no – it depends on your specific situation.
For acute injuries (like a recent fall or sudden pain), relative rest is usually appropriate initially. But for chronic conditions, appropriate movement is often beneficial. As we like to say, "motion is lotion" – the right kind of movement helps lubricate joints and strengthen supporting muscles.
What causes hip pain to worsen is often high-impact exercise. Instead, try gentler options like swimming, water walking, or stationary cycling. These activities strengthen muscles without putting excessive stress on painful joints.
Pay attention to your pain response. A little discomfort during exercise might be normal, but if pain increases significantly during activity, persists for hours afterward, or disrupts your sleep that night, you need to modify your approach.
"The old 'no pain, no gain' mentality can be dangerous with hip issues," warns Dr. Kimbrough. "Instead, aim for short, regular walks to keep muscles strong and joints mobile, but always check with your healthcare provider about your specific exercise routine."
Working with a physical therapist to develop an appropriate exercise program takes the guesswork out of the equation. We can help you find the sweet spot between doing too much and too little.
When Is Hip Pain an Emergency?
While most hip pain can be addressed through conservative care, some situations require immediate medical attention. Don't hesitate to seek emergency care if you experience:
Sudden, severe pain, especially following a fall or injury. This could indicate a fracture, particularly in older adults with osteoporosis.
Inability to bear weight on the affected leg. If you can't put weight on your leg without extreme pain, something serious may be happening.
Visible deformity where your hip appears misshapen or your leg is noticeably shorter or turned outward. This could signal a dislocation or fracture.
Signs of infection like fever, redness, or unusual warmth around the hip joint. Joint infections can progress rapidly and cause permanent damage if not treated promptly.
Loss of feeling or numbness and tingling that extends into the leg or foot, which might indicate nerve compression requiring urgent care.
Sudden loss of movement where you cannot move the hip joint at all, which could indicate several serious conditions.
One Brooklyn resident shared a powerful cautionary tale: "I thought I could tough out my hip pain after a fall, but when I couldn't put any weight on it and noticed my leg was turned outward, I went to the ER. It turned out I had a hip fracture that required immediate surgery. Don't wait if something seems seriously wrong."
When it comes to what causes hip pain that requires emergency attention, it's always better to err on the side of caution. Serious conditions like fractures, dislocations, and infections need prompt treatment for the best outcomes.
Conclusion
Living with hip pain isn't something you should simply accept as normal. Whether it's a dull ache that wakes you at night or a sharp pain that limits your daily activities, understanding what causes hip pain is your first step toward finding relief.
Throughout this guide, we've explored the many faces of hip pain—from sudden injuries like fractures and labral tears to the gradual onset of conditions like osteoarthritis and tendinitis. What's become clear is that hip pain is rarely straightforward, often involving complex interactions between bones, muscles, tendons, and nerves.
One of the most important insights we've covered is that hip pain can be deceptive. That nagging discomfort in your hip might actually originate elsewhere—your lower back, sacroiliac joint, or even internal organs. This is why professional evaluation is so valuable; what feels like hip arthritis might actually be a referred pain pattern from a completely different source.
The location of your pain offers valuable clues. When patients tell me they feel pain deep in their groin, I'm immediately thinking about the hip joint itself. Outer hip pain often points to bursitis or IT band issues, while discomfort in the buttock region might suggest SI joint problems or piriformis syndrome.
I've seen countless patients who wished they'd sought help sooner. Early intervention can make an enormous difference in outcomes, especially for conditions like avascular necrosis or labral tears where timely treatment prevents further damage. Don't wait until you can barely walk to seek help for your hip pain.
The good news is that most hip conditions respond well to conservative approaches. Physical therapy, targeted exercise programs, and simple lifestyle adjustments often provide significant relief without surgery. Even for those who eventually need surgical intervention, starting with proper rehabilitation sets the stage for better outcomes.
Remember those red flags we discussed—inability to bear weight, visible deformity, fever with hip pain—these require immediate medical attention. Don't hesitate to seek emergency care if you experience these symptoms.
At Evolve Physical Therapy + Sports Rehabilitation in Brooklyn, we see hip pain not as an isolated problem but as part of your overall movement system. Our approach looks beyond simple symptom management to address underlying movement patterns, muscle imbalances, and lifestyle factors that contribute to your pain. We use hands-on techniques and personalized exercise programs to help restore normal function and get you back to the activities you love.
Hip pain doesn't have to define your future or limit your potential. With proper understanding and care, most hip conditions can be effectively managed, allowing you to stay active and engaged in life. Whether you're a competitive athlete looking to return to your sport or simply want to walk through the neighborhood without pain, there's reason for optimism.
If hip pain is affecting your quality of life, I encourage you to reach out to our Brooklyn clinic for an evaluation. Our expert team is ready to help you evolve beyond pain toward optimal function and performance. After all, life's too short to let hip pain slow you down.

Rotator Cuff Recovery: A Comprehensive Healing Guide
The Marathon of Shoulder Recovery: Understanding the Healing Journey

Think of recovering from a rotator cuff injury as running a marathon, not a sprint. I've seen countless patients come through our doors at Evolve expecting quick fixes, only to learn that shoulder healing requires patience, consistency, and understanding.
The rotator cuff injury healing process follows a predictable pattern, though everyone's journey is unique. Your shoulder's complex structure, combined with its naturally poor blood supply, means healing happens gradually—but it does happen!
When you damage your rotator cuff—those four crucial muscles and tendons that stabilize your shoulder joint—daily activities like reaching for a coffee mug or brushing your hair can suddenly become painful challenges. This group of tissues gives your shoulder its remarkable range of motion, which is why damage can feel so limiting.
I'm Lou Ezrick, and throughout my years as a physical therapist specializing in shoulder rehabilitation, I've guided hundreds of Brooklyn residents through their recovery journeys. What I've learned is that understanding what's happening inside your shoulder at each stage makes the marathon easier to run.
Here's what your body is doing during each phase of healing:
Healing PhaseTimelineWhat's HappeningInflammation0-7 daysPain, swelling, immune responseEarly Healing1-6 weeksCollagen formation, fragile repairRemodeling6 weeks-3 monthsTissue strengthening, improved organizationMaturation3-12+ monthsFinal strengthening, full function return
For minor tears with proper care, you may feel significantly better in 4-6 weeks. More severe tears often require surgery, with recovery extending 4-12 months depending on the tear size and other factors we'll discuss later.
The good news? With proper guidance and consistent effort, most people return to their favorite activities. Your shoulder may even end up stronger and more stable than before if you follow through with the complete rehabilitation process.

Rotator Cuff 101: Anatomy, Causes, Diagnosis & Symptoms
Your shoulder is an engineering marvel—offering incredible mobility but requiring a delicate balance of strength and stability. At the heart of this complex joint sits the rotator cuff, a team of four muscles working together like a well-rehearsed quartet.
The rotator cuff includes four key muscles and their tendons, commonly remembered as "SITS":
Supraspinatus: The workhorse that helps lift your arm to the side
Infraspinatus: Your specialist for rotating the arm outward
Teres minor: The helpful assistant that works with infraspinatus
Subscapularis: Your powerful inward rotation controller
These muscles begin on your shoulder blade and attach to your upper arm bone through tendons, forming a protective "cuff" around your shoulder joint. Think of them as both the security team and movement directors for your shoulder.
When your rotator cuff is healthy, you hardly notice it. But when injured, it certainly makes its presence known. You might experience sharp pain reaching overhead, that nagging night pain that wakes you up, weakness when lifting grocery bags, or that tell-tale crackling sound when moving your shoulder. Simple actions like washing your hair or reaching for your back pocket suddenly become challenging trips.
As Dr. Beau Sasser explains, "The shoulder joint is comprised of the surrounding capsule and four muscles that together comprise the rotator cuff. These muscles help to compress, stabilize, lift, extend, flex, and rotate the shoulder. Due to the complex mechanics of the shoulder it's not surprising that a rotator cuff injury healing process – whether from a tear or tendonitis – requires a prolonged period of time to regain proper function."
Common Causes & Risk Factors
Rotator cuff injuries typically happen in one of two ways. Sometimes it's a dramatic moment—falling on an outstretched arm during a bike ride or that "pop" you felt moving furniture. But more often, it's a slow, gradual breakdown from years of use.
Several factors can put you in the high-risk category for rotator cuff problems:
Age plays a significant role, with tears becoming increasingly common after 40. By 50, most of us have some degree of wear in these tendons. Occupational hazards exist for painters, carpenters, and mechanics who work with their arms overhead for hours. Similarly, athletes who throw repeatedly (think baseball pitchers or tennis players) put tremendous stress on these tissues.
Your posture matters too—that forward-head, rounded-shoulder position many of us adopt at computers creates an environment where tendons get pinched. Anatomical factors like bone spurs can physically abrade your tendons with each movement.
"Age is one culprit," notes Dr. Sasser. "The rotator cuff tendons that attach to the humerus have a poor blood supply. Therefore, as we age we have an increased risk of rotator cuff injury secondary to wear and tear."
Smoking and diabetes both compromise the already limited blood supply to these tendons, making them more vulnerable to injury and slower to heal. And if you've had previous shoulder injuries, altered mechanics may place additional stress on your rotator cuff.
How Doctors Pinpoint the Problem
Getting an accurate diagnosis is the crucial first step in the rotator cuff injury healing process. When you visit a doctor or physical therapist for shoulder pain, they'll begin with a thorough physical examination.
They'll first observe your posture and shoulder symmetry—often spotting subtle clues in how you sit and stand. Testing your range of motion comes next, both when you move your own arm and when they gently move it for you. Strength testing in specific positions helps isolate which of the four rotator cuff muscles might be involved.
Your clinician will likely perform special tests with curious names like the "drop-arm test" (can you slowly lower your arm from an liftd position without it dropping?), the "Hawkins-Kennedy test" (which positions your shoulder to pinch the tendon if it's inflamed), or the "empty can test" (which specifically challenges your supraspinatus muscle).
After the hands-on assessment, imaging often follows:
X-rays serve as the starting point, not because they show tendons (they don't), but because they reveal bone spurs, arthritis, or other bony problems that might contribute to your pain.
Ultrasound offers a dynamic view—allowing clinicians to see your tendons in motion—and has the advantages of being non-invasive and relatively affordable.
MRI provides the most detailed look at soft tissues and remains the gold standard for evaluating tear size, location, and quality of the remaining tissue—all factors that influence treatment decisions.
"Healing can only begin after an accurate diagnosis," emphasizes Dr. Sasser. "From there, you can follow a treatment plan beginning with pain control and progression to regaining range-of-motion then strength and finally back to normal activities."
At Evolve Physical Therapy + Sports Rehabilitation in Brooklyn, we take pride in our comprehensive shoulder evaluations. We don't just identify what's wrong—we determine why it happened and create a roadmap for your recovery. Our detailed assessment becomes the foundation for a personalized treatment plan designed specifically for your shoulder, your lifestyle, and your goals.
For the latest scientific research on shoulder injuries and treatment approaches, the Cleveland Clinic offers excellent resources that complement hands-on care.
The rotator cuff injury healing process: Nonsurgical Path
When it comes to rotator cuff injuries, especially partial tears, good news awaits—about 8 out of 10 people improve without surgery, according to Cleveland Clinic. Your body has remarkable healing abilities when given the right support and time.
The rotator cuff injury healing process isn't a quick fix, though. Think of it as a journey that typically spans from 4-6 weeks for minor injuries to 12 months for more significant damage. During this time, your treatment will likely include a combination of rest, ice, anti-inflammatory medications, and carefully structured physical therapy.
What makes recovery challenging is the rotator cuff's naturally poor blood supply. These tendons don't receive the rich blood flow that muscles do, meaning healing happens more slowly. This is why patience becomes your greatest ally during recovery.
"I tell my patients to think of tendon healing like growing a garden," says Lou Ezrick, PT at Evolve Physical Therapy. "You can't rush it—you need to create the right conditions and then allow nature to do its work."
Healing Timeline: What to Expect Week by Week
Your body follows a predictable healing pattern after a rotator cuff injury. During the first 1-2 weeks, you'll experience the acute inflammation phase. This is your body's initial response, sending healing cells to the injured area. Your focus should be on relative rest (avoiding movements that cause pain), applying ice for 10-20 minutes every 1-2 hours, taking recommended anti-inflammatory medications, and perhaps beginning gentle pendulum exercises if your therapist prescribes them.
Weeks 2-6 mark the early healing phase, where collagen fibers begin forming a fragile repair matrix. Your treatment progresses to controlled passive range of motion exercises, continued pain management, gradual reduction in sling use (for minor tears), and initial shoulder blade stabilization exercises.
From weeks 6-12, you enter the remodeling phase. Here, those collagen fibers reorganize and strengthen along lines of stress. Your treatment advances to active range of motion exercises, light resistance training, functional movement patterns, and more challenging shoulder blade work.
Finally, months 3-6 bring the maturation phase—the final tissue strengthening and return to function. Treatment includes progressive strengthening, activity-specific training, and returning to normal activities with proper mechanics.
"These injuries generally take four to six months or up to a year to heal," explains Dr. Sasser. "If you follow the recommendations – rest, heat, ice, anti-inflammatory medications and/or steroid injections and physical therapy – and still don't improve, speak to your physician."
Factors That Influence the rotator cuff injury healing process
Not all rotator cuff injuries heal at the same pace. Several factors affect your personal recovery timeline:
Tear size and location make a significant difference. Small, partial-thickness tears have much better healing potential than full-thickness tears, especially larger ones that may not heal without surgery. The supraspinatus tendon, due to its location and limited blood supply, often heals more slowly than other parts of the rotator cuff.
Blood supply plays a crucial role. Rotator cuff tendons have a naturally poor blood flow in what doctors call the "critical zone." This limited vascularity slows healing, especially as we age.
Your personal health factors matter tremendously. Younger patients typically heal faster. Smoking significantly impairs tendon healing by reducing blood flow to these already poorly vascularized tissues. Diabetes affects microcirculation and collagen formation. Your overall health, including nutrition, sleep quality, and stress levels, all impact healing speed. Even certain medications can slow tissue repair.
Perhaps most important is your rehabilitation adherence. Consistently performing prescribed exercises accelerates recovery. Following activity modifications prevents re-injury. Finding the sweet spot between rest (to allow healing) and appropriate movement (to prevent stiffness) requires working closely with your physical therapist.
As one Evolve Physical Therapy patient shared: "The therapists don't want me to stick to one method. They keep on switching me onto different things so my motion keeps on improving and improving."
When Conservative Care Isn't Enough
While conservative treatment works for many rotator cuff injuries, certain situations may signal the need for surgical intervention:
Persistent pain despite 3-6 months of appropriate conservative care
Tears exceeding 90% of the tendon thickness
Significant weakness affecting daily function
Young, active patients with acute, traumatic full-thickness tears
High-demand athletes or workers needing to return to previous activity levels
"The larger and more chronic the tear, the harder it is to repair surgically and the longer it takes to heal," cautions Dr. Sasser. If your symptoms aren't improving with conservative care, we'll help coordinate a referral to an orthopedic surgeon for evaluation.
At Evolve Physical Therapy + Sports Rehabilitation, we specialize in guiding Brooklyn residents through each stage of the rotator cuff injury healing process. Our approach respects the biology of healing while maximizing your functional recovery. More info about How to Rehabilitate Rotator Cuff Injury
Surgical Repair & Post-Op Recovery Timeline
When your shoulder isn't getting better with rest and physical therapy, surgery might be your next step—especially for large or complete tears. Modern rotator cuff surgery has come a long way, with surgeons now able to reattach your torn tendon using specialized suture anchors that secure it back to the bone where it belongs.
Most repairs today happen arthroscopically—a fancy way of saying surgeons use a tiny camera and instruments through small incisions rather than opening up your entire shoulder. This minimally invasive approach means less pain and faster healing for you compared to traditional open surgery.
The rotator cuff injury healing process after surgery follows a predictable path, though everyone's journey is slightly different:
Phase 1: Protection (0-6 weeks) Those first six weeks are all about protecting your repair. The connection between your tendon and bone is fragile—like wet tissue paper—so you'll wear a sling to keep everything still. Your surgeon might allow some gentle passive movements (someone else moving your arm for you) depending on how complex your repair was. During this time, focus on managing pain and keeping your elbow, wrist, and hand moving to prevent stiffness.
Phase 2: Early Motion (6-12 weeks) Around the six-week mark, most surgeons start allowing more movement. You'll gradually transition from having someone move your arm to moving it yourself—first with assistance, then independently. You'll begin activating those rotator cuff muscles again with gentle exercises, but still no resistance or lifting yet.
Phase 3: Strengthening (3-6 months) Now the real work begins! Your physical therapist will introduce resistance bands and light weights as your healing progresses. You'll practice functional movements that mimic daily activities and work on patterns specific to your job or sports. During this phase, you'll return to light daily activities while continuing to build strength.
Phase 4: Return to Function (6-12 months) The final stretch focuses on advanced strengthening and returning to your pre-injury activities. Whether you're hoping to get back on the tennis court or just want to lift your grandchildren without pain, this phase prepares your shoulder for real-world demands.

Here's something interesting from Johns Hopkins Medicine that we always warn our patients about: the highest risk for re-tearing your repair happens between three and five months after surgery. This is the perfect storm—your tendon is biologically at its weakest point while you're starting to feel pretty good. This is exactly why following your surgeon's and physical therapist's guidelines is so crucial, even when you're tempted to do more.
The good news? Success rates for rotator cuff repair are encouraging. Small tears heal successfully over 95% of the time, while two-tendon tears still see success rates above 70%. Your recovery timeline will depend on your specific situation—about 4 months for small tears, 6 months for larger ones, and 6-12 months for massive tears.
Inside the Operating Room
Modern rotator cuff surgery often involves several components beyond just stitching things back together:
Debridement is like spring cleaning for your shoulder. Your surgeon removes damaged tissue and smooths frayed edges to create a healthier environment for healing.
Subacromial Decompression/Acromioplasty might be performed if bone spurs are crowding your tendons. By creating more space under the acromion (the bony roof of your shoulder), your tendons can move freely without getting pinched.
Tendon Repair is the main event—specialized anchors drilled into bone with strong sutures reattach your tendon securely where it belongs.
For complex cases, surgeons have additional tricks up their sleeves. They might perform tendon transfers (borrowing nearby healthy tendons), use patch augmentation (reinforcing repairs with biological or synthetic materials), or even recommend a reverse shoulder arthroplasty for massive, irreparable tears with arthritis.
At Evolve Physical Therapy + Sports Rehabilitation, we work hand-in-hand with Brooklyn's leading orthopedic surgeons to create a seamless experience from operating room to rehab gym.
Post-Op Milestones & Red-Flags
After surgery, knowing what's normal and what's not can save you worry (and potentially complications):
Normal Recovery Signs include initial pain that gradually improves over the first couple weeks, some stiffness early on (which is actually protective for your repair), incremental improvements in range of motion, and strength that returns gradually as you progress through rehab.
But keep an eye out for these Red Flags that warrant immediate medical attention: excessive pain that your prescribed medication doesn't touch, fever or chills that could indicate infection, redness/warmth/drainage from your incisions, numbness or tingling in your arm or hand that doesn't improve, sudden loss of motion after you've been improving, or sharp pain with specific movements once you're past the initial healing phase.
"Unless you need a protective sling after surgery, I don't recommend immobilizing the shoulder for long periods," advises Dr. Sasser. "A sling can be useful to decrease pain and inflammation. After these symptoms subside, I recommend beginning range-of-motion exercises to prevent a frozen shoulder."
At Evolve Physical Therapy in Brooklyn, we'll monitor these milestones closely during your recovery, celebrating each step forward while watching for any concerning signs. Our therapists are experts at knowing exactly when to push you forward and when to hold you back for optimal healing—because the rotator cuff injury healing process isn't just about repairing tissue; it's about rebuilding your confidence in your shoulder.
Home Rehab, Prevention & Lifestyle Strategies
Whether you're recovering from surgery or managing a rotator cuff injury without operation, what you do at home plays a crucial role in your healing journey. At Evolve Physical Therapy + Sports Rehabilitation, we don't just work with you during sessions – we equip you with personalized strategies to continue healing between visits.
Your home rehabilitation program will be custom specifically to your injury, but most include these key components:
Theraband Exercises become your best friend during recovery. These colorful resistance bands might look simple, but they provide precisely the right amount of resistance for strengthening your rotator cuff muscles without overloading healing tissues. Many of our patients keep their bands hanging on doorknobs as visual reminders to complete their exercises.
Scapular Stabilization exercises focus on strengthening the muscles around your shoulder blade. Think of your shoulder blade as the foundation of a house – if it's unstable, everything built on top (including your rotator cuff) becomes vulnerable. Simple exercises like shoulder blade squeezes can make a tremendous difference in your rotator cuff injury healing process.
Postural Awareness matters more than most people realize. That forward-head, rounded-shoulder posture many of us adopt while working at computers creates constant tension on the rotator cuff. We'll teach you how to recognize and correct these patterns throughout your day.
Range of Motion Activities help maintain mobility without stressing healing tissues. These gentle movements prevent stiffness while respecting your body's current limitations.
Your daily habits and environment significantly impact healing too. Small changes can create big results:
Making ergonomic adjustments at work and home prevents unnecessary strain. This might mean rearranging kitchen shelves to avoid overhead reaching, adjusting your computer monitor height, or learning proper lifting techniques that engage your legs rather than yanking with your arms.
Your diet provides the building blocks for tissue repair. Anti-inflammatory foods like colorful fruits, vegetables, and fatty fish supply nutrients that help control inflammation naturally. Adequate protein gives your body the raw materials to rebuild damaged tissues, while vitamin C boosts collagen production – the main structural protein in tendons. Don't forget to stay hydrated; well-hydrated tissues heal more efficiently.
Certain habits significantly slow healing and should be avoided. Smoking is perhaps the most damaging, as it dramatically reduces blood flow to the already poorly-vascularized rotator cuff tendons. Heavy alcohol consumption interferes with tissue repair processes, and poor sleep prevents your body from conducting its nighttime healing work.
As Dr. Sasser wisely notes, "You should not postpone seeing a physician. The sooner you're diagnosed, the sooner we can start treatment and improve your outcome."
At-Home Toolkit for Daily Healing
These practical tools and techniques help our patients steer daily life during recovery:
Managing pain and inflammation becomes easier with the right ice and heat protocol. Apply ice for acute pain and after exercises (10-20 minutes), which constricts blood vessels and reduces swelling. Heat before exercises improves tissue elasticity (10-15 minutes), making movement easier. Always wrap ice packs or heating pads in a thin towel – never apply them directly to your skin.
Sleep positioning can make or break your night's rest during recovery. Many of our patients find relief using a body pillow or shoulder wedge to prevent rolling onto the injured side. During early healing, sleeping partially upright in a recliner takes pressure off the shoulder. Whatever position you choose, avoid direct pressure on the healing shoulder.
If you're using a sling, proper management prevents secondary problems. Ensure it fits correctly to avoid wrist or elbow strain. Take scheduled breaks (if your doctor approves) to gently move your elbow, wrist, and fingers to prevent stiffness. Follow medical guidance on gradually reducing sling use as healing progresses.
Effective pain management helps you stay comfortable without overmedication. Take prescribed medications before pain becomes severe rather than playing catch-up with intense discomfort. Many patients find that applying ice before bedtime helps control night pain that might otherwise interrupt sleep.
One patient recovering from rotator cuff surgery shared: "Sleeping in a recliner with pillows supporting my arm made a huge difference in my comfort level, especially during the first few weeks after surgery."
Frequently Asked Questions about rotator cuff injury healing process
How long before I can drive again?
Most patients return to driving approximately 4-6 weeks after rotator cuff surgery, though this timeline varies based on several factors. The size and location of your tear, whether the surgery was on your dominant arm, and your progress in physical therapy all influence when driving becomes safe again.
Before getting behind the wheel, you should be able to comfortably move your arm through all motions needed for driving, including turning the steering wheel quickly if needed. You'll also need to be off pain medications that might impair your reaction time. Always get specific clearance from your surgeon before returning to driving – safety comes first.
Will a partial tear heal on its own?
Good news – many partial rotator cuff tears can heal without surgery. Research shows that up to 80% of patients with partial tears improve with nonsurgical treatments over the course of a year. Your chances of natural healing improve when the tear affects less than 50% of the tendon thickness, is located in a well-vascularized area, and when you're younger and in good overall health.
Even if the tear doesn't completely close, strengthening the surrounding muscles often compensates remarkably well, providing good function with minimal pain. Your commitment to rehabilitation exercises and activity modifications plays a crucial role in this process.
What happens if I delay treatment?
Postponing treatment for a rotator cuff injury can lead to several complications that make eventual recovery more difficult:
Tear Enlargement happens when small tears progress to larger ones that become more difficult to repair. Muscle Atrophy occurs as unused muscles literally shrink and weaken over time. Fatty Infiltration – where fat replaces muscle tissue – cannot be reversed once it happens. Shoulder Stiffness develops as compensatory movement patterns lead to frozen shoulder. Finally, Arthritis Development accelerates when altered mechanics place uneven stress on joint surfaces.
As orthopedic surgeon Dr. Howard J. Luks notes, "You can't fight biology. It takes many months for a repaired rotator cuff to become strong enough to use it." Starting appropriate treatment early gives you the best chance for optimal recovery.
At Evolve Physical Therapy + Sports Rehabilitation, we're committed to guiding you through each step of your recovery journey. Our Shoulder Physical Therapy program combines evidence-based techniques with personalized care to help you return to the activities you love.
Conclusion
The rotator cuff injury healing process truly is more marathon than sprint. Like any long-distance race, recovery requires patience, consistency, and a smart, graduated approach to rehabilitation. Whether you're bouncing back from a minor strain or navigating post-surgical healing, understanding the biological timeline helps set realistic expectations and prevents the frustration that often comes with seemingly slow progress.
Think about your recovery journey as having several key milestones:
First, seek early, accurate diagnosis to determine the right treatment path. Many patients I've worked with express regret about trying to "tough it out" for months before getting proper care, only to find their injury had worsened.
Next, respect tissue healing biology by following protection phases before advancing activity. Your body has its own timeline—pushing too hard too soon is like trying to drive a car before the engine is fully assembled.
Finding the sweet spot between rest and appropriate movement is crucial. As one of my patients recently put it, "I thought complete rest was best, but I learned that gentle, controlled movement actually helped my shoulder heal stronger."
Remember to address the entire kinetic chain, including posture and shoulder blade mechanics. Your shoulder doesn't exist in isolation—it's part of an interconnected system that needs balanced attention.
Be diligent about modifying activities to prevent re-injury during healing. This might mean temporarily adjusting how you reach into cabinets, carry groceries, or even hug loved ones.
Finally, follow a progressive rehabilitation program supervised by qualified professionals who can adjust your plan based on how your unique body responds to treatment.
At Evolve Physical Therapy + Sports Rehabilitation in Brooklyn, we specialize in guiding patients through every phase of rotator cuff recovery. Our hands-on approach combines evidence-based techniques with personalized care to optimize your healing and return to function.
While the healing timeline we've outlined provides a framework, your individual recovery may progress at a different pace based on your specific injury, overall health, and commitment to rehabilitation. I've found that celebrating small victories along the way—like improved sleep, decreased pain, or simply being able to wash your hair without discomfort—can help maintain motivation during this lengthy process.
If shoulder pain is limiting your life or you're recovering from a rotator cuff injury, we invite you to contact our Brooklyn location to schedule a comprehensive evaluation. Our team is ready to support you through every step of your recovery journey, helping you not just heal, but emerge stronger and more resilient than before.
For more information about our shoulder rehabilitation services, visit our Shoulder Physical Therapy page or call us to schedule your initial evaluation.
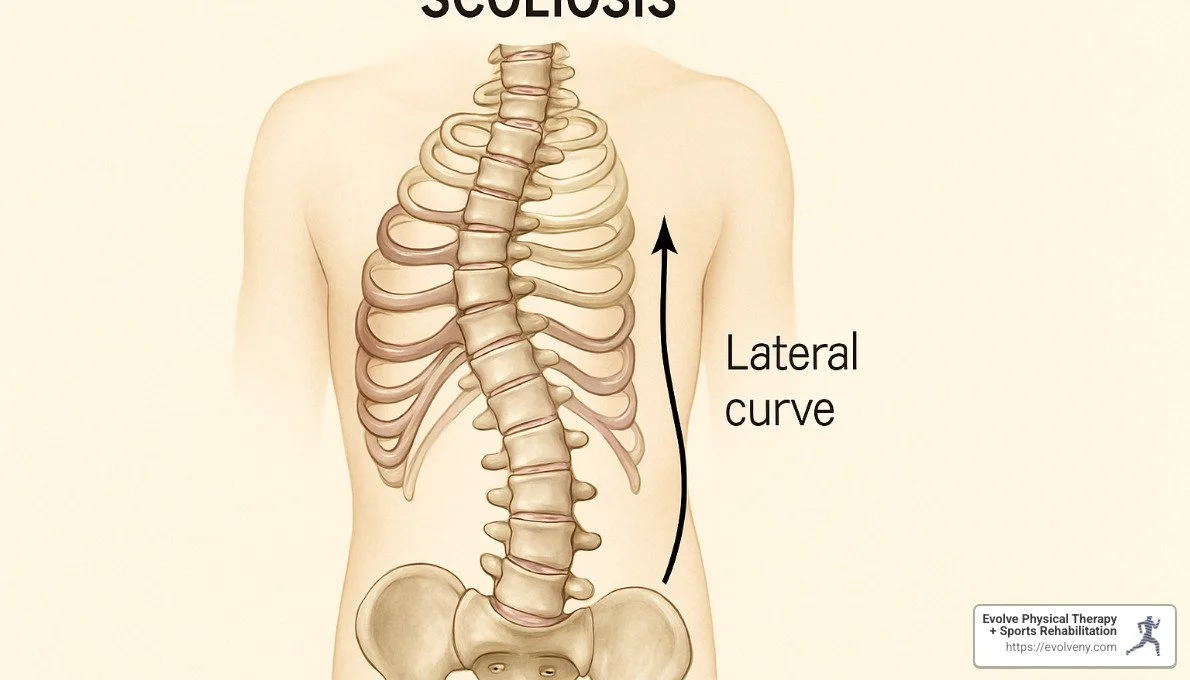
Behind the Curve: What Causes Scoliosis?
Understanding What's Behind the Curve

When families first hear the diagnosis, one question immediately surfaces: what causes scoliosis? It's a natural concern when facing a condition that affects the very structure that holds us upright. While the answer isn't always straightforward, we've helped hundreds of patients steer these waters.
Scoliosis creates either a C-shaped or S-shaped curve when viewed from behind, rather than the straight alignment you'd expect to see. This sideways curve affects approximately 2-3% of Americans—that's 6 to 9 million people living with this condition.
Most people develop scoliosis during growth spurts between ages 10-15, with girls being eight times more likely than boys to need treatment. What surprises many parents is that despite common beliefs, poor posture, heavy backpacks, and sports activities don't actually cause scoliosis.
Here's what we currently understand about the main causes:
Type of ScoliosisPrimary CausesIdiopathic (80% of cases)Unknown cause; likely combination of genetic factors, hormones, and growth patternsCongenitalBirth defects in spine formation during fetal developmentNeuromuscularConditions like cerebral palsy, muscular dystrophy, or spina bifidaDegenerativeAge-related wear and tear of spinal disks and jointsFunctionalTemporary curves due to leg length differences or muscle spasms
The uncertainty can feel overwhelming. Is it genetic? Will it get worse? Can we prevent it? These questions are completely valid when facing a condition that might affect quality of life and physical function.
I'm Lou Ezrick, founder of Evolve Physical Therapy + Sports Rehabilitation, and I've witnessed how understanding what causes scoliosis empowers patients. Our specialized treatment approaches address both the structural and functional aspects of spinal curvature, helping patients regain confidence and control.

Scoliosis 101: Understanding the Spine's Natural & Abnormal Curves
When you look at a healthy spine from the side, you'll notice it naturally forms a gentle S-shape. These natural curves—the inward curve at your neck (cervical lordosis), the outward curve in your mid-back (thoracic kyphosis), and another inward curve in your lower back (lumbar lordosis)—aren't just there by accident. They work together like shock absorbers, helping you balance and move with ease.
But here's the key difference with scoliosis: When viewed from behind, a healthy spine should run straight down your back. With scoliosis, the spine develops an unexpected sideways curve in this plane (called the coronal plane), often twisting as it curves, which can make ribs or muscles stick out more on one side.
"Scoliosis is a very manageable condition when diagnosed early," explains Dr. Paul Sponseller, a pediatric orthopedic surgeon. "If scoliosis can be diagnosed before the child has a growth spurt, the provider can determine a treatment plan that prevents a bigger curve from forming during times of growth."
Doctors measure these curves using something called the Cobb angle on X-rays, which helps determine if your scoliosis is:
Mild scoliosis: 10-24 degrees
Moderate scoliosis: 25-39 degrees
Severe scoliosis: 40+ degrees
About 2-3% of Americans have some form of scoliosis—that's millions of people walking around with curves in their spines. And if you're female, your risk is about eight times higher than males for developing curves that need treatment.
Signs & Symptoms You Shouldn't Ignore
What makes scoliosis tricky is that it often sneaks up without pain, especially in kids and teens. This is why knowing what to look for is so important.
You might notice uneven shoulders where one sits higher than the other, or perhaps a shoulder blade that sticks out more prominently. Many people with scoliosis have one hip that sits higher than the other, creating an asymmetrical waistline that makes clothes hang unevenly.
When someone with scoliosis bends forward, you might see a more obvious curve in the spine or a rib hump—where the ribs on one side stick out more than the other, creating a raised area on the back.
For adults, scoliosis often brings different challenges. Chronic back pain might develop, especially after standing or sitting for long periods. Some experience leg pain, numbness, or weakness from nerves getting pinched. In severe cases, the curve can even affect breathing as it limits chest expansion. Many adults also notice they're getting shorter as their curve progresses over time.
Nicholas's story shows why regular check-ups matter. Diagnosed with scoliosis at just 3 years old, he showed almost no visible symptoms. His mother shares, "We wouldn't have noticed anything wrong just by looking at him—it was only through regular pediatric screenings that we caught it early."
Early detection makes all the difference in managing what causes scoliosis and preventing progression—another reason why those routine doctor visits are more important than they might seem.
The Different Types of Scoliosis You Might Encounter
Scoliosis isn't a one-size-fits-all condition. Each person's curve tells its own story, and understanding the specific type helps determine both the underlying cause and the best treatment approach.
Idiopathic Scoliosis makes up about 80% of all cases, and the term "idiopathic" simply means doctors don't know exactly what causes it. We categorize it by when it appears:
Infantile: From birth to 3 years
Juvenile: From 4 to 10 years
Adolescent: From 11 to 18 years (this is the most common time for curves to develop)
Adult: After the skeleton has finished growing
When Sarah first came to our Brooklyn clinic, she had adolescent idiopathic scoliosis that wasn't finded until a routine school screening. "I had no idea my spine was curved," she told us. "I never felt any pain or noticed anything different about my body."
Congenital Scoliosis is present right from birth because the vertebrae didn't form correctly during those crucial early weeks of pregnancy. Between weeks 4 and 7 of development, these spinal abnormalities begin to take shape, creating the foundation for a curved spine that will become more apparent as the child grows.
Neuromuscular Scoliosis develops when conditions affect the brain, spinal cord, or muscles. Children with cerebral palsy, muscular dystrophy, spina bifida, or (rarely nowadays) polio often develop this type of scoliosis because their muscles can't properly support the spine. Without that crucial support, gravity gradually pulls the spine into a curved position.
For adults over 50, Degenerative Scoliosis is the most common type. Years of wear and tear on spinal discs and joints, especially when combined with osteoporosis or arthritis, can cause the spine to gradually curve sideways. Many of our older patients at Evolve Physical Therapy didn't have scoliosis in their youth but developed it as they aged.
Some people develop Rotoscoliosis, where the vertebrae not only curve sideways but also twist along the spine's axis. This rotation often creates that telltale rib hump that becomes visible when bending forward. More info about rotoscoliosis
We also classify scoliosis as either:
Structural: These curves are permanent and include vertebral rotation. They won't straighten even when you bend or change positions.
Functional (Non-structural): These temporary curves often resolve when the underlying issue—like muscle spasms or leg length differences—is addressed.
Why Idiopathic Is So Common
The most puzzling aspect of scoliosis is that in around 8 out of 10 cases, we simply don't know what causes scoliosis. This mystery is particularly true for adolescent idiopathic scoliosis (AIS).
"Parents often ask what they could have done to prevent their child's scoliosis," notes Dr. Sponseller, "but the truth is that there's currently no known cause or prevention method."
Researchers believe idiopathic scoliosis likely results from several factors working together:
Genetic predisposition plays a significant role—about 30% of people with scoliosis have a family member with the condition. Hormonal factors might explain why girls are eight times more likely than boys to need treatment, suggesting estrogen may influence curve progression.
Growth and development patterns matter too. It's no coincidence that curves often worsen during growth spurts. Some theories suggest neuromuscular development issues, particularly with the brain's postural control mechanisms, while others point to connective tissue abnormalities in collagen or elastic fibers.
As the National Institute of Health explains: "Researchers suspect that many genes are involved in adolescent idiopathic scoliosis. Some of these genes likely contribute to causing the disorder. Others play a role in determining the severity of spinal curvature and whether the curve is stable or progressive."
When Scoliosis Starts at Birth or With a Condition
Unlike idiopathic scoliosis, some forms have clear causes that can be identified from birth or develop from specific conditions.
Congenital Scoliosis occurs when vertebrae don't form properly during fetal development. This might include wedge-shaped vertebrae (hemivertebrae), fused vertebrae or ribs, or missing portions of vertebrae. These malformations create an imbalance that causes uneven spinal growth and curvature. Children with congenital scoliosis often have other birth defects, particularly in their hearts and kidneys.
Neuromuscular Scoliosis develops when conditions affect the muscles supporting the spine. In our Brooklyn practice, we work with many patients managing this type of scoliosis, including those with cerebral palsy that affects muscle control, muscular dystrophy that causes progressive weakness, and spina bifida where the spinal column didn't close completely during development.
We also see patients with scoliosis from spinal cord injuries that damaged critical nerve pathways. In these cases, muscle imbalances prevent proper spinal support, allowing gravity to gradually pull the spine sideways. These curves often progress more rapidly than idiopathic scoliosis and may continue worsening into adulthood.
At Evolve Physical Therapy in Brooklyn, we create specialized exercise programs to help patients with all types of scoliosis maintain function and prevent progression. Understanding what causes scoliosis in each individual case helps us develop the most effective treatment plan for each unique curve.
What Causes Scoliosis? The Core Factors Explained
When patients ask what causes scoliosis, the answer isn't always straightforward. Think of scoliosis causes as falling into two main categories: structural (permanent changes to spine anatomy) and non-structural (temporary curves that may resolve when underlying conditions are treated).
The spine is an amazingly complex structure, and several factors can influence its alignment. For many families navigating a new diagnosis, understanding these causes helps make sense of the condition.
Genetic factors play a significant role in many cases. If you have a first-degree relative with scoliosis, your risk increases by about 11%. Specific gene variations affecting bone growth and certain hereditary conditions like Marfan syndrome can predispose someone to developing a curve. I've worked with multiple families where several members across generations have scoliosis, highlighting this genetic connection.
Your environment might also influence scoliosis development. Research suggests nutritional deficiencies, hormonal imbalances during growth periods, and even vitamin D levels may contribute to curve development or progression. These factors don't cause scoliosis directly but may influence how the spine develops in susceptible individuals.
Growth-related factors are particularly important in adolescent scoliosis. Those rapid teenage growth spurts can trigger curve progression, especially when growth happens asymmetrically. This explains why we often see curves worsen during puberty, when the body is changing rapidly.
For patients with conditions like cerebral palsy or muscular dystrophy, neuromuscular disorders create imbalanced muscle tension on the spine. Without proper muscle support on all sides, the spine can gradually curve. These patients often need specialized approaches to manage their scoliosis.
In older adults, degenerative processes commonly cause scoliosis. Years of disc and joint degeneration, vertebral compression fractures, and asymmetric arthritic changes can slowly alter spinal alignment. As one patient in her 70s told me, "I never had scoliosis as a child, but now my spine has a definite curve."
Trauma and structural changes can also lead to scoliosis. Spinal fractures that heal unevenly, previous spinal surgeries, and tumors affecting vertebral structure can all disrupt normal alignment. These cases often have a clear starting point—the injury or medical event that initiated the curve.
Less commonly, infections and inflammatory conditions like vertebral osteomyelitis, spinal tuberculosis, or inflammatory arthritis can damage spinal joints asymmetrically, leading to curvature.
Dr. Dean Chou, a neurosurgeon specializing in spinal disorders, explains it well: "Adult scoliosis can be different from the scoliosis that occurs in children and teenagers, especially if it develops later on in life." This highlights how causes vary significantly across age groups.
For evidence-based information on scoliosis epidemiology and causes, the National Library of Medicine provides comprehensive resources: Scientific research on scoliosis epidemiology
What Causes Scoliosis in Children & Teens?
When parents bring their children to our Brooklyn clinic asking what causes scoliosis, I often see the worry in their eyes. They wonder if they could have prevented it somehow. The truth is, for about 80% of pediatric cases, we simply don't know the exact cause—these are called idiopathic cases, meaning the cause remains unknown.
However, research has uncovered several contributing factors that help us understand why some children develop curves while others don't.
Genetic predisposition plays a significant role. About 30% of patients with adolescent idiopathic scoliosis have a family member with the condition. I remember one family where both mom and daughter had nearly identical curve patterns—a clear example of genetic influence. As the National Institute of Health notes, "Adolescent idiopathic scoliosis probably results from a combination of genetic and environmental factors."
Hormonal influences likely contribute too, especially considering girls are eight times more likely than boys to develop curves requiring treatment. The connection between estrogen levels and scoliosis progression is particularly notable during puberty when growth accelerates. Many of our young female patients see their curves progress most rapidly during growth spurts.
Some researchers believe neuromuscular development issues may be involved. The brain's control of posture and spinal alignment—sometimes called "postural memory"—might develop incorrectly in some children. This could explain why the body doesn't automatically correct the curve as it forms.
Growth patterns themselves can trigger curve progression. Many children with mild curves experience significant worsening during adolescent growth spurts. One 12-year-old patient gained four inches in height over six months, and during that same period, her curve increased from 15 to 27 degrees.
For children with early-onset scoliosis (before age 10), the causes may differ slightly:
Infantile idiopathic scoliosis (0-3 years) might relate to positioning in the womb or sleeping position after birth
Juvenile idiopathic scoliosis (4-10 years) often has a stronger genetic component
For more information on the hereditary aspects of scoliosis, visit our detailed guide: Is Scoliosis Hereditary?
What Causes Scoliosis in Adults?
Adult scoliosis falls into two main categories, each with distinct causes that we regularly address at Evolve Physical Therapy.
Adult Idiopathic Scoliosis is essentially a continuation of adolescent scoliosis that persists into adulthood. While the initial cause remains unknown, several factors can contribute to curve progression in adults. Loss of bone density (osteoporosis) weakens the vertebrae, making them less able to maintain proper alignment. Disc degeneration reduces the cushioning between vertebrae, allowing for more movement and potential curve progression. Asymmetric arthritic changes and muscle imbalances that develop over time can pull the spine further out of alignment.
Jane, a 45-year-old patient who'd had scoliosis since her teens, found her previously stable 25-degree curve had increased to 32 degrees after menopause, likely due to hormonal changes affecting her bone density.
De Novo (Degenerative) Scoliosis develops after skeletal maturity, typically between ages 50 and 70. This type results from age-related changes in the spine. As intervertebral discs lose height and hydration, the spine can become unstable and shift laterally. Facet joint arthritis creates uneven forces on the spine as these small joints wear down asymmetrically. Vertebral compression fractures, often due to osteoporosis, can create wedge-shaped vertebrae that initiate curves. And as spinal ligaments lose elasticity and strength with age, they provide less structural support.
Dr. Dean Chou explains it clearly: "Adult scoliosis can develop between ages 50 and 70 due to vertebral ligament degeneration, disc degeneration, and asymmetric spinal loading."
An estimated 1 in 3 adults aged 40-90 may be affected by some degree of scoliosis, though many cases remain asymptomatic and undiagnosed.
Leg length discrepancy can also contribute to functional scoliosis in adults. When one leg is shorter than the other, the pelvis tilts, causing the spine to curve as a compensation mechanism. We've had great success addressing this type of scoliosis with proper orthotics and targeted exercises.
For more information on adult-onset scoliosis, see this article: Adults can develop scoliosis too
Injuries, Infections & Other Medical Triggers
Beyond the common causes, several less frequent medical conditions can trigger scoliosis. These cases often have a clearer starting point than idiopathic scoliosis.
Traumatic injuries can significantly alter spinal alignment. Vertebral fractures from car accidents, falls, or sports injuries create asymmetry in the spine as they heal. Spinal cord injuries may cause muscle imbalances leading to gradual curvature. Even previous spinal surgeries, particularly laminectomies (removal of part of the vertebral arch), can destabilize the spine.
Robert, a construction worker who came to our Brooklyn clinic, developed a progressive curve after falling from scaffolding and fracturing two vertebrae. His case illustrates how trauma can initiate scoliosis even in previously healthy adults.
Though less common in developed countries, infections can damage the spine and lead to scoliosis. Osteomyelitis (infection of bone or bone marrow) can erode vertebrae, while tuberculosis of the spine (Pott's Disease) can severely damage vertebral bodies. Even discitis (inflammation of intervertebral discs, usually due to infection) can create enough damage to alter spinal alignment.
Tumors and space-occupying lesions represent another category of medical triggers. Spinal cord tumors can cause pressure and neurological changes affecting posture, while vertebral tumors may weaken or deform vertebrae directly. Syringomyelia, a fluid-filled cavity within the spinal cord, can disrupt normal function and lead to progressive curvature.
Several other medical conditions can predispose someone to scoliosis, including Ehlers-Danlos Syndrome (affecting collagen and connective tissue), Marfan Syndrome (affecting connective tissue including in the spine), Neurofibromatosis (causing abnormal bone growth), and Rheumatoid Arthritis (damaging spinal joints asymmetrically).
At Evolve Physical Therapy, we've worked with patients whose scoliosis developed after specific medical events. Through targeted physical therapy, we help stabilize curves and manage pain effectively, even when the underlying cause can't be reversed.

Myths Busted: Posture, Backpacks & Sports
Part of understanding what causes scoliosis is clearing up what doesn't cause it. I've heard so many misconceptions from worried parents and patients over the years, and it's important to separate fact from fiction.
Poor posture doesn't cause structural scoliosis. I can't tell you how many grandmothers have blamed themselves for not making their now-adult children "sit up straight." While slouching might make an existing curve more noticeable or cause temporary postural changes, it cannot create the structural changes in the spine that characterize true scoliosis. As the Cleveland Clinic notes, "The misconception that slouching or sitting up straight can fix scoliosis stems from confusing cause and effect."
Heavy backpacks don't cause scoliosis either. This is a common worry for parents watching their children trudge to school with seemingly oversized bags. Research has not established any link between carrying heavy backpacks and developing scoliosis. Dr. Paul Sponseller puts it clearly: "Parents tend to ask what they could have done to prevent scoliosis, but scoliosis is a very interesting disease because there is currently no known cause or prevention method." While heavy bags can certainly cause muscle strain and back pain, they don't cause the structural spinal changes seen in scoliosis.
Sports participation doesn't cause scoliosis, even in activities with asymmetrical movements like tennis or golf. In fact, physical activity is generally beneficial for spine health. Some sports may make an existing mild curve more noticeable due to muscle development on one side, but they don't create the curve. I always encourage my patients with scoliosis to stay active – strong core muscles provide better support for the spine.
Scoliosis isn't always painful, especially in children and adolescents. Many curves are finded during routine screenings or when parents notice clothing hanging unevenly, not because the child complained of pain. This painless presentation is why screening is so important – we can catch curves before they progress significantly.
Not all curves get worse over time. The likelihood of progression depends on the patient's age, curve pattern, degree of curvature, and skeletal maturity. Many mild curves remain stable throughout life, requiring only monitoring rather than intervention.
At Evolve Physical Therapy in Brooklyn, we encourage our patients with scoliosis to maintain healthy lifestyles. While good posture, proper backpack use, and regular exercise won't prevent or correct scoliosis, they contribute to overall spine health and may help manage symptoms in those who already have curves.
How Doctors Pinpoint the Cause
When you or your child receives a scoliosis diagnosis, understanding what causes scoliosis in your specific case becomes a top priority. Doctors use a thoughtful, systematic approach to identify the underlying factors behind each curve.
The diagnostic journey typically begins with a conversation about your symptoms and medical history. Dr. Lou Ezrick at Evolve Physical Therapy explains, "We start by listening to patients describe their experience—when they first noticed changes, any pain patterns, and family history can provide valuable clues about the cause."
Your doctor will then conduct a thorough physical examination. This includes observing your posture while standing naturally, checking shoulder and hip alignment, and measuring leg lengths. One of the most telling assessments is the Adam's Forward Bend Test, where you'll bend forward at the waist with arms hanging down—this position makes any spinal rotation or rib prominence much more visible to the trained eye.
During this exam, your doctor might use a scoliometer, a specialized tool placed along your spine that measures the angle of trunk rotation. This simple device helps quantify the three-dimensional nature of the curve.
"The physical exam is just the beginning," notes Dr. Clayton Stitzel, a scoliosis specialist. "A bent spine is the main sign, not the cause of scoliosis. Doctors search for reasons beyond the curve."
Imaging studies form the cornerstone of diagnosis. X-rays remain the primary tool, providing clear views of the spine from both front and side angles. From these images, doctors measure the Cobb angle—the gold standard for diagnosing and monitoring scoliosis severity. This measurement identifies the most tilted vertebrae at the top and bottom of the curve.
For patients with unusual presentations or neurological symptoms, an MRI might be ordered. These detailed images can reveal tumors, syringomyelia (fluid-filled cavities in the spinal cord), or other structural abnormalities that might be causing the curve. CT scans offer another option, particularly useful for congenital scoliosis or pre-surgical planning, as they provide detailed cross-sectional images of bone structure.
Beyond imaging, your doctor may recommend:
Genetic testing if there's a strong family history or signs of genetic syndromes like Marfan syndrome or Ehlers-Danlos syndrome
Bone density screening for adult patients to assess osteoporosis risk, which can influence treatment decisions
Pulmonary function tests for those with severe curves that might be affecting breathing capacity
At Evolve Physical Therapy in Brooklyn, we've seen how this comprehensive approach helps tailor treatment to each patient's specific needs. When Sarah, a 13-year-old patient, came to us with a newly diagnosed curve, her MRI revealed a small syrinx (spinal cord cavity) that had been causing her curve. This findy completely changed her treatment plan and prognosis.
For more detailed information about the diagnostic process, visit our guide: How to Know if You Have Scoliosis
Risk Factors & When to Get Screened
Understanding your risk factors helps determine when and how often to get screened for scoliosis. While we can't always pinpoint exactly what causes scoliosis, we can identify who's most likely to develop it.
Age plays a critical role in scoliosis development. Most idiopathic scoliosis emerges during growth spurts between ages 10-15, when the spine is growing rapidly. This is why school screenings typically target fifth through ninth graders.
Sex is another significant factor. While boys and girls develop small curves at roughly equal rates, girls are 7-8 times more likely to have curves that progress to needing treatment. This striking difference suggests hormonal influences during puberty might contribute to curve progression.
Family history significantly raises your risk. Having a parent or sibling with scoliosis increases your odds by about 30%. When Emma came to our Brooklyn clinic with early signs of scoliosis, her mother's history of wearing a brace as a teenager had already put the family on high alert, leading to early intervention.
Your growth rate matters too. Children experiencing rapid growth spurts need closer monitoring, as this is when curves tend to worsen most dramatically. The faster you grow, the higher the risk of progression.
The curve pattern itself offers clues about progression risk. Double curves (S-shaped) and thoracic curves (in the mid-back) typically have higher progression rates than single lumbar curves (lower back). Your doctor will consider this pattern when recommending follow-up intervals.
"Children around the age of 10 to 12 are usually becoming more private, and parents are no longer involved in activities like bathing or dressing them, when they might have otherwise noticed a change," notes Dr. Sponseller. This developmental shift makes formal screening especially valuable during these years.
For adults, degenerative scoliosis risk increases significantly after age 50, particularly for those with osteoporosis, previous spinal surgery, or a history of adolescent scoliosis. Height loss, increasing back pain, or noticeable postural changes in midlife warrant a spine assessment.
At Evolve Physical Therapy, we recommend these screening timeframes:
For children: Basic spine assessment during yearly pediatric check-ups
For pre-teens: School-based or pediatrician screenings around ages 10-12
During growth spurts: Extra vigilance when children are growing rapidly
With family history: Earlier and more frequent screenings if close relatives have scoliosis
For adults over 50: Consider spine assessment during regular physical exams, especially with height loss or new back pain
Early detection remains our most powerful tool for managing scoliosis effectively and preventing progression that might require more intensive intervention.

Prevention, Early Detection & Lifestyle Support
While we can't completely prevent idiopathic scoliosis, catching it early and making smart lifestyle choices can make a world of difference in managing the condition and stopping curves from getting worse.
Early detection is your best ally in the scoliosis journey. Regular check-ups with your pediatrician that include a quick spine assessment can catch subtle changes before they become obvious. Many schools offer screening programs around ages 10-12, which is perfect timing since this is when many curves first appear during growth spurts.
"I encourage parents to be curve detectives," says Lou Ezrick, founder of Evolve Physical Therapy. "Simple things like noticing uneven shoulders, clothes that hang unevenly, or one hip that seems higher than the other can lead to early intervention when treatment is most effective."
When it comes to supporting spine health, several approaches can help manage scoliosis:
Core strength truly matters. A strong core provides better support for your spine, almost like creating your own internal back brace. At Evolve, we design personalized strengthening programs that target the specific muscles needed to counterbalance your unique curve pattern.
Bone health shouldn't be overlooked either. Getting enough calcium and vitamin D supports overall bone strength, which becomes particularly important as we age. For our younger patients, building strong bones during growth years creates a more resilient foundation.
Healthy weight reduces stress on the spine. Each extra pound puts additional pressure on spinal structures, which can increase pain in those with scoliosis. We work with patients to find enjoyable activities that help maintain a healthy weight while being spine-friendly.
Our Brooklyn clinic specializes in the Schroth method – a three-dimensional approach to scoliosis treatment that uses customized exercises to elongate and de-rotate the spine. This method has shown remarkable results for many patients who commit to the program. Schroth Scoliosis Physical Therapy Brooklyn
Beyond Schroth, we offer comprehensive scoliosis care including postural re-education, hands-on manual therapy to address muscle imbalances, and functional training that translates into improved daily activities. Our approach is always individualized – what works for one curve pattern might not work for another.
The field of non-surgical scoliosis management continues to evolve with exciting new approaches. Dynamic bracing systems, scoliosis-specific yoga, and neuromuscular retraining show promise in helping patients manage their curves. We stay current with these developments to offer our patients the most effective options. What's New in Nonsurgical Scoliosis Treatment
Can Scoliosis Be Prevented?
This is perhaps the most common question I hear from concerned parents, and I wish I had a simpler answer. The truth is, for idiopathic scoliosis – which accounts for about 80% of cases – there is currently no known prevention method.
"It's like trying to prevent being tall or having blue eyes," I often explain to families. "There's a strong genetic component that we simply can't control."
However, for other types of scoliosis, we can sometimes address underlying factors:
For neuromuscular scoliosis, early and effective treatment of conditions like cerebral palsy or muscular dystrophy may help reduce the severity of spinal curves.
With degenerative scoliosis, which typically affects adults over 50, there are several modifiable factors that can help. Maintaining good bone density through weight-bearing exercise and proper nutrition makes a difference. Avoiding smoking is crucial since it accelerates bone loss. And preventing falls can help avoid the vertebral fractures that sometimes trigger curve progression.
For functional scoliosis, early correction of leg length differences or addressing muscle imbalances can sometimes prevent curves from developing.
I remember working with Maria, a 67-year-old with early degenerative scoliosis. By focusing on bone-strengthening exercises, fall prevention strategies, and gentle yoga, we were able to stabilize her curve and significantly reduce her pain. Three years later, her X-rays show no progression – a real victory at her age.
At Evolve Physical Therapy in Brooklyn, we believe that while we may not be able to prevent all cases of scoliosis, we can absolutely influence its impact on quality of life. Our approach combines the latest evidence-based techniques with compassionate, personalized care to help each patient write their own success story.
Frequently Asked Questions About What Causes Scoliosis
Does scoliosis run in families?
You're not imagining things if scoliosis seems to appear in multiple family members. There's definitely a genetic component at play. Research shows about 30% of people with idiopathic scoliosis have a family member with the condition too. If you're a parent with scoliosis, your children have roughly an 11% chance of developing it—though daughters face a higher risk (29%) compared to sons (9%).
But genetics aren't as straightforward as passing down eye color. The National Institute of Health explains that scoliosis inheritance is complex: "Researchers suspect that many genes are involved in adolescent idiopathic scoliosis. Some of these genes likely contribute to causing the disorder. Others play a role in determining the severity of spinal curvature and whether the curve is stable or progressive."
What's fascinating is that even identical twins can develop completely different scoliosis patterns. This tells us that while genes matter, environmental factors are also part of the puzzle in determining what causes scoliosis.
Will my child's heavy backpack cause scoliosis?
This is one of the most common concerns I hear from parents at our Brooklyn clinic, but I can reassure you: heavy backpacks do not cause scoliosis. While that overstuffed school bag might cause temporary posture changes, muscle fatigue, or even back pain, it simply doesn't create the structural spinal changes that define true scoliosis.
As Dr. Paul Sponseller puts it: "Parents tend to ask what they could have done to prevent scoliosis, but scoliosis is a very interesting disease because there is currently no known cause or prevention method."
That said, I still recommend smart backpack habits for your child's overall spine health:
Use both shoulder straps (no one-shoulder carrying)
Keep backpack weight under 10-15% of body weight
Position it properly—centered on the back, not hanging low
Consider a rolling backpack for especially heavy loads
These practices won't prevent scoliosis, but they will help avoid unnecessary muscle strain and discomfort.
What ages are most at risk for curve progression?
When it comes to scoliosis progression, timing is everything. Not all curves worsen, but certain developmental stages carry significantly higher risks.
The danger zones for curve progression are primarily during growth spurts. For girls, this typically means ages 10-14, while boys face highest risk between 12-16 years. Girls who haven't started menstruating yet are particularly vulnerable to rapid progression.
Doctors measure skeletal maturity using the Risser sign (which looks at hip bone development on X-rays). Lower Risser scores mean more growth potential—and unfortunately, more risk for curve worsening.
Children between 4-10 years (juvenile scoliosis) need careful monitoring since their curves often remain stable until adolescence, then suddenly progress during growth spurts. Interestingly, some infantile curves actually resolve on their own, while others worsen.
Once we reach skeletal maturity, most curves under 50 degrees tend to stabilize—until around age 50, when a new risk emerges. After menopause, women particularly may see degenerative changes and bone density loss that can reactivate progression.
"While it may be a hard decision to make on behalf of your child, having surgery sooner rather than later is better. When done early, the surgery tends to be simpler, as less of the spine needs to be fused," notes Dr. Sponseller. This highlights why we at Evolve Physical Therapy work closely with orthopedic specialists to carefully monitor our younger patients during critical growth windows.
Timing interventions just right—whether that's specialized physical therapy, bracing, or in some cases surgery—can make all the difference in long-term outcomes.
Conclusion & Next Steps
Understanding what causes scoliosis is like piecing together a complex puzzle. While medical science hasn't found all the answers yet, we've made significant progress in recognizing that scoliosis typically stems from a blend of genetic factors, hormonal influences, growth patterns, and sometimes specific medical conditions.
After exploring the many facets of scoliosis, here's what we've learned: Idiopathic scoliosis—the most common form accounting for 80% of cases—likely results from multiple genetic and environmental factors working together, not a single cause. This helps explain why the condition can appear differently even among family members with similar genetic makeup.
We've also seen how different types of scoliosis have distinctly different origins. From vertebral malformations present at birth to the gradual wear and tear that leads to degenerative curves in adults, the "why" behind the curve varies widely from person to person.
Perhaps most importantly, we've debunked those persistent myths that cause unnecessary worry. Poor posture, heavy backpacks, and sports activities don't cause structural scoliosis—information that brings relief to many parents and patients who feared they might have somehow contributed to the condition.
While we may not be able to prevent idiopathic scoliosis, early detection remains our most powerful tool. Finding curves early, especially before major growth spurts, opens the door to more effective management strategies that can prevent progression and minimize impact on quality of life.
Here at Evolve Physical Therapy + Sports Rehabilitation in Brooklyn, we believe in turning knowledge into action. Our specialized Schroth method practitioners work with scoliosis patients of all ages, developing individualized treatment plans that address both the structural curve and the functional aspects of living with scoliosis.
We've seen how specialized physical therapy approaches can make a meaningful difference. Many of our patients report improvements in posture, pain levels, breathing capacity, and overall confidence—even when the curve itself can't be reversed.
Whether you're newly diagnosed with scoliosis or looking for better ways to manage a long-standing curve, our team is here to support you with evidence-based, compassionate care that evolves with the latest research.
While we may not fully understand what causes scoliosis in every case, we absolutely know how to help you live well with it. With proper support and specialized care, scoliosis doesn't have to define your life or limit your potential.
For more information about our scoliosis therapy options or to schedule a consultation with our specialized team, visit: More info about scoliosis therapy options
